Appointment Status Attributes
The Appointment Status Attributes setup allow you to customize statuses that can be assigned to an appointment.
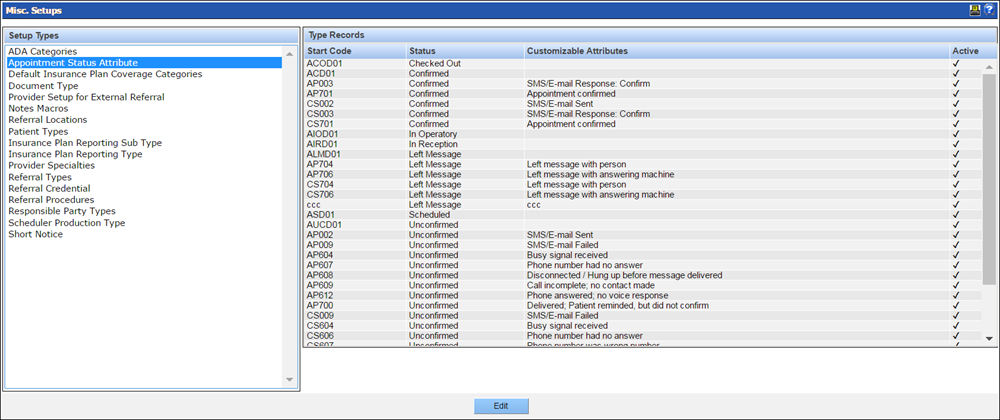
To add an appointment status:
- From the Misc. Setups window, select the Appointment Status Attributes setup from the list on the left.
-
Click Edit.
The Type Records for Appointment Status Attribute screen displays.
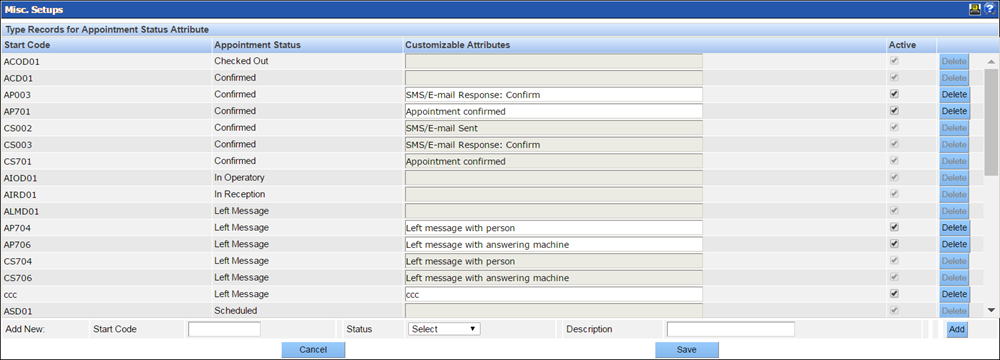
- In the Add New row at the bottom of the screen, enter a start code, select a status from the dropdown and enter a description for the new status type.
- Click Add.
- Click Save.
-
From the Misc. Setups window, select the Appointment
Status Attributes setup from the list on the left.
To edit an appointment status:
-
Click Edit.
The Type Records for Appointment Status Attribute screen displays.
-
Make your changes in the row of the status type you wish to edit. Your options are as
follows:
- Edit the status description in the Customizable Attributes column.
- Make the status inactive by deselecting the checkbox in the Active column. An inactive status will not be available for selection in the Scheduler.
- Delete the status by clicking the Delete button.
- Click Save.