In order for payment or adjustment type to appear as an option in the transaction window,
it must be established in the setup. Fortunately, many of the common payment/adjustment
types are already established. These items can be edited or deleted and new items added.
Please work with the project manager when setting up new codes. Improperly set up payment
types can negatively impact financial reporting and account balances.
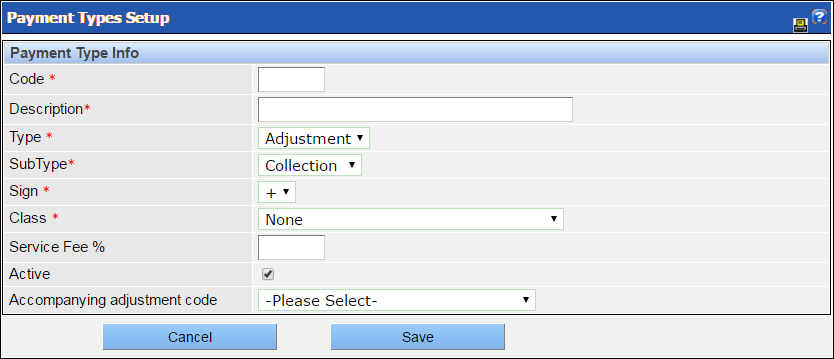
To set up payment and adjustment types:
Click the Add New Type button (or select an existing
payment/adjustment type and click the Edit button).
Complete the fields as desired.
Enter the code and its description.
Select its type and subtype from the dropdown lists.
In the Sign field, indicate whether it is a positive or negative
payment or adjustment.
Select the appropriate class.
Enter the service fee percentage.
Note: By default, the Active check box is selected. You can make
the payment/adjustment type inactive by clearing this check box.
If the payment/adjustment type should have an accompanying adjustment code, select one from the provided list. If you select an accompanying adjustment code, the system will trigger that code during the posting of the code that you are setting up. For example, you could set up an adjustment code to debit a customer’s account for the payment amount if the customer’s credit-card payment or automatic draft is returned. That adjustment code could have an accompanying adjustment code that would also be triggered at posting time to debit the account for an additional fee for the returned payment.