Add an Insurance Plan
To add a new insurance plan to the practice’s database:
- Navigate to .
- Search for the desired carrier to determine if the carrier already exists within the database. Search by both Carrier and Plan.
- Click the Add New Insurance Plan button.
- Complete the information for each of the four steps as appropriate. Each step ultimately corresponds to the tabbed information for the plan.
- Click Save.
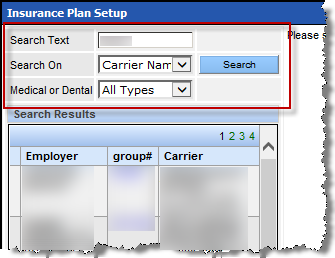
Search for a Plan
Many carriers are included in the original setup of QSIDental Web. Over time, more carriers and plans are added. Always search for a plan before adding it.
- Navigate to .
- In the Search Text field, type the desired carrier.
- Select Carrier from the Search On dropdown.
- To search for a plan, type the plan number in the Search Text field and select Plan ID in the Search On dropdown.
-
Click Search.
Set Up the Insurance Plan
In step 1 of adding an insurance plan, you must enter the plan details.
-
Click .
The Insurance Plan Setup window opens.
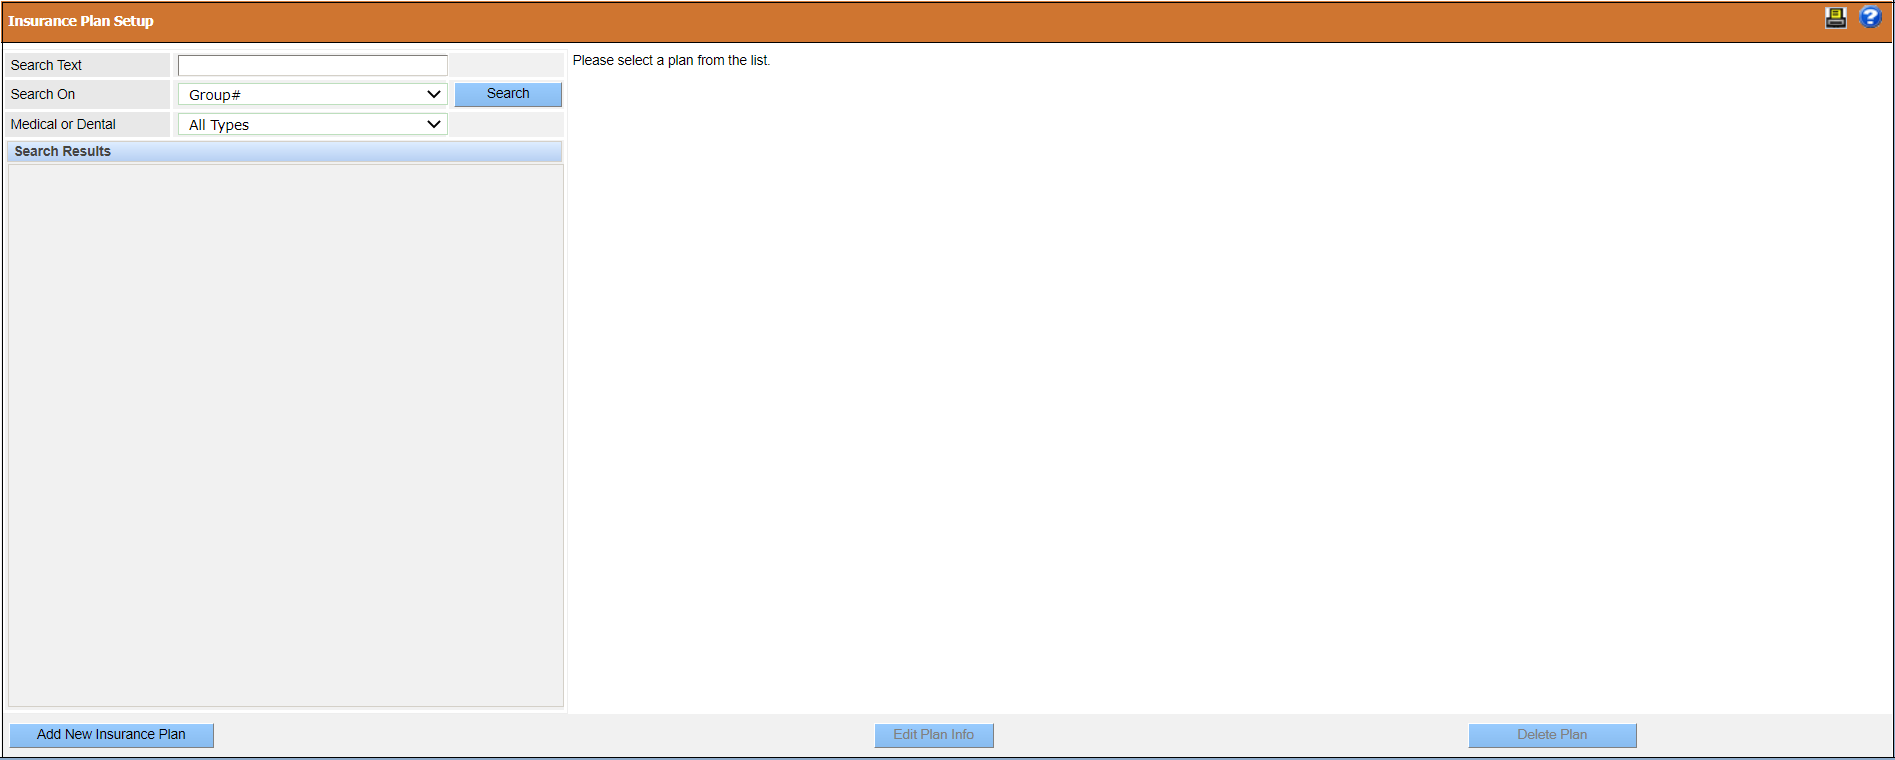
-
Click Add New Insurance Plan.
The Insurance Plan Setup window opens.
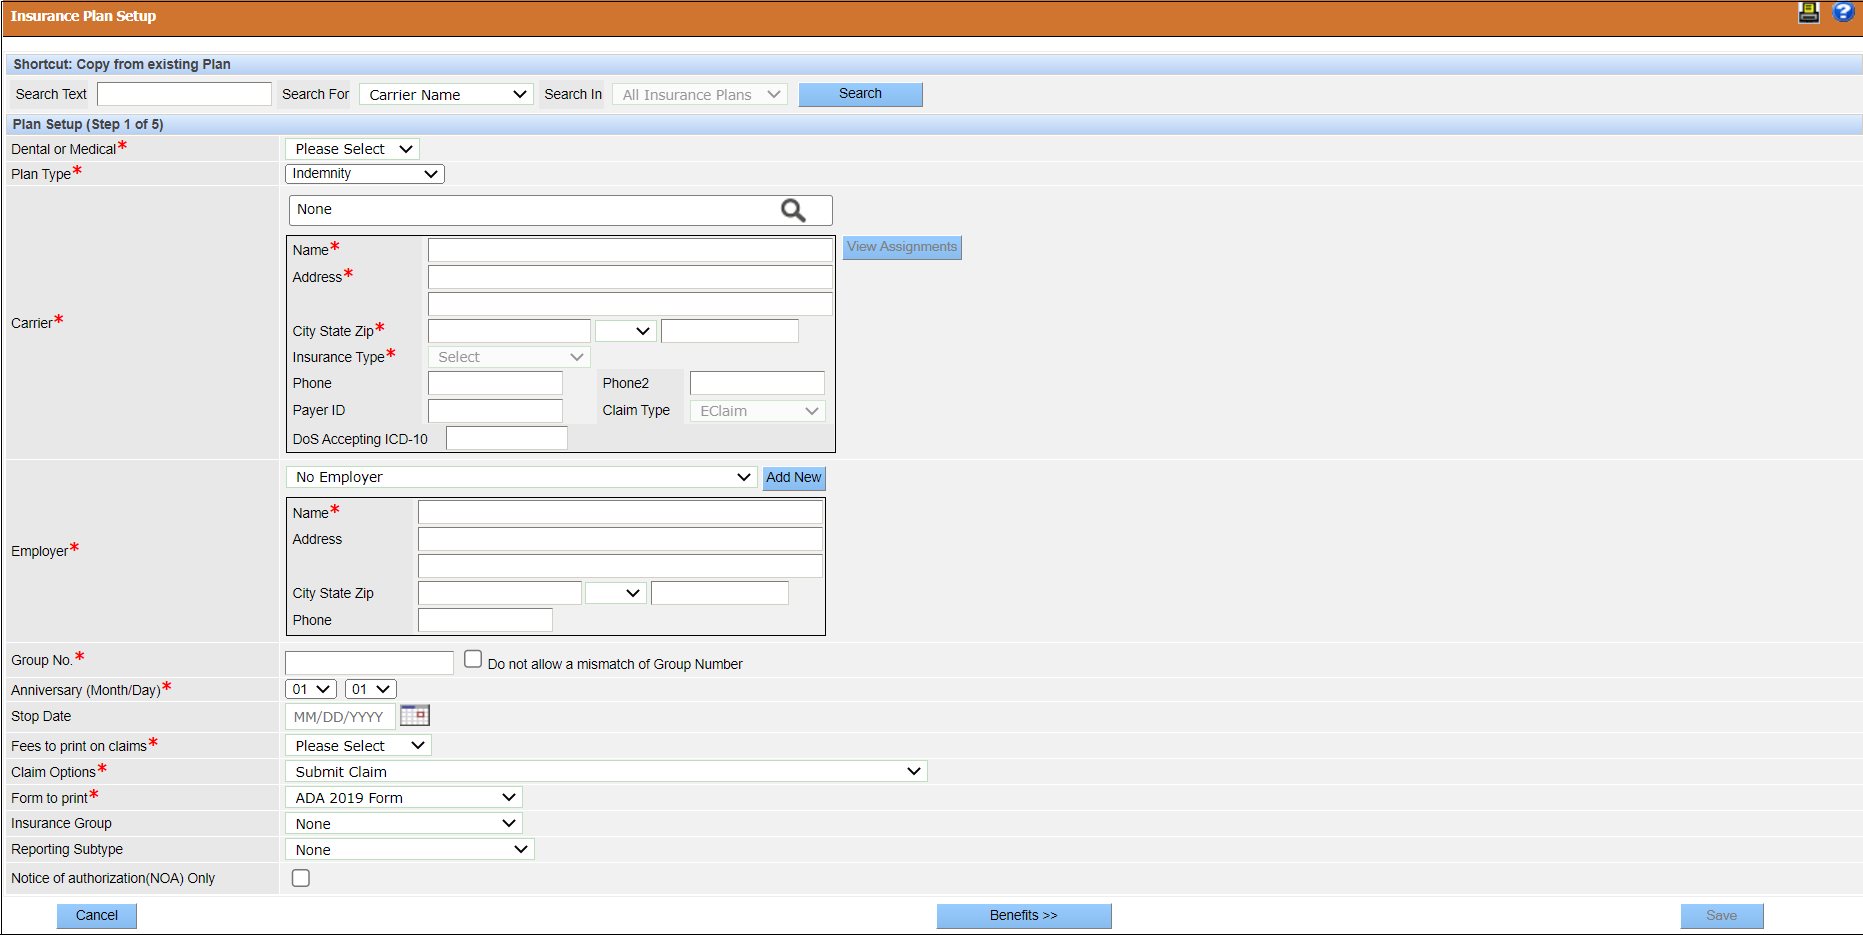
- Enter the required information in the Plan Setup section.
- Click Benefits.
Insurance Plan Setup Fields
This section provides a description of the fields on the Insurance Plan Setup window.
| Field | Description |
|---|---|
| Dental or Medical | You must select the plan you want to set up from the list. |
| Plan Type | You must select the plan type from the list. Note: Depending
on the plan type selected, some fields on this window may
change. |
| Carrier | You can search for an existing carrier or add a carrier by
clicking the Carrier Search icon To view the fee schedule assignments for the carrier, click View Assignments. The fee schedule assignment for the selected carrier is displayed on the right side of the Carrier field. Note: If there
is no fee schedule assignment for the selected carrier, then
the message “Fee schedule not assigned for the selected
carrier” appears. |
| Employer | You can select the employer from the list or you can add an employer by clicking Add New. |
| Group No. | You must type the group number that ties the plan to the
carrier. Select the Do not allow a mismatch of Group
Number check box if you want QDWDental Web to
alert you when the group numbers in the Subscriber
Information and Plan
Information sections do not match on the
Add/Edit Primary Dental Plan
window. Note: If you select the Plan
Type as Managed Care,
the Group No. field label changes to
Cap Fee ID and the Do
not allow a mismatch of Group Number check
box does not appear. |
| Cap Fee ID | You must type the cap fee ID for the plan. Note: If you select
the Plan Type as Managed
Care, the Cap Fee ID
field appears. |
| Anniversary | You can select the anniversary date of the plan. |
| Stop Date | You can select the insurance plan end date. |
| Fees to print on claims | You must select the fees to print on the claim form. Note: If
you select the Plan Type as
Managed Care, by default
Actual Charges is
selected. |
| Claim Options | You must select the claim option for the plan from the list. |
| Form to print | Applicable only for paper claims. You must select the appropriate form from the list. |
| Insurance Group and Reporting Subtype | You can add a plan to an insurance group or reporting subtype. These are created and used for different types of reports and are not mandatory. |
| Notice of authorization(NOA) only | Applicable only for Denti-cal plan type. |
Add Insurance Benefits
In Step 2 of adding an insurance plan, you must enter the benefits provided by the plan.
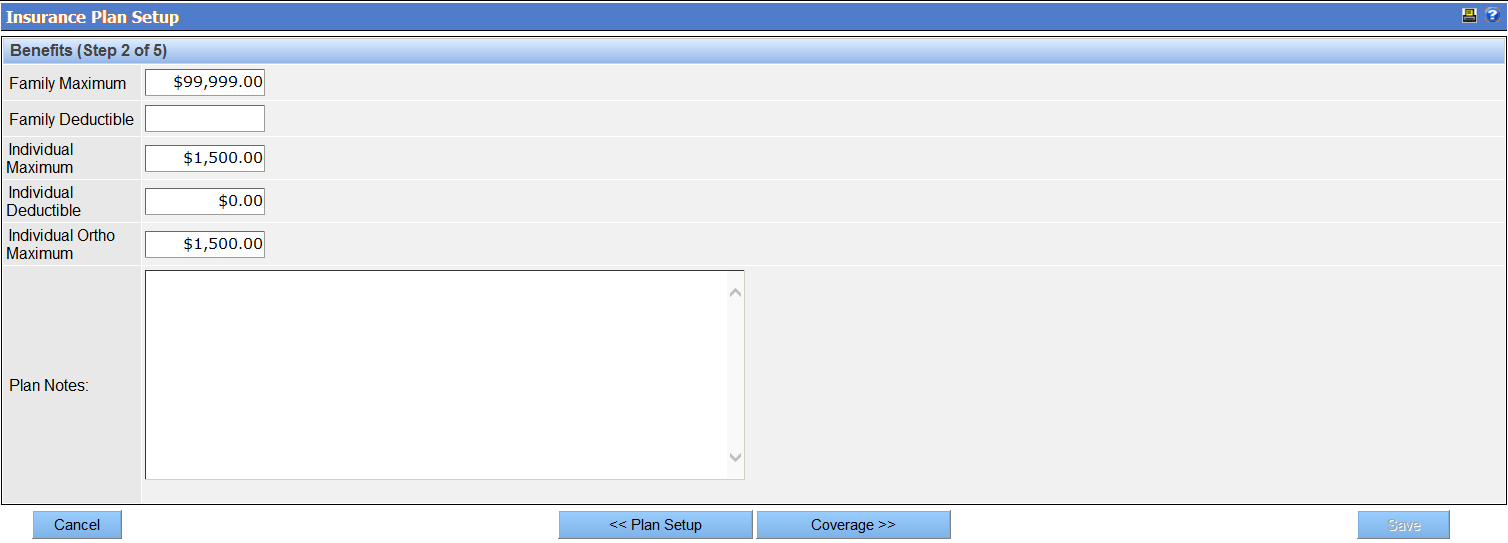
To add insurance benefits:
-
Enter the benefits as shown in the plan materials. Following are some notes on these
fields:
- Maximums: To indicate that a plan has no maximum, use $99,999.00.Leaving the field blank would create faulty calculations.
- Plan Notes: Use this space to indicate frequency requirements and limitations. For example, sealants covered until age 15.
- Click Coverage to move to the next step.
Add Insurance Coverage
In step 3 of adding an insurance plan, you must enter the coverage percentage mentioned
in the plan. 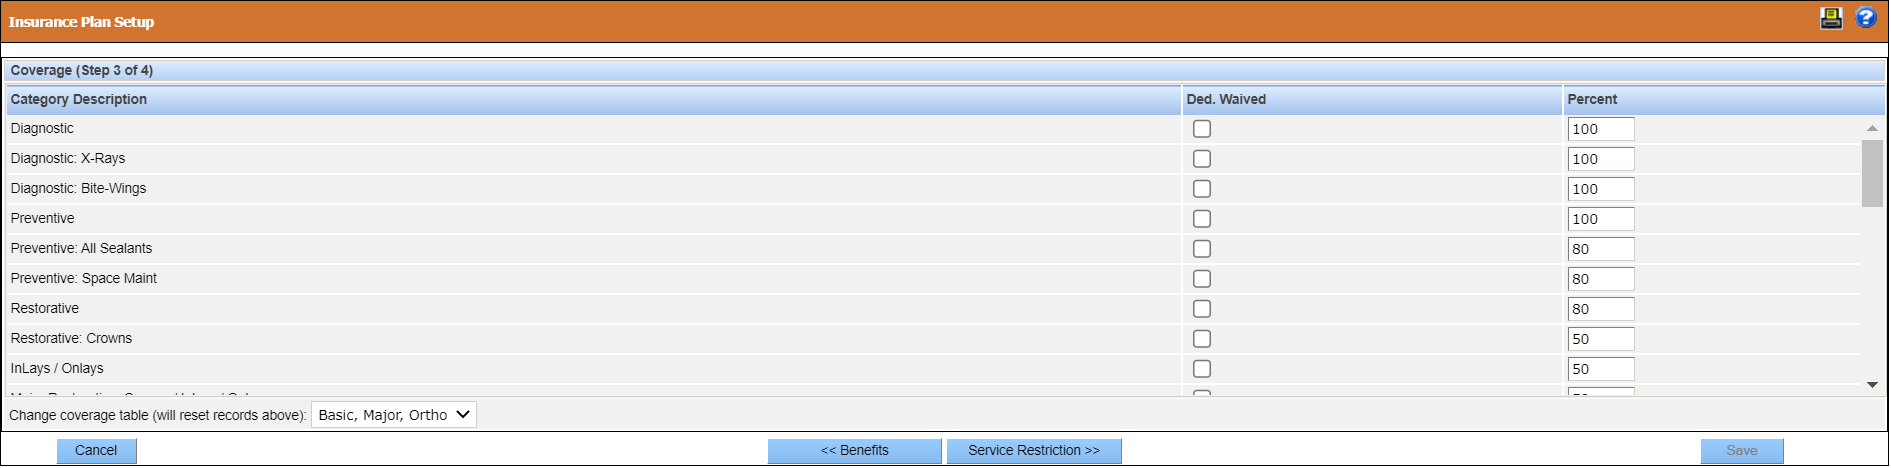
- Enter the coverage percentage for the respective category as mentioned in the plan materials.
-
To waive off the deductible, select the Ded. Waived check
box.
Note: If you select the Ded. Waived check box, enter the percentage you want to waive off in the Percent field.
- Click Service Restriction to move to the next step.
Add Service Restrictions
In Step 4 of adding an insurance plan, you have the option to setup service restrictions.

To add service restrictions:
-
Click the button to the right of the Procedure Codes field. .
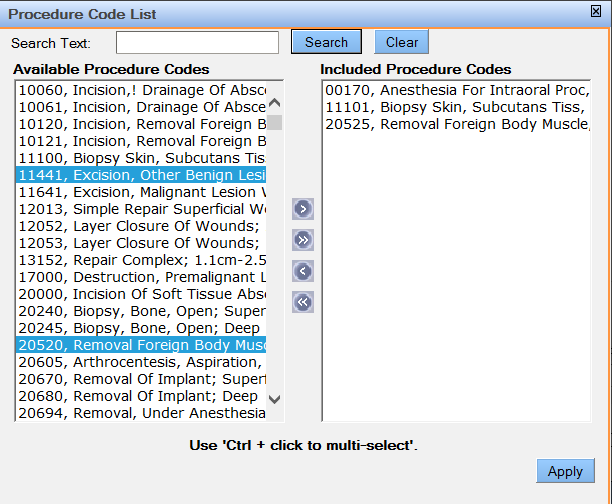 The Service Code List displays.Note: Alternately, type the procedure code in the field and skip to Step 5.
 - Perform a search for the desired procedure using the text search.
- Select the item(s) and click the right arrow icon to move it to the included procedure codes list.
- Click Apply.
-
Select the desired rule from the Service Restrictions dropdown list.
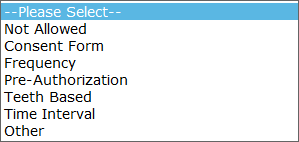 The Service Restriction Rule area updates to display the fields related to the selected rule.
 - In the Age Range area, specify an age range, if necessary. If you enter an age range, the service restriction will apply only to patients whose age falls within that range.
- If necessary, enter a description in the Service Restriction Description field. The text in this field will appear in alerts that display regarding the service restriction.
- Click the Add New button.
- Repeat steps to add additional service restrictions for the insurance plan.
- When all service restrictions are added, click Fee Schedule.
Select a Fee Schedule
In Step 5 of adding an insurance plan, you enter the fee schedule for the plan. A specific fee schedule may be assigned to the insurance plan, most commonly for managed care plans. If no fee schedule is assigned to the plan, fees could be assigned to the carrier for a PPO plan.If no fee schedule is assigned for either the plan or the carrier, office default fees will apply.

To select a fee schedule, perform one of the following steps:
-
To select an existing fee schedule, click the dropdown list and select the appropriate
one.
Note: All managed care fee schedules are available from the dropdown.
- To create a new fee schedule to assign to the plan, click Add New Fee Schedule. For more information see Add a New Fee Schedule.
- Enter the benefits as shown in the plan materials.
- Click Save.