Create Appointment Intake Forms
Create the appointment intake forms to be completed before an appointment.
Note: You must have specific user rights enabled to access the appointment intake form
setup window.
You can create appointment intake forms with custom health status questions that patients or responsible parties can answer before an appointment.
-
From the Setup menu, select .
The Appointment Intake Form window opens.

- To view the appointment intake form when you create a new appointment or edit an existing appointment, select Enable Appointment Intake Form.
- To send an email with a blank intake form automatically to the patient when the appointment intake form is not filled and appointment is confirmed, select E-mail patient when appointment is confirmed and intake form is not filled.
- To view the appointment intake form when the status of an appointment changes to In Reception, select When an appointment status changes to In Reception, show the Appointment Intake Form.
-
To add rows or columns, click Add New Row or
Add New Column.
Note: You can add a maximum of 3 columns and 20 rows.
-
Click Save.
Note: When you add or modify questions or add rows or columns, you must click Save for the changes to appear on the Preview window.
-
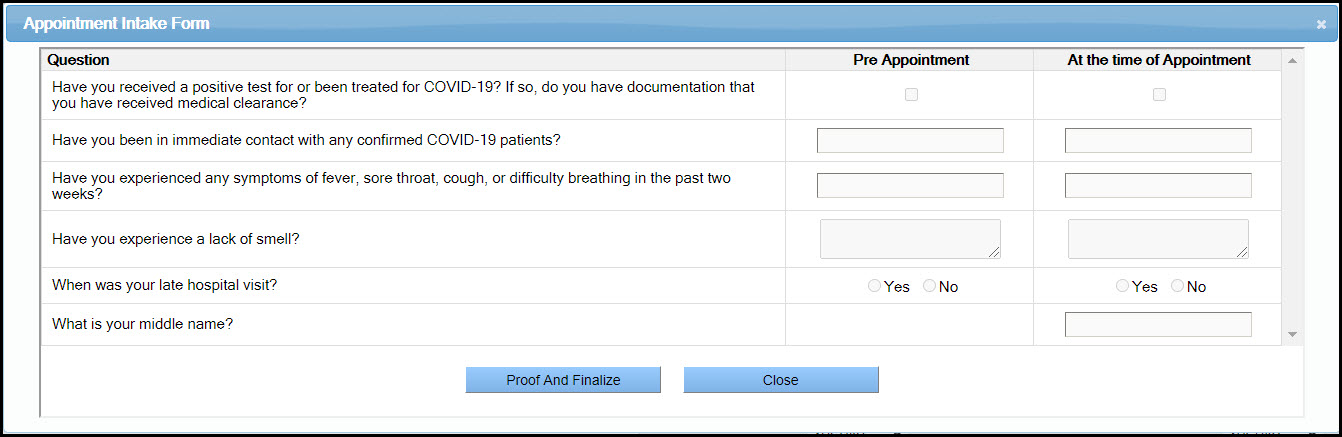
Click Preview.
The Appointment Intake Form opens with the custom health questions set for an office.
-
Click Proof And Finalize.
The Appointment Intake Form is created.