Add Office Specific Templates
You can create a template and associate an office under the same Practice Group with the template.
All alerts created under a new template are visible only to that particular template. You can select the template in the left pane to view all the alerts associated with the template. Templates created cannot be renamed or deleted.
To create an Office Specific Template.
-
From the QSI Dental main window menu, navigatie to .
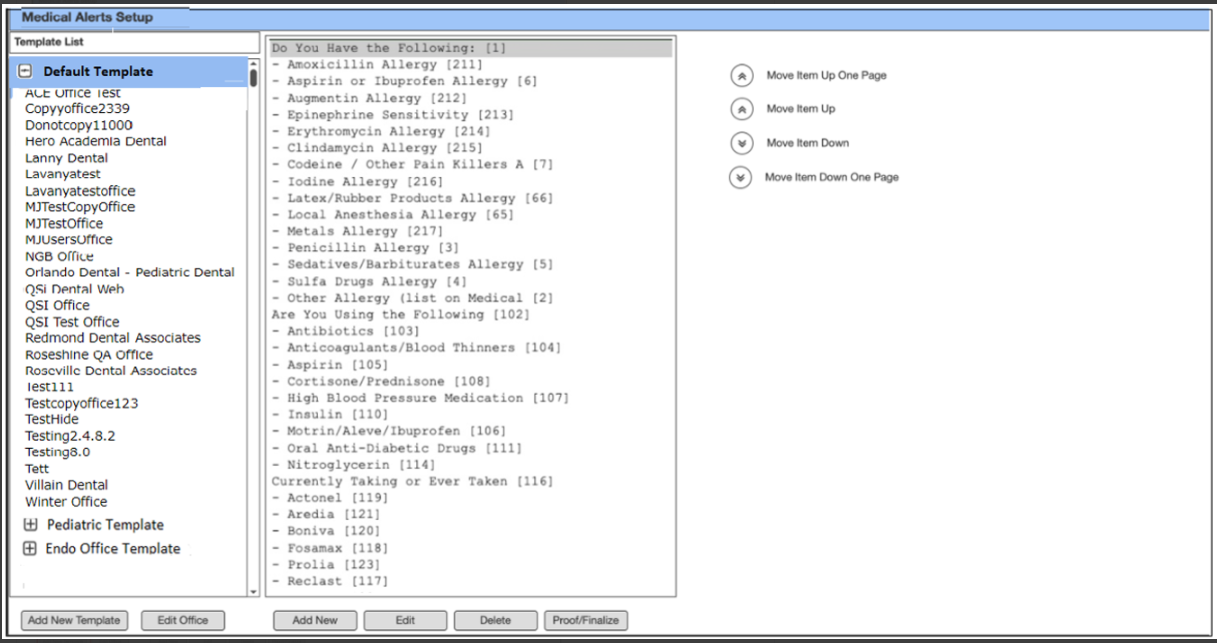
Medical Alerts Setup window opens, displaying the default template list.
-
Click Add New Template to create a new template.
The New Template Setup window opens displaying the available offices.

- Type a name for the template.
- Select the desired offices from the Available Office box, and click the right arrow to move them to the Included Office box.
-
Click Apply.
A confirmation appears indicating, recapturing all the health histories of the patient from the selected office.
-
To accept changes, click OK.
The Medical Alerts Setup window opens, displaying the template name on the blue bar. You can set up alerts for the new template.

-
To set up alerts, do the following.
- Click Add New.
- Complete the Add New Itemtab as desired.
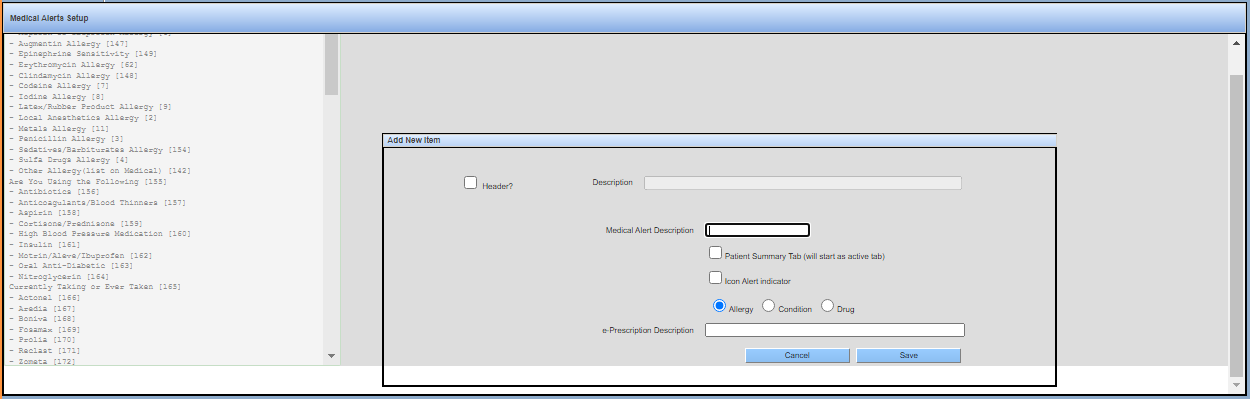
- To use the description as a category header instead of a specific alert, select the Header? check box.
- Type the description as it appears on the Medical Alerts window.
- To trigger the alerts on the Patient Information window when the chart is open. Select Patient Summary tab check box.
- To trigger the Patient Information icon to display the red plus. Select the Icon alert Indicator.
- Click the Save.
The Medical Alert Setup window opens, displaying the new template created.
-
For preview of the Alerts window, click
Proof/Finalize.
Note: Offices are specific to a template. You can add or remove offices associated with a template. Offices removed from the template are available in the Default Template.