Add Primary Dental Plan
You can add or choose a primary insurance plan within the practice's database for a patient.
-
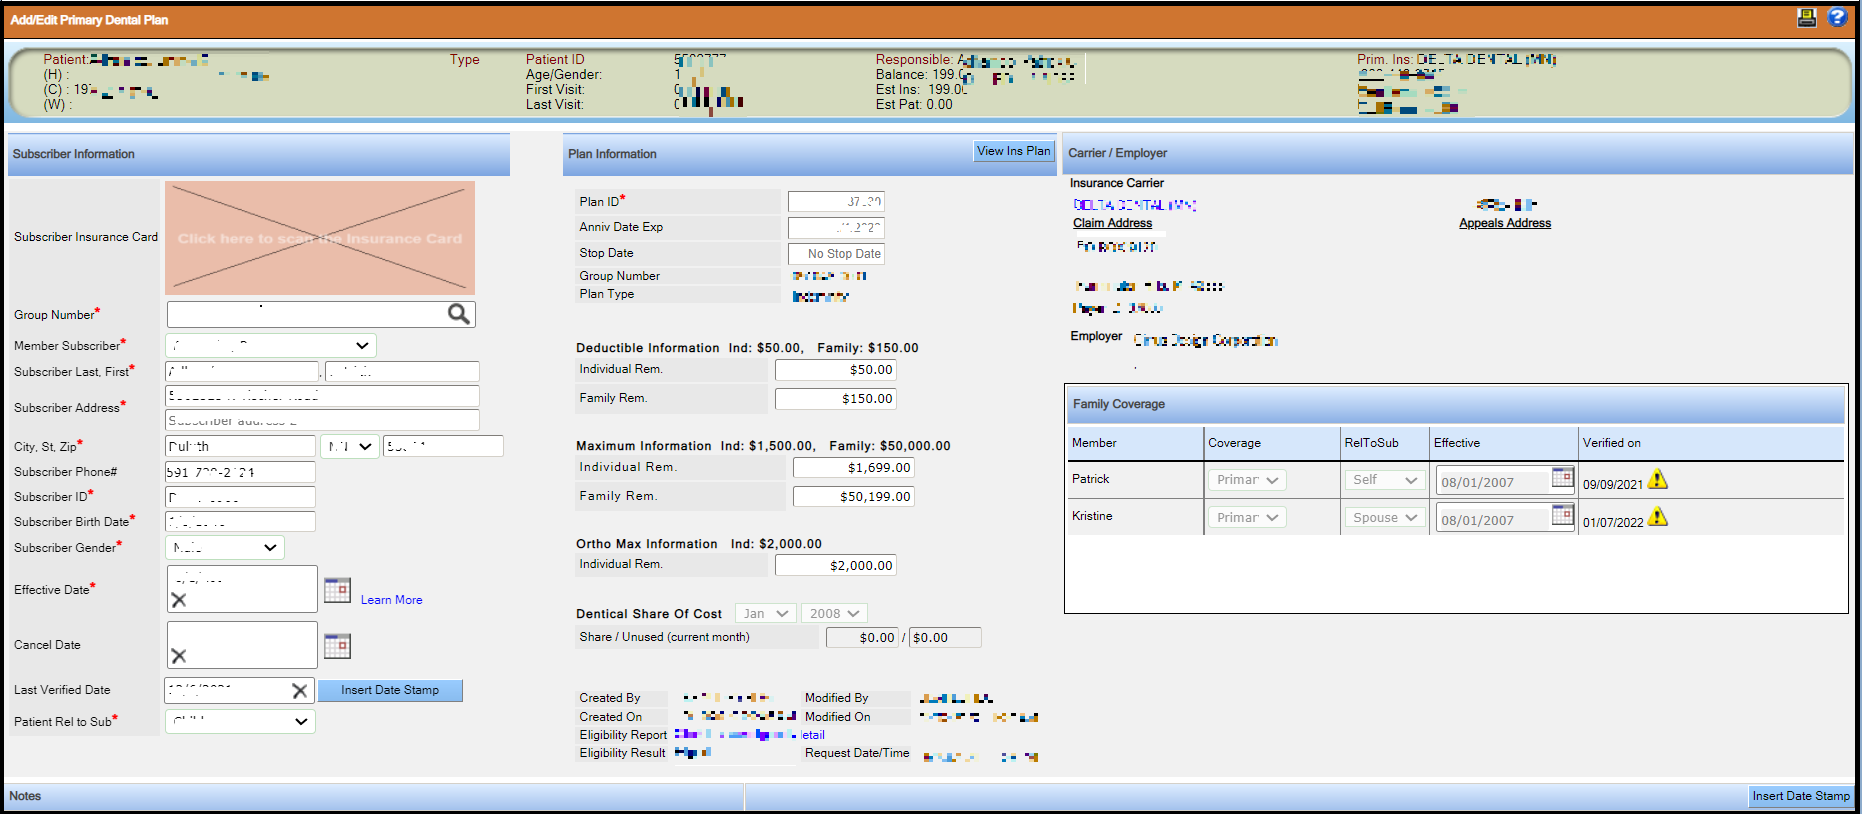
Click the Subscriber Insurance Card field, in the
Add/Edit Primary Dental Plan window and scan the patient's
insurance card into the system.
You can then click the thumbnail image to view the card as you enter details about the patient's insurance.
-
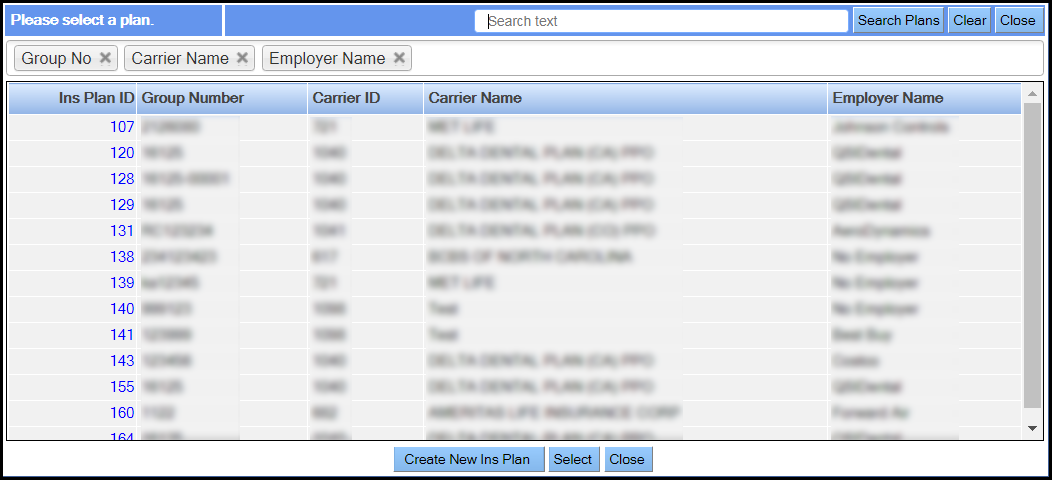
To search for the appropriate insurance plan, do the following:
-
In the Group No. field, enter the insurance plan ID, carrier
name, employer name, or group number and then press Enter or click the magnifying
glass.
Please select a plan pop up window displays a list of plans that meet your criteria.
-
In the Group No. field, enter the insurance plan ID, carrier
name, employer name, or group number and then press Enter or click the magnifying
glass.
-
Enter the other details in the Subscriber Information
section.
The subscriber is the person who provides the eligibility for the carrier. The subscriber does not have to be the same as the patient or the responsible party. For managed care or Medicaid patients, set up individual coverage for each patient if they have an individual social security number or subscriber ID.
-
To complete and confirm the plan information, do the following:
- The red asterisk indicates the required fields.
- You must specify the patient's relationship with the subscriber in the Patient Rel to Sub field to activate the coverage for the patient. If it is set to None, coverage is deactivated (but not deleted).
- To indicate that you have verified the patient's insurance, click Insert Date Stamp next to the Patient Last Verified Date field.
-
Click Add Medical Information.
Note:
- If the patient has additional medical or secondary insurance carriers, add them in the same way.
- The windows appear based on the Coverage Type selection in Patient Information.