Eligibility verification ensures a patient has the necessary coverage before a service is
performed. This section discusses more about verifying eligibility electronically and
manually.
Viewing Eligiblity Information
After the eligibility is verified, the eligibility information appears in the
following locations.
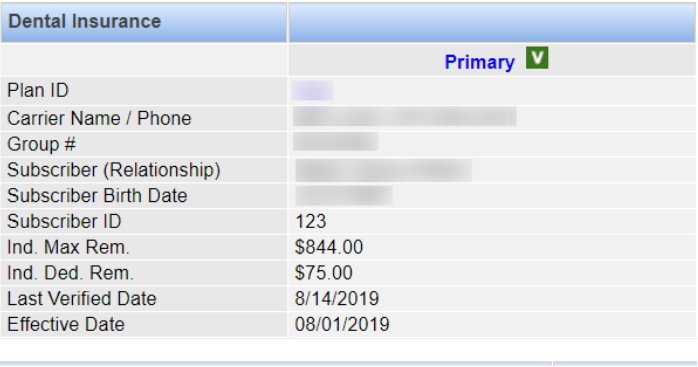
In the Dental Insurance section on the Patient
Overview window, the icon
indicates that eligibility has been verified, and the icon indicates that eligibility needs verification or
that the insurance plan has expired. For example, in the following screenshot, the
patient's primary insurance has been verified, but the secondary insurance is not
verified or expired.
You can hover over the Verified icon to view the date on which eligibility
was last verified. If eligibility was verified electronically through
EDI Clearinghouse, the EDI message regarding eligibility also appears when you
hover over the icon. Both the Verified and Needs verification icons indicate
when a carrier does not support real-time eligibility checks, when you hover
over them.
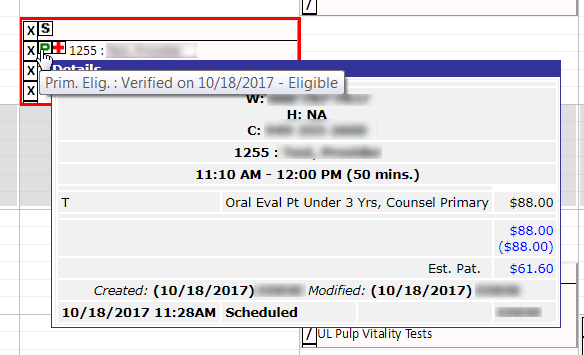
Eligibility also appears on the Scheduler window when you hover
over the insurance eligibility status icon in an appointment box.
In the list view of the Scheduler, the Last verified column
displays the icon along
with the last verified date. The icon will
appears for unverified patients or if the insurance has expired. Last
verifiedcolumn will appear blank for patients who do not have a
carrier.
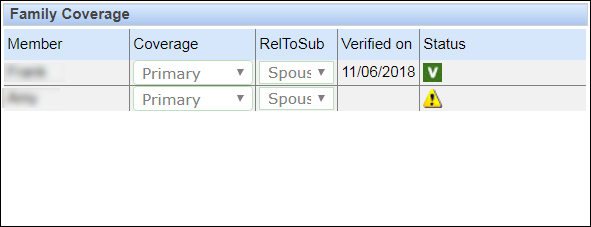
When you are adding or editing the insurance plan for a patient, the verification
information for each family member appears in the Family
Coverage section.
Eligibility Verification
Electronic and annual eligibility verification can be done using the following methods.
The availability of these options depends on your practice setup and subscriptions.
Automatic verification of eligibility a set number of days before an appointment. This
option requires each office to define the number of days prior to an appointment that
verification occurs.
Electronic verification of eligibility, as needed.
Manual verification of availability by contacting the carrier and then noting the
patient's eligibility in the application.
Verify Eligibility Electronically As Needed
Practices that subscribe to EDI Clearinghouse service can check eligibility electronically
on an as-needed basis. An insurance eligibility report details the response from the
carrier.
Note: Insurance last verified dates displaying in red indicate it has been greater
then 30 days since an eligibility verification was performed.
On the Patient Overview screen, click the eligibility icon (either Verified or Needs verification) in the Dental Insurance section.
The Patient Eligibility screen displays.
Select Primary or Secondary or both to
indicate which coverage will be checked. The far-right column of the Current Insurance
Policies section indicates whether the plan is eligible for a real-time eligibility
check.
Note: To view details about a patient's primary or secondary insurance plan, click the
plan ID.
Click Check Eligibility.
The system submits a request for an eligibility check and logs the request in the
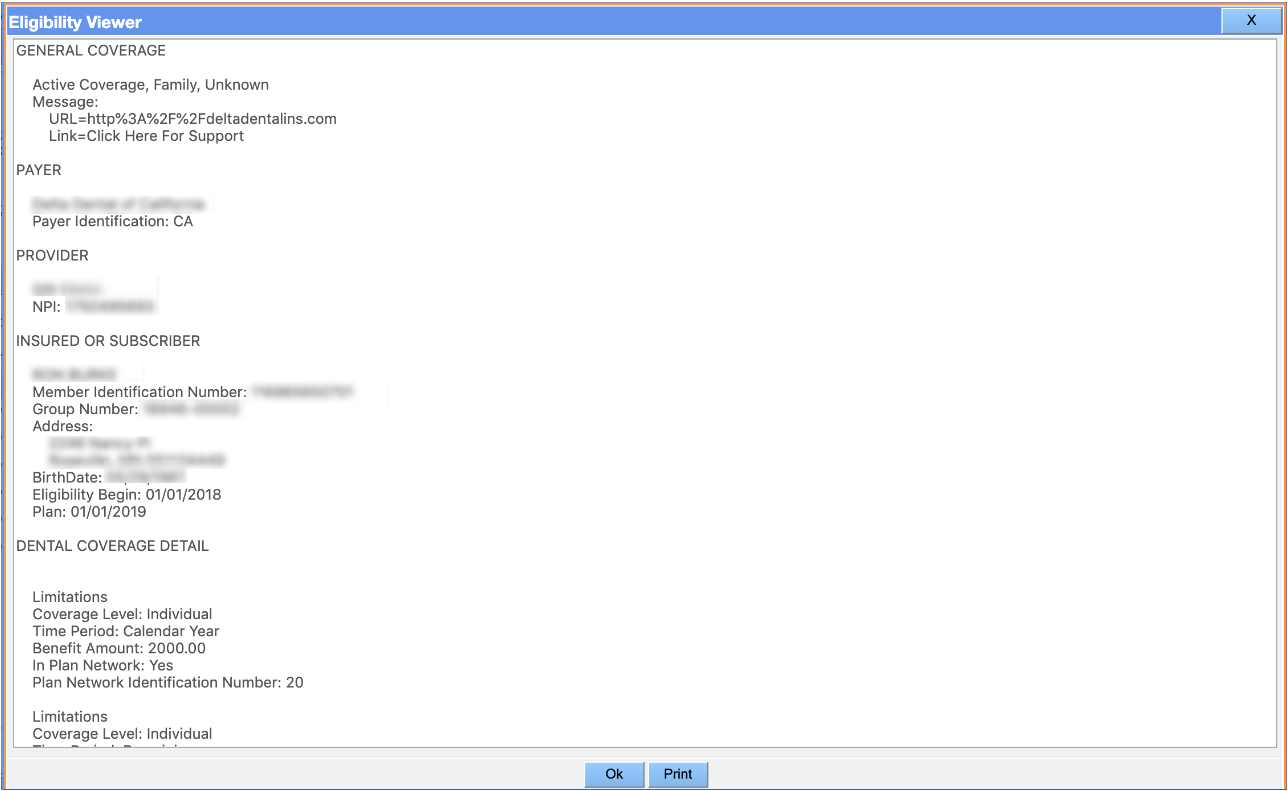
history in the lower half of the window. When a response is received from EDI, the
result will appear in the history, and you will be able to view and print the
eligibility report by clicking the link in the Report column. If
applicable, the patient's status will also change to verified.
Verify Eligibility Manually
Once you have verified a patient's eligibility by contacting the carrier, you can note this
in the system via the Patient Last Verified Date
field.
Note: Insurance last verified dates displaying in red indicate it has been greater
then 30 days since an eligibility verification was performed.
To mark a patient's insurance as verified:
On the Patient Overview screen, click the Primary or
Secondary link in the Dental Insurance section.
The system displays the plan's details on the Add/Edit Dental
Plan screen.
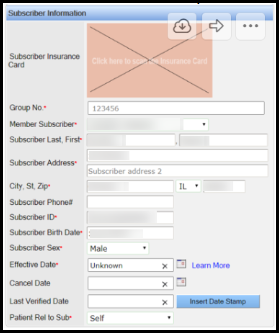
In the Subscriber Information section, select the desired member
subscriber if necessary.
Click Insert Date Stamp next to the Patient Last
Verified Date field.
The system inserts the current date in the Patient Last Verified Date
field.
 icon
indicates that eligibility has been verified, and the
icon
indicates that eligibility has been verified, and the  icon indicates that eligibility needs verification or
that the insurance plan has expired. For example, in the following screenshot, the
patient's primary insurance has been verified, but the secondary insurance is not
verified or expired.
icon indicates that eligibility needs verification or
that the insurance plan has expired. For example, in the following screenshot, the
patient's primary insurance has been verified, but the secondary insurance is not
verified or expired.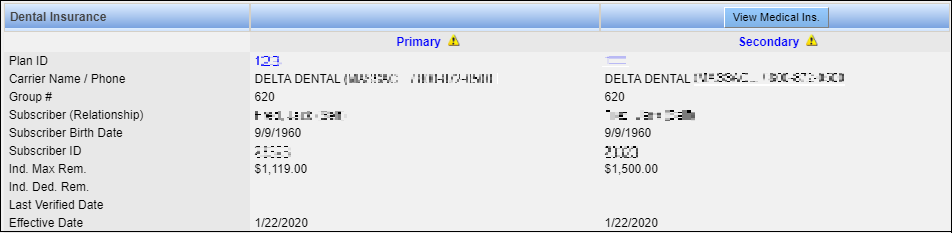

 or Needs verification
 ) in the Dental Insurance section.
 The Patient Eligibility screen displays.
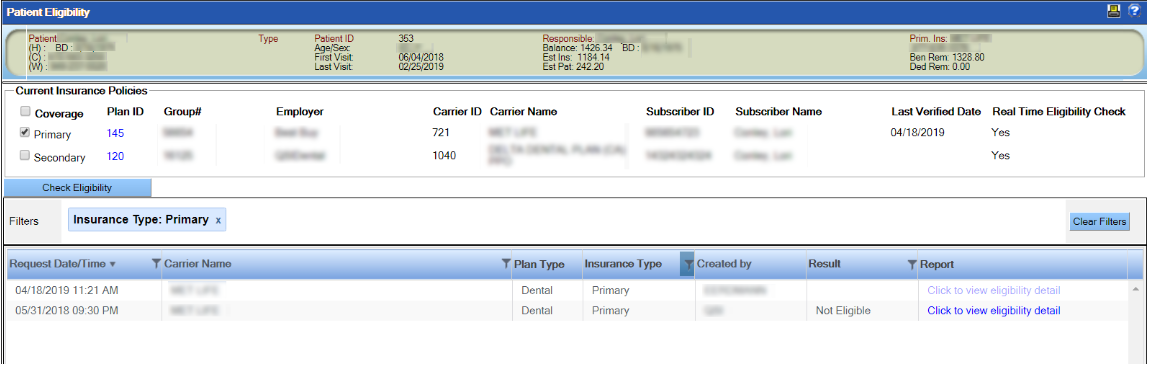
 The system displays the plan's details on the Add/Edit Dental Plan screen.