Add or Edit Insurance Plans
You can add a patient's primary or secondary insurance plan when you create the patient record. However, you can add or edit insurance plans any time.
-
On the Patient Overview window, in the insurance section, click
the Primary or Secondary link.
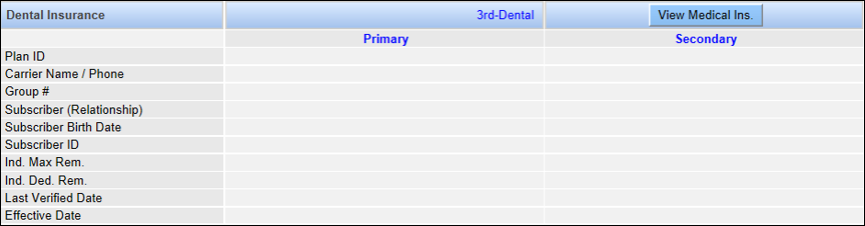 The Add/Edit Dental Plan window opens.
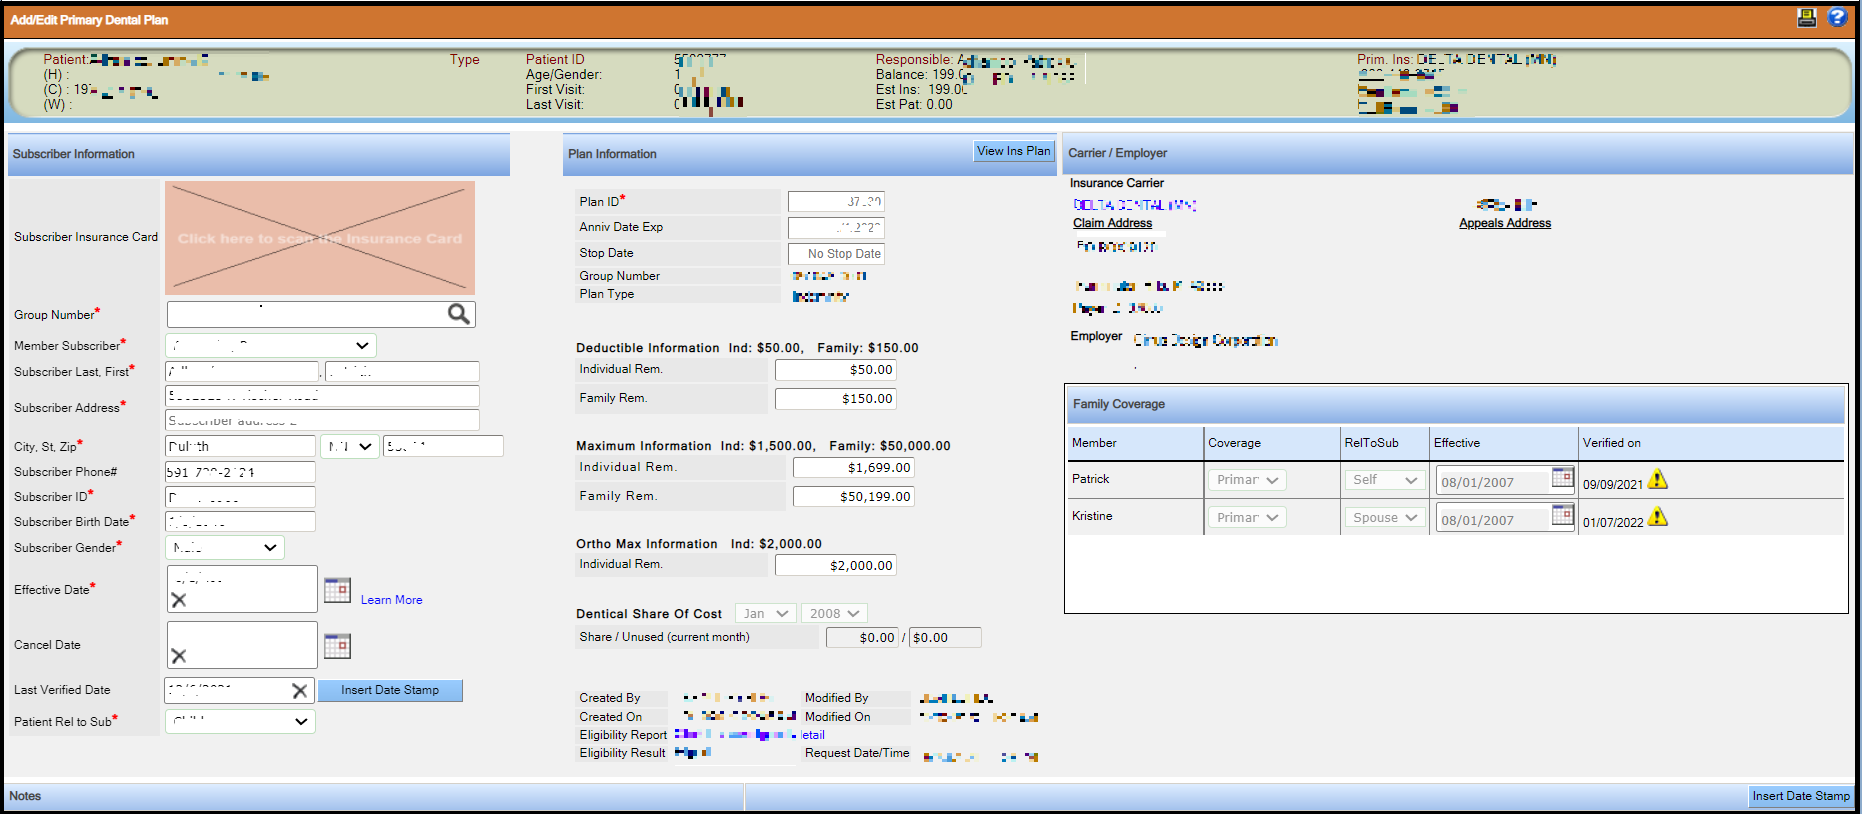
If the patient's insurance coverage is not entered in the application, but coverage does exist for a family member on the same account, the application displays a list of plans on the account.
-
Do one of the following:
- If the patient has coverage under one of the plans, select the plan and click Select.
- If there is no coverage for the patient from the listed account plans, click Close.
You can view the details of a plan by clicking the insurance plan ID. You can filter the list of account plans by entering a keyword in the search field, and clicking Search Plans or by clicking Select filter and choosing a filter from the list. You can delete a plan from this window by clicking Del in the corresponding row.The account plan closes, and the Add/Edit Insurancewindow displays the details from the selected plan.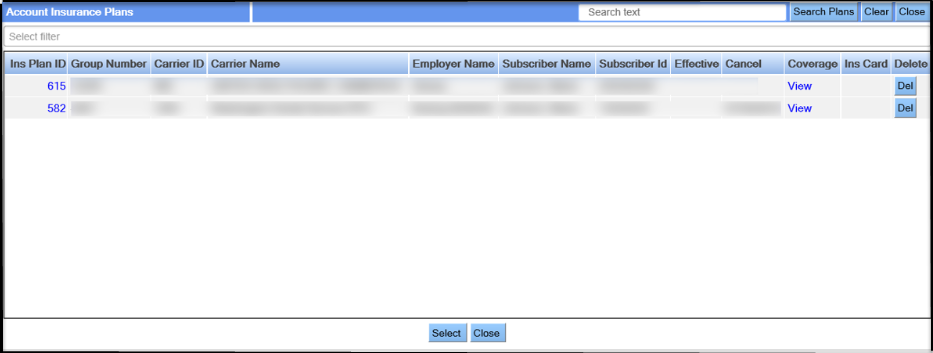
-
Click the Subscriber Insurance Card field and scan the patient's
insurance card into the system.
You can then click the thumbnail to view the card as you enter the insurance details of the patient.
-
If you did not select an insurance plan for the patient in step 2, search for the
appropriate plan using the following steps.
-
In the Group No. field, enter an insurance plan ID, carrier
name, employer name, or group number and then press Enter or click the magnifying
glass. The system displays a list of plans that meet your criteria.
If you have selected Do not allow Group Number mismatch on the Insurance Plan Setup window, and if the group number in the Subscriber Information section does not match with the group number in the Plan Information section, then a message appears stating that there is a group number mismatch. You cannot save the window when there is a mismatch. However, you can edit the Group No. field in the Subscriber Information section to match it with that in the Plan Information section and then save the window.
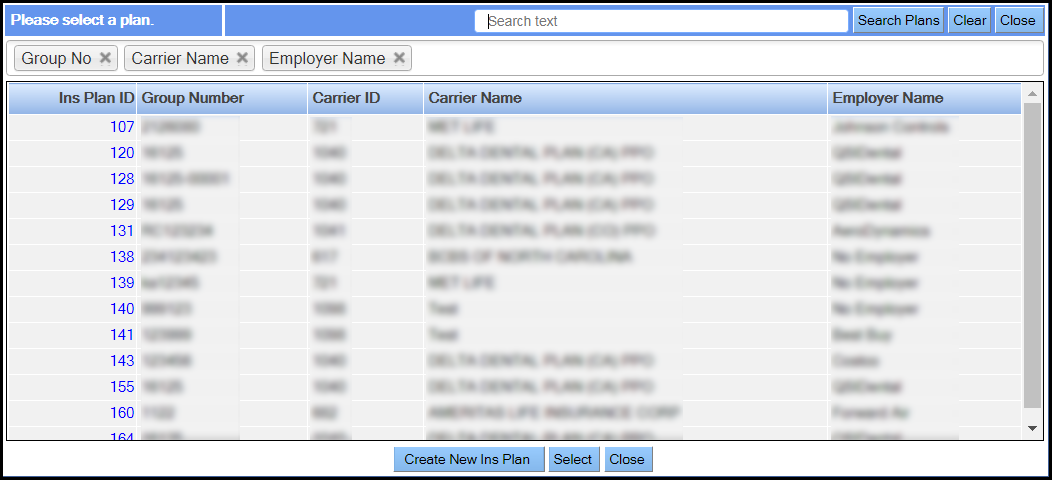
The Add/Edit Insurance Plan window redisplays with the Plan Information and Carrier or Employer sections filled with the details from the selected plan.Note: If the desired plan is not displayed, an administrator user must add it to the practice database. -
In the Group No. field, enter an insurance plan ID, carrier
name, employer name, or group number and then press Enter or click the magnifying
glass. The system displays a list of plans that meet your criteria.
-
From Member Subscriber, select the subscriber.
The other fields in the Member Subscriber section are filled based on your selection. If you select Other, you must complete the fields manually.
- Subscriber's name
- Address - Automatically filled with the address of the responsible party
- Phone number
- Subscriber ID
- Birth date
- Sex
-
Enter a date in the Effective Date field when you add a new
insurance coverage. If the date is not known, select Unknown.
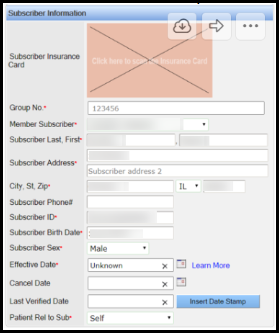 If you select Unknown in the Effective Date field, the Dental Insurance section on the Patient Overview window displays Unknown in red indicating that this field must be updated
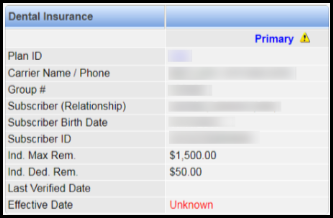
-
To complete and confirm the plan information. Do the following:
- The red asterisk indicates the required fields.
- You must specify the patient's relationship with the subscriber in the Patient Rel to Sub field to activate the coverage for the patient. If it is set to None, coverage is deactivated (but not deleted).
- To indicate that you have verified the patient's insurance, click Insert Date Stamp next to the Patient Last Verified Date field.
- In the Family Coverage section, you can update the coverage for other family members in the Coverage column and their relationship to the subscriber in the RelToSub column.
- Click Save.