Add a Provider
When you add a provider, the system walks you through the six steps involved.
To add a provider:
-
Click .
The Provider Setup window opens.
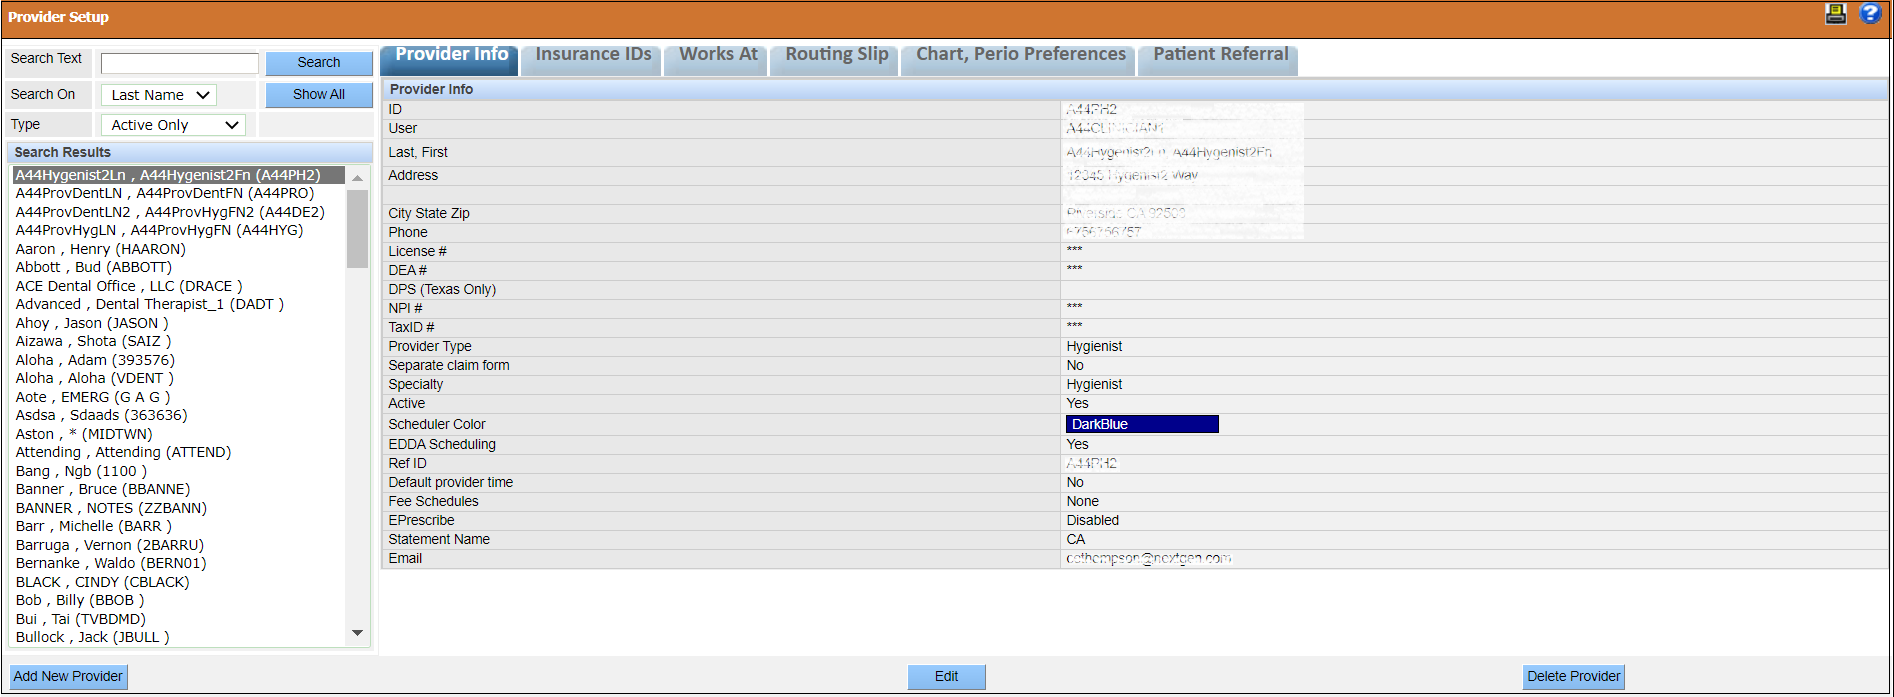
- Click Add New Provider.
-
Complete the information for each of the six steps as appropriate:
- Add Provider Info
- Add Insurance Provider IDs
- Add Offices Where Provider Works
- Add Routing Slip Customizations
- Add Chart Perio Preferences
- Add Patient Referral Preferences
- Click Save.
Add Provider Info
In step 1 of adding a provider, you must provide the following information specific to the provider. Required fields are indicated by a red asterisk.
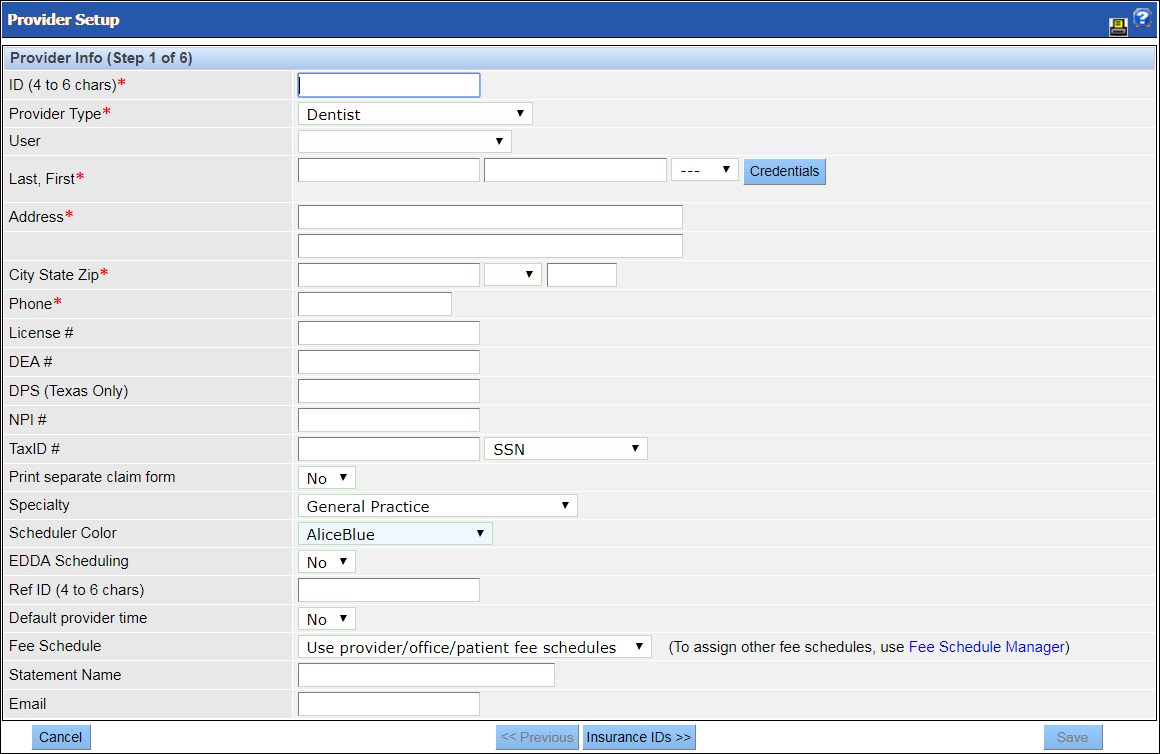
- ID (4 to 6 chars): Identifies the provider in various modules and reports. The ID is separate from designations such as the user name and mnemonic.
- Provider Type: Select the appropriate provider type for the user. Choose from Dentist, Advanced Dental Therapist, Dental Therapist, Hygienist, Assistant, N/A.
- User: Select the user account associated with this provider. For a user account to appear in the list, the user must have been set as a clinical user via the Clinical User check box on the Charting tab of user setup.
- Demographics: Details about the specific provider, including
name, contact information, credentials and licensing information.
- Address and Phone may be the office address and phone.
- Though not indicated as required by QSIDental Web, License
#, DEA#, NPI#, and
TaxID # are required to file electronic claims.Note: A valid NPI number is required to trasmit a claim.
- Print separate claim form: When claims are created, separate claim forms may be
printed for each provider for a given date of service.
- Yes: Select this option to print a separate claim form for each provider.
- No: Select this option if you don’t want to print a separate claim form for each provider.
- Yes, Use as Billing Provider: Select this option to use a selected provider as the billing provider and to print a separate claim form for each provider.
Note: The provider is not used as the billing provider if Allow Billing Provider Exceptions option is deselected in the Office Setup page. - Print separate claim form: Separate claim forms may be printed for each procedure under a provider. It is recommended that you leave this at the default value No.
- Specialty: Use the list to indicate the provider’s specialty, which is printed in Box56a of the claim form and used in some reporting.
- Scheduler Color: The Scheduler can be color coded by provider so that each of that provider’s appointments appears as a specific color. Select the color from the dropdown.
- EDDA Scheduling: The Scheduler can be managed using EDDA scheduling. Select Yes to enable this.
- Ref ID (4 to 6 chars): Serves as another identifier for the provider. The Ref ID is generally the same as ID (at the top of the screen).
- Default provider time: The appointment block on the Scheduler
indicates the availability of the provider. For each unit of time, a symbol shows the
requirement for a dentist during the appointment.
- The letter x identifies the time in which a dental assistant is monitoring or working with the patient.
- A slash identifies time in which the provider cannot be booked in another operatory.
- A period identifies anesthesia time in which the doctor does not have to be physically present in the operatory. These time indicators may be associated with procedure codes and managed manually within a specific appointment.
- Fee Schedule: A fee schedule may be associated with a specific provider. Select the fee schedule from the dropdown.
- Statement Name: If the provider prefers his or her name to appear differently on statements, indicate the name in this field (applies primarily to visit-oriented statements).
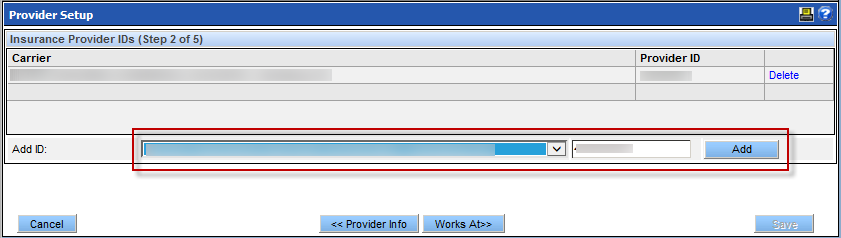
Add Insurance Provider IDs
Some carriers require special ID numbers for a provider’s claim submissions. You must provide these in step 2 of adding a provider. This information appears in Box 58 of the claim form.
To add insurance provider IDs:
- Select the carrier from the list.
- Type the specific provider ID.
- Click Add.
- Repeat as needed for the carriers that require IDs.
-
Click Works At.
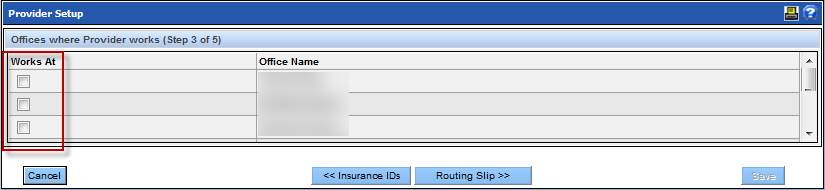
Add Offices Where Provider Works
In step 3 of adding a provider, you specify the offices where the provider works.
To specify the offices where the provider works:
- Check the offices this provider will need to be available for selection as a provider. Place check marks beside the desired offices.
-
Click Routing Slip.
 Note: The provider's user account should provide access to these offices.
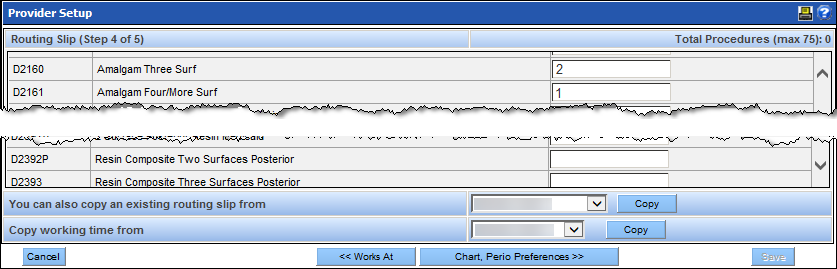
Add Routing Slip Customizations
In step 4 of adding a provider, you can customize the provider's routing slip. The routing slip, or care slip, is a key method of communicating information from the front desk to the clinicians.It typically specifies the procedures to be performed in the scheduled appointments.The bottom section is customizable with up to 75 procedure codes.
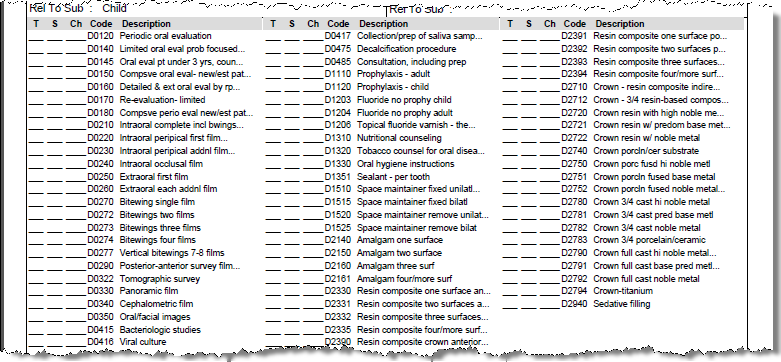
A routing slip may be customized per provider or shared across providers. To add procedures to the routing slip:
-
For each procedure listed, specify the number of times a procedure should appear on the routing slip.
Note: Copy from an existing provider by selecting the provider from the dropdown and clicking the Copy button.
-
Click Save.
Working Time: Represents the actual times that the provider is available for appointments. Copy working time from an existing provider by selecting the source provider from the dropdown and clicking the Copy button. The specific hours for each day and office can be managed in the Provider Per Office Settings setup tool.
- Click Chart, Perio Preferences.
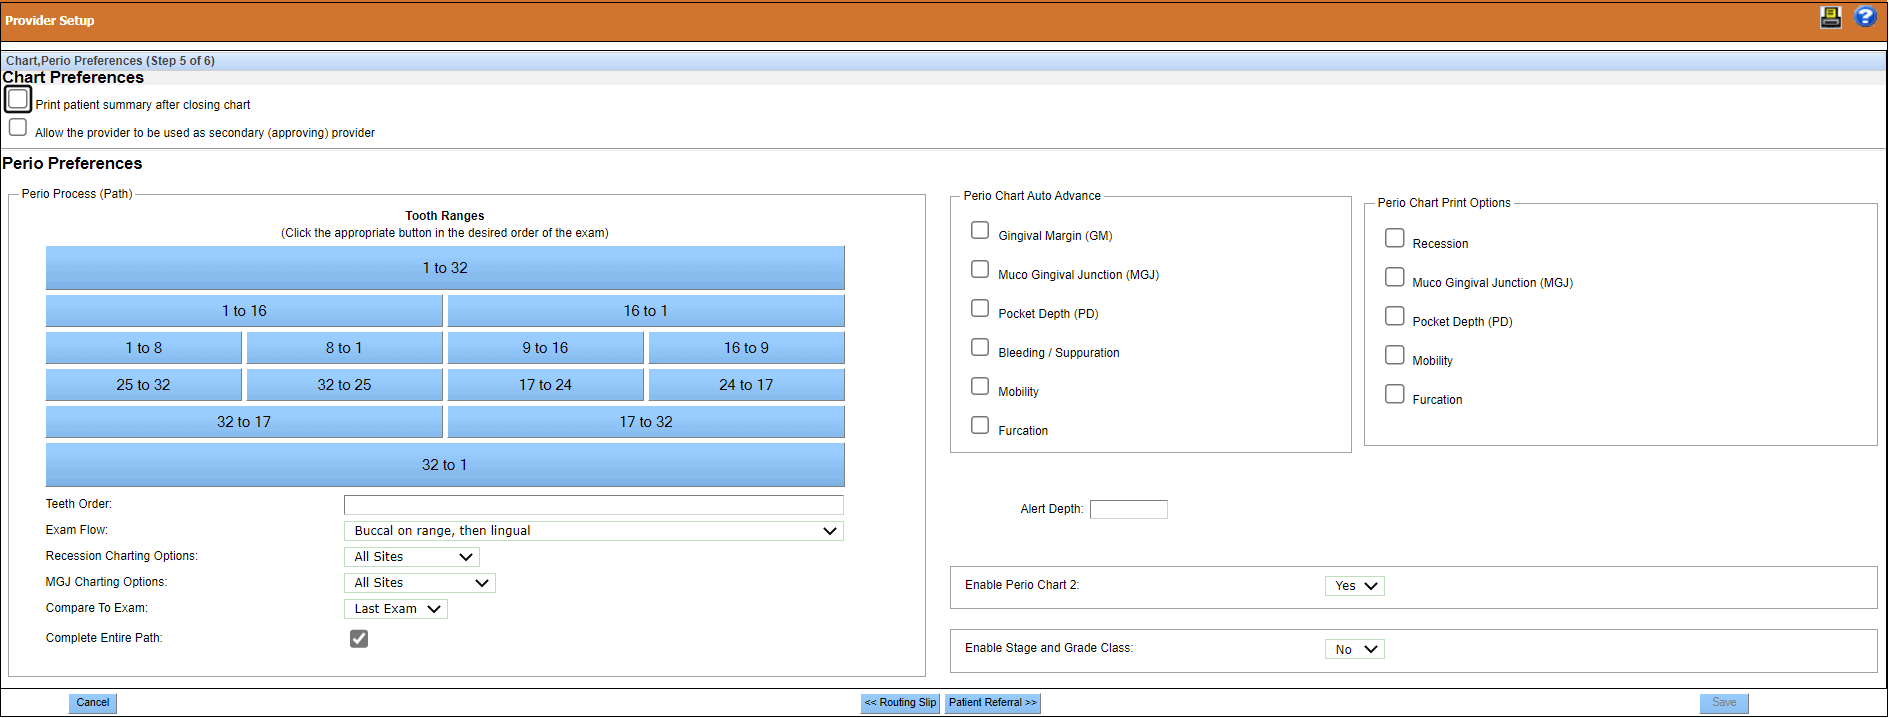
Add Chart Perio Preferences
In step 5 of adding a provider, you can specify the provider's preferences for restorative and periodontal charting.
To add chart perio preferences:
- Print patient summary after closing chart: Select the check box if the provider wants to automatically print the patient summary when the Tooth Chart module is closed. QSIDental recommends against printing.
- Secondary Provider: If the practice has selected to use the Secondary Provider options, the Allow the provider to be used as secondary (approving) provider check box is available. Select the check box, the provider appears in the Secondary Provider list.
-
To set the provider’s perio process:
- Select whether to enable perio chart 2 for the provider from the Enable Perio Chart 2 list.
- Select whether to enable stage and grade class from the Enable Stage and Grade Class list.
- Click Patient Referral.
Add Patient Referral Preferences
In step 6 of adding a provider, you can establish the provider’s preferences for patient referrals.
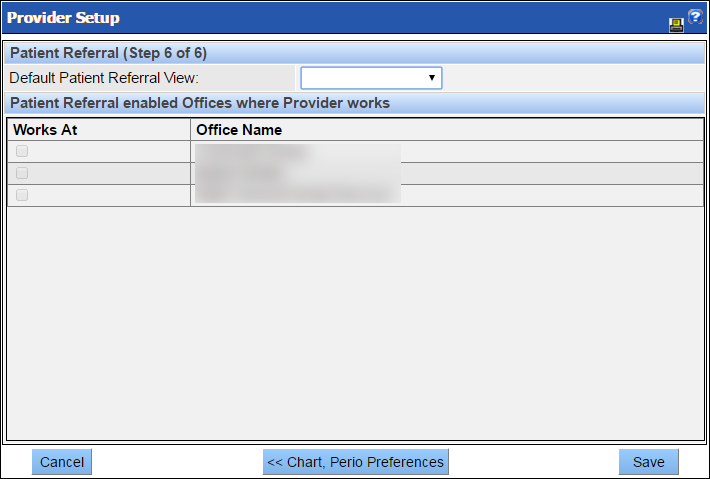
To set the provider's patient referral preferences:
- Click the Default Patient Referral View dropdown, and select the desired default view.
-
Select the check boxes next to the offices for which patient referral should be enabled
for the provider.
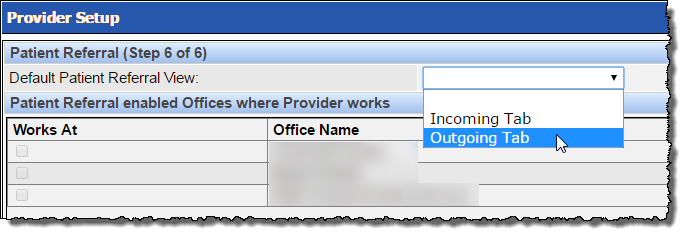
- Click Save.