List View of the Scheduler
About the List View
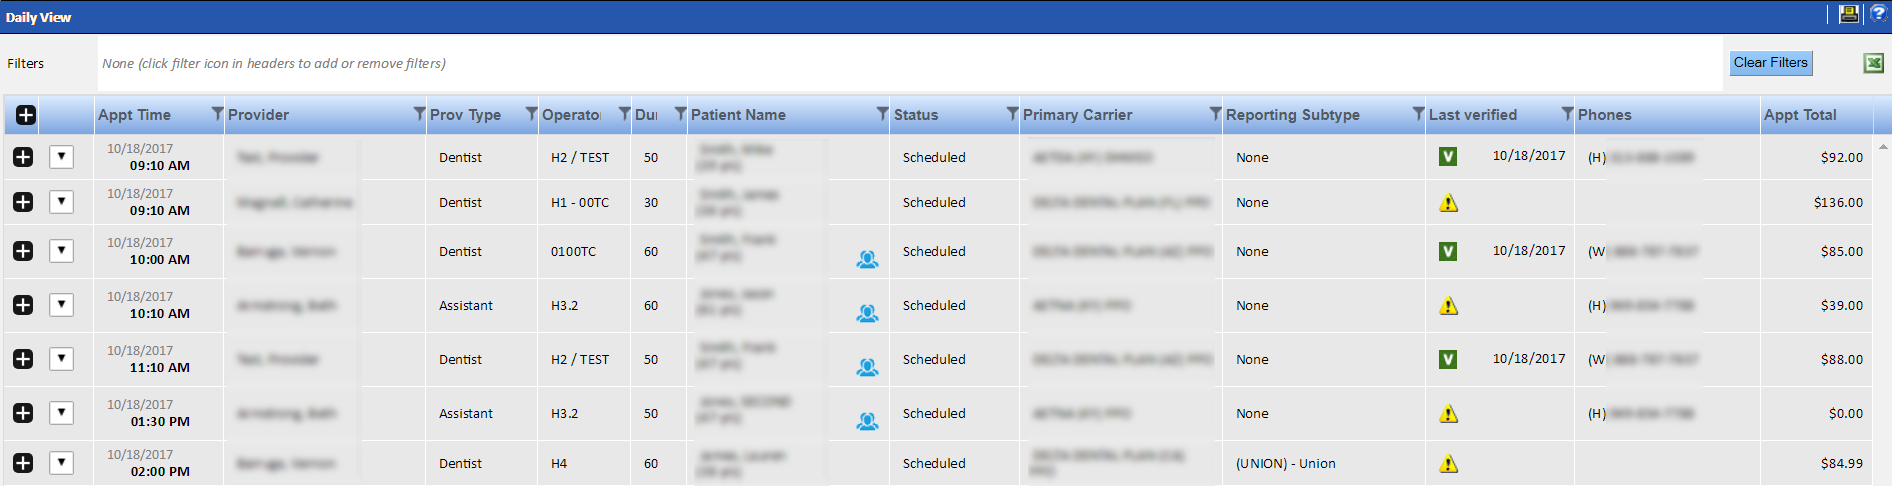
The list view of the Scheduler displays all appointments for the currently selected day or week in a simplified list format. Each appointment can be expanded to view patient demographic information and insurance details. Many of the options that are available in the regular view of the Scheduler are also available in the list view, such as appointment status icons and the ability to display the view for a particular provider.
Access the List View of the Scheduler
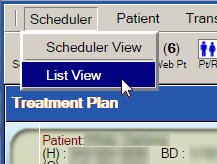
You can access the list view of the Scheduler in either of the following ways:
-
From the toolbar, select Scheduler > List
View.
-
If you already have the Scheduler open, simply select the List
View check box.
The appointments that you are currently viewing will display in a list format.
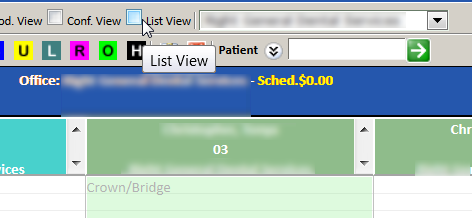
- After opening the list view, you can return to the regular view by clearing the List View check box.
Actions Available in the List View
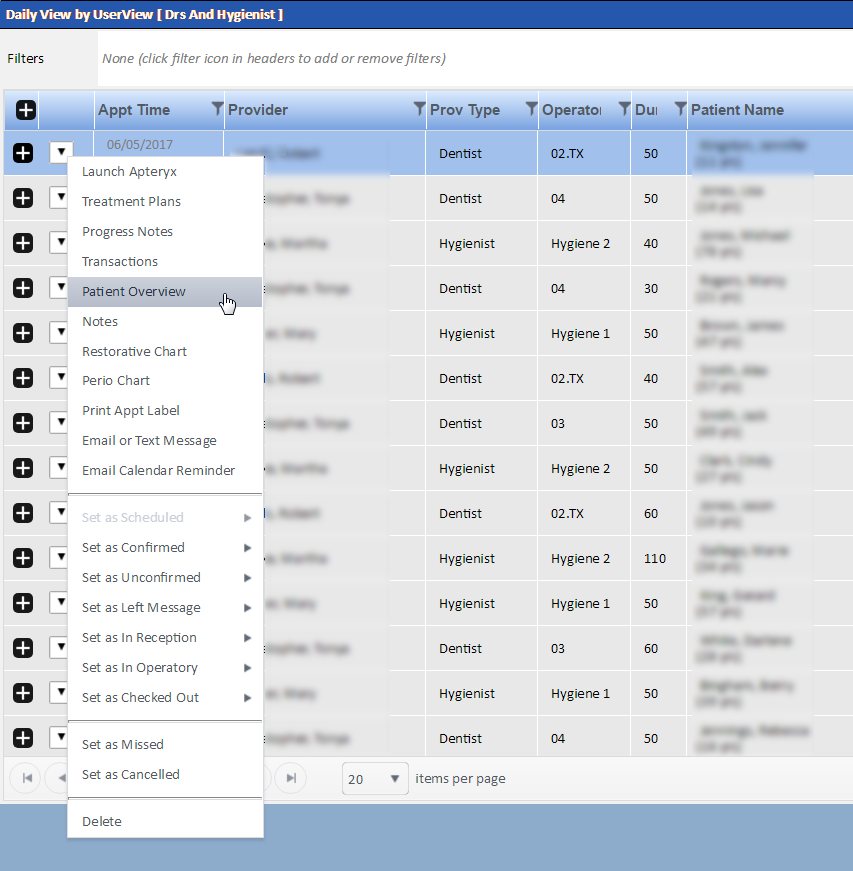
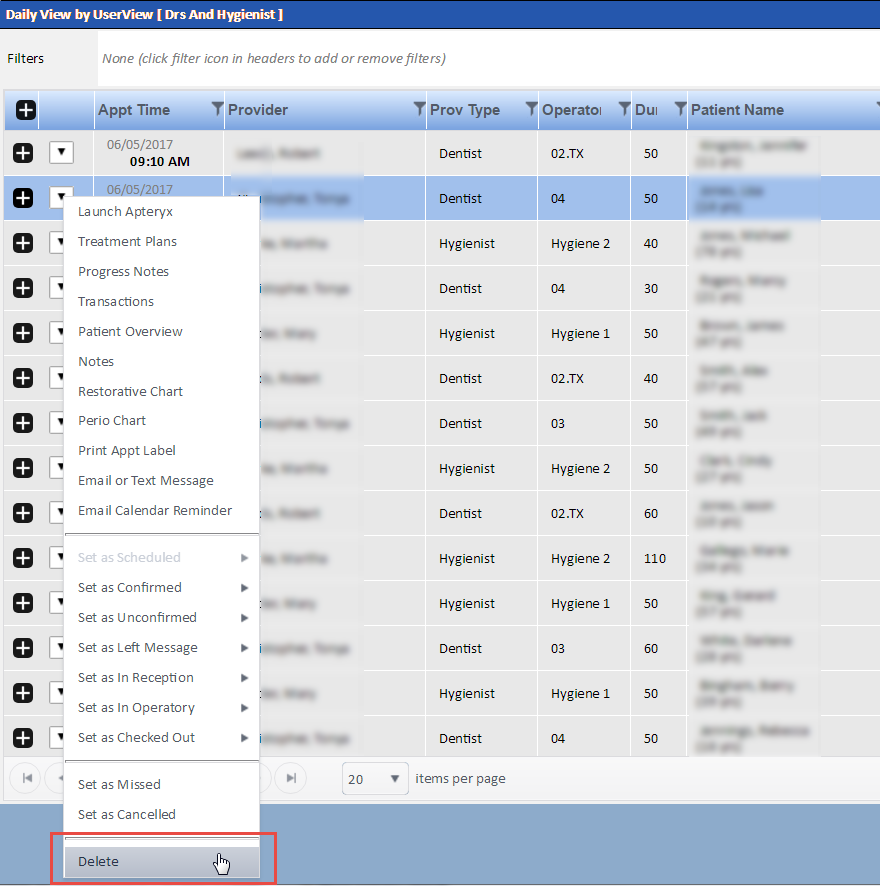
To the left of each appointment in the list view of the Scheduler is an arrow icon that you can click to reveal a list of actions that you can take on that particular appointment.
|
Action |
Explanation |
|---|---|
| Launch Apteryx |
Launches the Apteryx application. |
| Treatment Plans |
Opens the Treatment Plan module. |
| Progress Notes |
Displays the patient's progress notes, if any. |
| Transactions |
Opens theTransactions Entry module. |
| Patient Overview |
Opens the Patient Overview |
| Notes |
Opens the Notes module. |
| Restorative Chart |
Opens the patient chart and displays the patient summary. |
| Perio Chart |
Opens the perio Chart. |
| Print Appt Label |
Opens the Label Appointment window, where you can specify options for printing the appointment label. |
| Email or Text Message |
Allows you to compose and send an email or text message to the patient. |
| Email Calendar Reminder |
Emails a calendar reminder to the patient. |
| Appointment Status |
These options allow you to set the appointment's status to confirmed, unconfirmed, left message, in reception, in operatory, checked out, missed or canceled. Except for missed or canceled, each of these statuses has multiple options from which to choose. When you select a status, the Status column of the list view will update accordingly. |
| Delete |
Deletes the appointment. |
View Patient Information in List View
To view a patient's information while in the list view of the Scheduler:
-
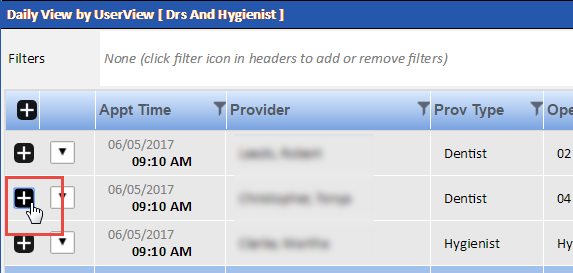
Click the Expand icon (plus sign) in the first column of the
patient's appointment.
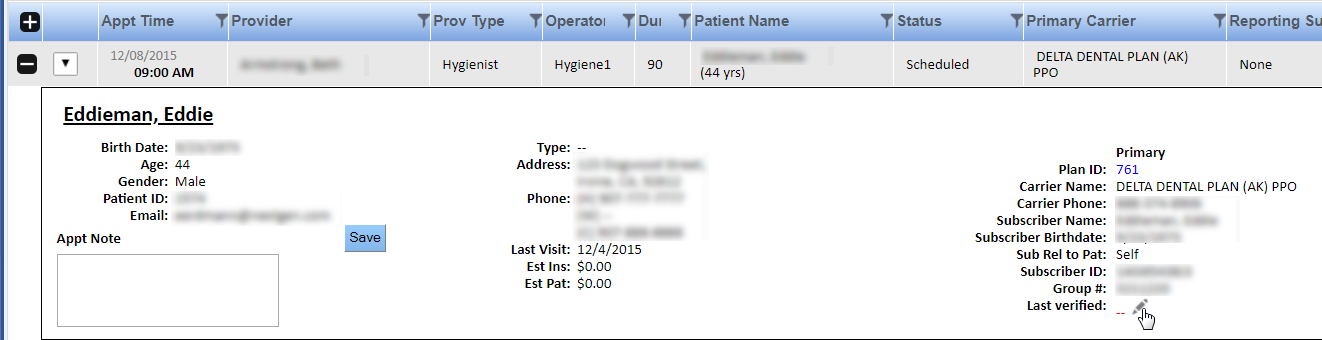
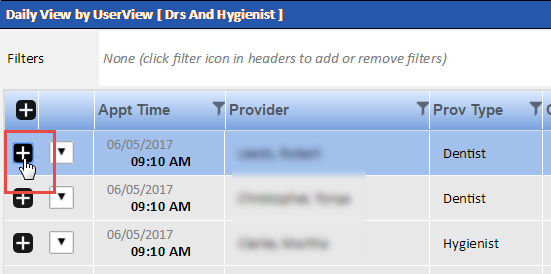 The row expands to reveal demographic information about the patient as well as their insurance details and appointment notes. You can take the following actions from the expanded row.
 - Add or edit the appointment note, as explained in Add Appointment Notes in List View.
- Edit the Last verified date and other information about the patient's insurance by clicking the pencil icon under the primary or secondary insurance.
-
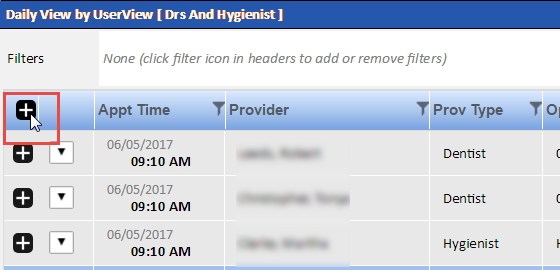
To expand all rows in the list view, click the Expand icon
located in the header row of the first column.
 Note: If the patient's demographic or insurance information has been updated since you opened the Scheduler, you can update the view with the new information by clicking the Refresh button in the upper-right corner of the expanded appointment.

Edit an Appointment in List View
While in the list view of the Scheduler, you can edit an appointment by double-clicking it. To edit an appointment in the list view of the Scheduler:
-
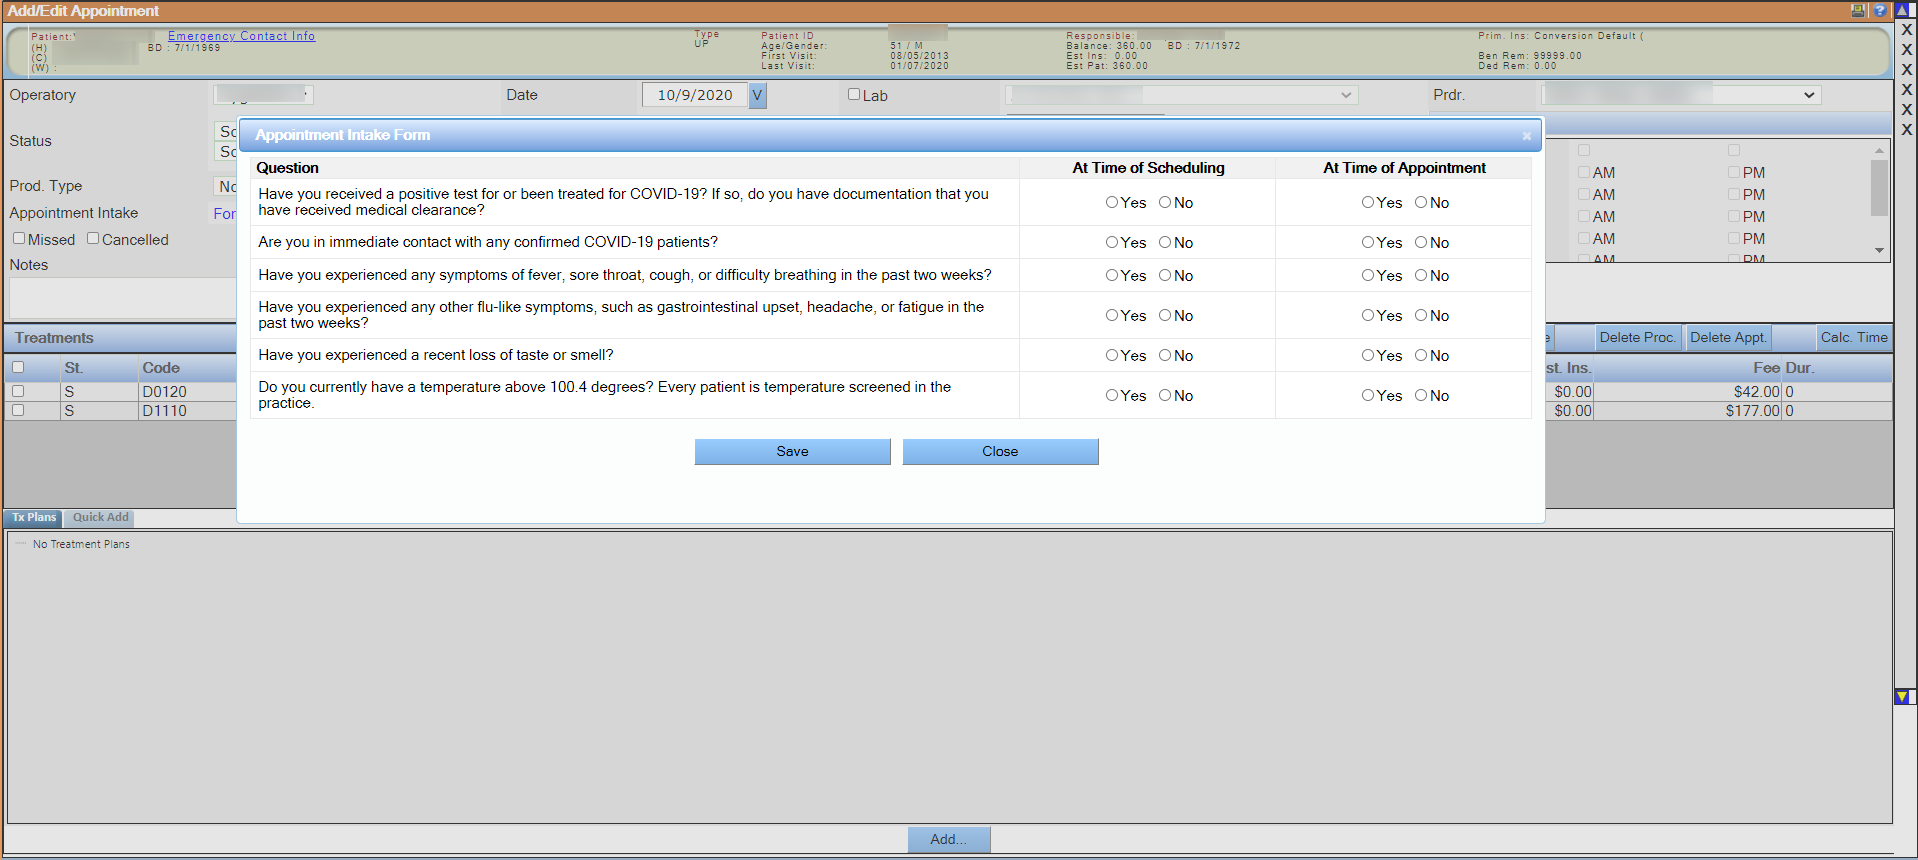
Double-click the appointment.
The Add/Edit Appointment window opens along with the Appointment Intake Form.
-
If completing the Appointment Intake Form at the time of the
appointment, click Save. You must save the Add/Edit
Appointment window to save the details of the Appointment Intake
Form.
Note:
- If the patient has more than one appointment in a day, then the same Appointment Intake Form is used for all the appointments.
- If the first column of the Appointment Intake Form is filled for a confirmed appointment, then the Appointment Intake Form is displayed on the patient’s chart only on the day of the appointment.
-
If the appointment intake form is not completed, select Email Intake
Form to send an email with the appointment intake form to the patient. The
appointment intake form is sent through the health history link. To send emails to
patients, the health history link must be enabled.
 Note: If E-mail patient when appointment is confirmed and intake form is not filled is selected while creating the appointment intake form, then an email is automatically sent to the patient when the intake form is not filled and the appointment is confirmed.
 - Edit the appointment in the Add/Edit Appointment window as desired.
-
Click Save.
The Add/Edit Appointment window closes, and the list view of the Scheduler re-displays.
Manage Family Appointments in List View
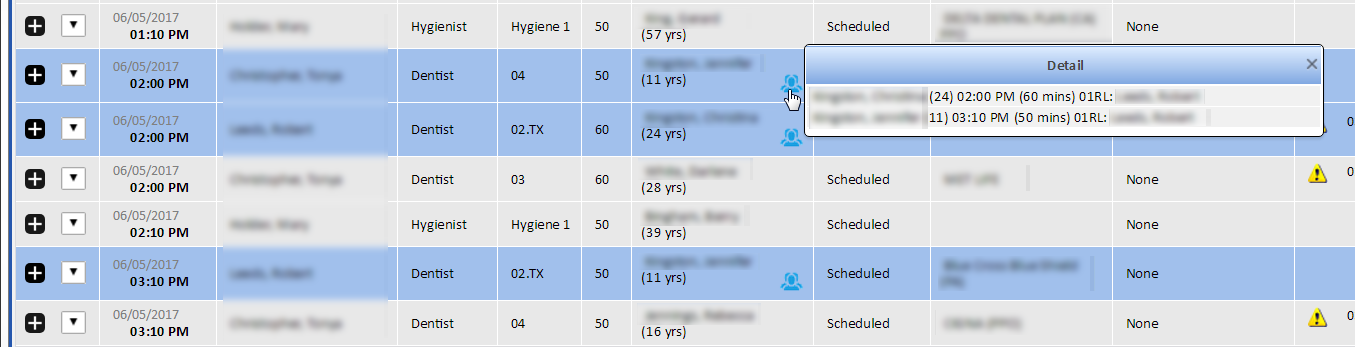
Appointments scheduled for more than one family member are indicated in the list view by a
family icon ( ![]() ) next to each family member's name.
) next to each family member's name.
![]()
When you click this icon, all of the family's appointments will be selected (highlighted in blue), and a popup window will display information about other family members who also have appointments for that day.
When you choose to delete the appointment of one family member, the system will ask if you would like to delete those related appointments as well. For more information see Delete an Appointment in List View.
Filter the List View
While viewing the list view of the Scheduler, you can filter the list by one or more of its columns. To filter the list view of the Scheduler:
-
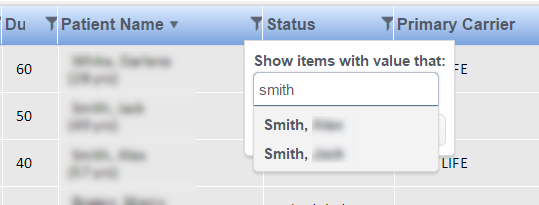
Click the filter icon in the header of the column to which you want to apply a filter.
A dropdown text box appears.

-
Enter the text by which you wish to filter the column.
As you enter text, the system displays items in the list that match the text.
-
Select the correct item from the list, and then click
Filter.
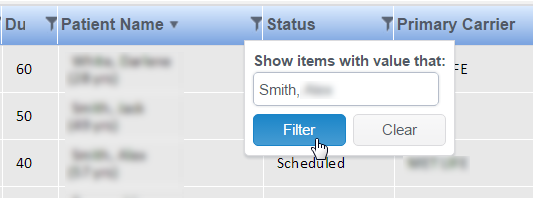 The list is filtered according to the criteria you selected. The filter appears in the Filters area at the top of the list, and the filter icon is highlighted to indicate a filter was applied to that column.
- Repeat steps 1- 3 to add additional filters.
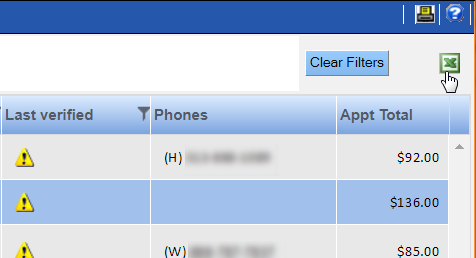
- To remove a filter, click the x next to it in the Filters area. To remove all filters, click the Clear Filters button.
Update Appointment Status in the List View
-
Click the arrow icon to the left of the appointment.
A list of options displays. In the lower half of this list, you see a number of appointment status options.
-
Select the appropriate status from the list. Some of the statuses have multiple options
from which you can choose.
 The Status column updates to reflect the change in status.
Add Appointment Notes in List View
You can add a note to an appointment from the list view of the Scheduler.
To add an appointment note in the List View:
-
Expand the appointment by clicking the Expand icon to the left
of it.
 The appointment expands to reveal patient information.
 -
In the
Appt Note
box, enter the appointment note.

-
Click
Save.
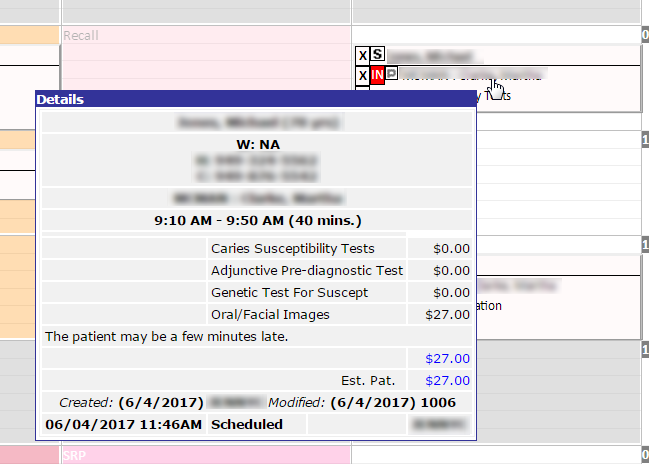
The note is saved. The note will appear when you expand the appointment in the list view of the Scheduler and also when you hover over the appointment in the regular view, as seen in the following screen shot:
Delete Appointments in List View
If one or more family members of the selected patient also have an appointment on the same day, the system will ask if you would like to delete those related appointments as well.
To delete appointments in the list view of the Scheduler, perform either of the following steps:
-
Click the arrow icon to the left of the appointment, and select
Delete. You can delete only one appointment at a time using this
method.
-
To delete multiple appointments, select one or more appointments, and click the
Delete icon (
 ) on the toolbar (Hold
down the Ctrl key to select multiple appointments.)
) on the toolbar (Hold
down the Ctrl key to select multiple appointments.)

View Insurance Plan Details in List View
-
To view details about a patient's primary or secondary insurance plan from the list
view of the Scheduler, click the plan ID.
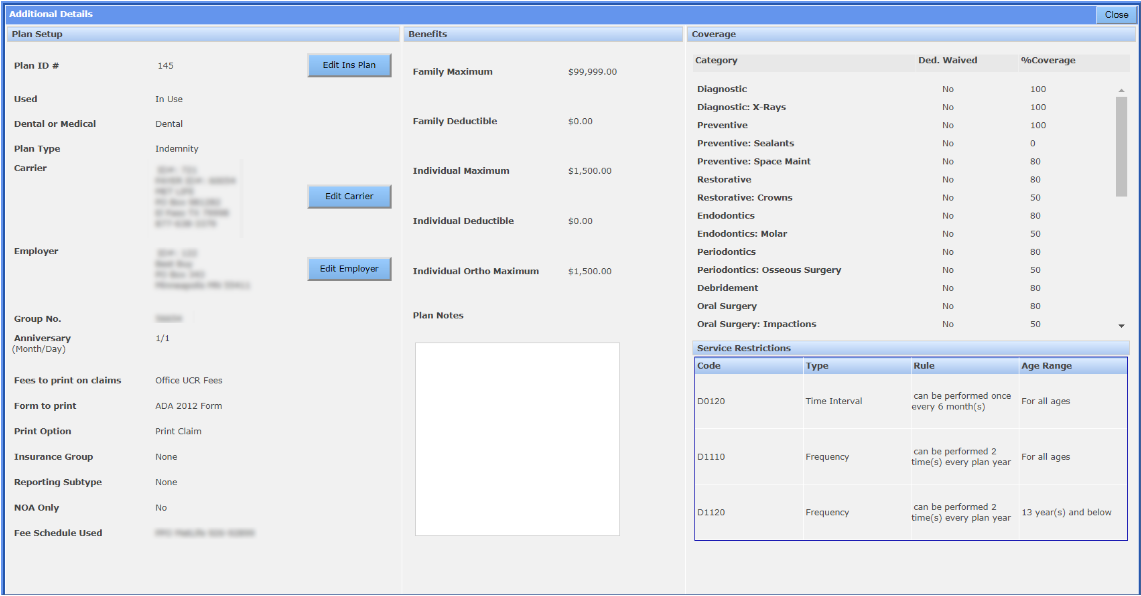
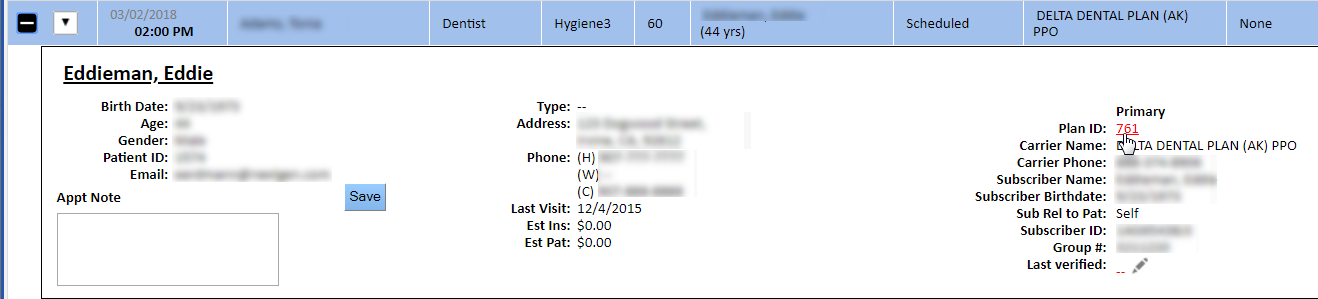 The system displays the insurance plan details in a popup window.
 -
To close the window, click Close.
Edit Insurance in List View
Edit the Last verified date and other information about the patient's insurance by clicking the pencil icon under the primary or secondary insurance. This will open the Add/Edit Insurance screen. For more information see Add or Edit Insurance Plans.
Export the List View to Excel
To export the list view of the Scheduler to Excel: