Insurance Claims Process
Though there are many different ways to handle the insurance claims process, it can be generalized into a few common steps:
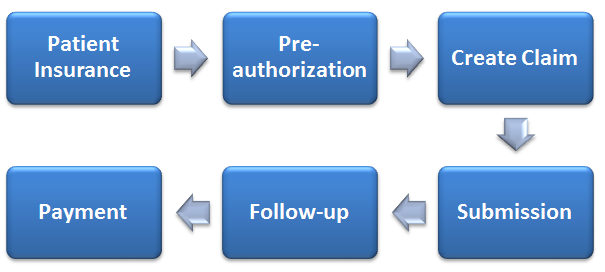
Patient Insurance details are summarized on the Patient Overview screen. Before creating a pre-authorization or insurance claim, be sure there is insurance attached to the patient record and clarify the benefit levels. However, the claim can be updated and rebilled if the plan is updated.
Pre-authorization (Pre-determination): Not all procedures require pre-authorization, but it is important to include it in the process. Though most billing and claims work will occur in the ledger, pre-authorizations requires the Treatment Plan module.
Create Claim: Claims are created from the patient view of the ledger.The Claims screen offers opportunities to view and provide additional details from the insurance company.
Submission: Claims created in QSIDental Web may be submitted electronically or printed directly on paper using the form selected when the plan was created. Claims set for electronic submission are sent with the Batch Claims tool.
Follow-up: QSIDental Web has a number of reports that can be used to track and follow-up on outstanding claims. Additionally, 835 records, Explanation of Benefit Statements and funds may be managed in a variety of tools.
Payment: Insurance payments come from carriers in two ways: in single checks representing a single claim for a single patient or in a large batch check representing multiple claims for multiple patients. Users of QSIDental Web have the capacity to process both or to accept electronic payments using the 835 tools.
Create a Claim
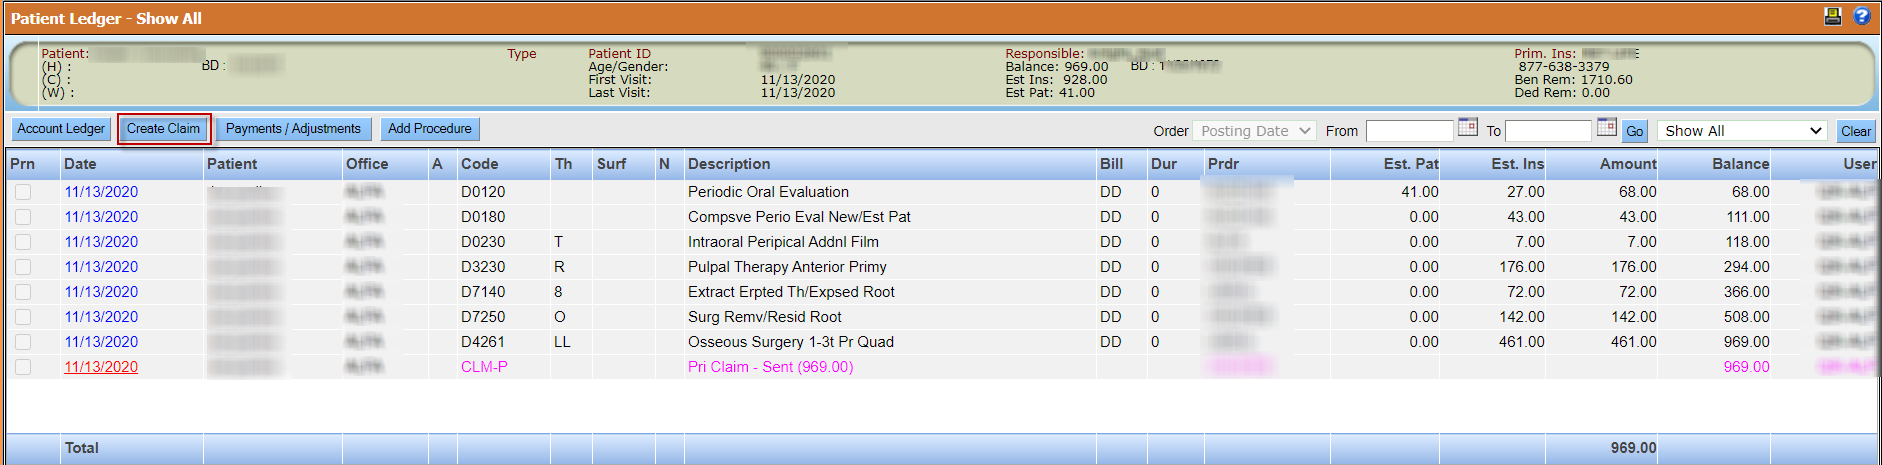
Insurance claims in QSIDental Web are primarily manages via the Ledger module. The ledger displays the recently billed charges, payments and claims. Claims must be created from th epatient view of the ledger.
To create a new claim:
- Select the procedures that should be included in the claim by clicking the check box beside the desired procedures. These procedures should show "D" in the Bill column indicating that the claim will be billed to the primary insurance carrier.
-
Click Create Claim.
-
Review claims details.
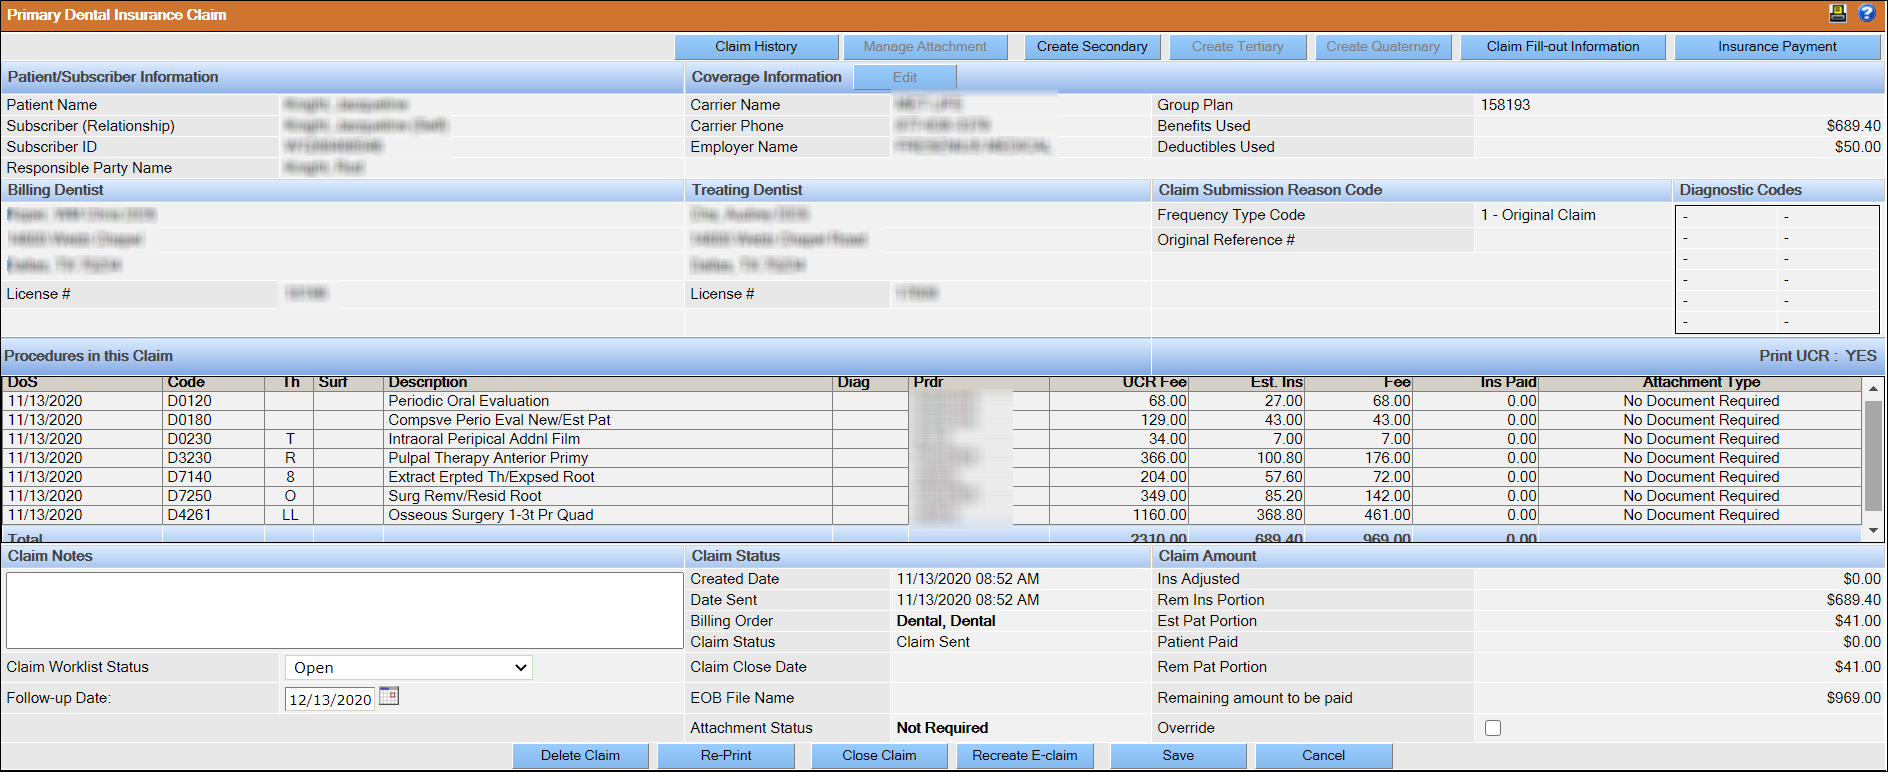
Following are some notes regarding the information you see on this screen:
- The patient, subscriber, and coverage information comes from the patient record and can be viewed and managed in the Patient Overview screen.
- Provider and procedure information comes from the Tooth Chart or Treatment Plan module depending on how the clinical information was recorded.
- If you are submitting a claim on procedures completed by both a dentist and a dental therapist (or advanced dental therapist), the dentist is listed as the treating provider on the claim.
-
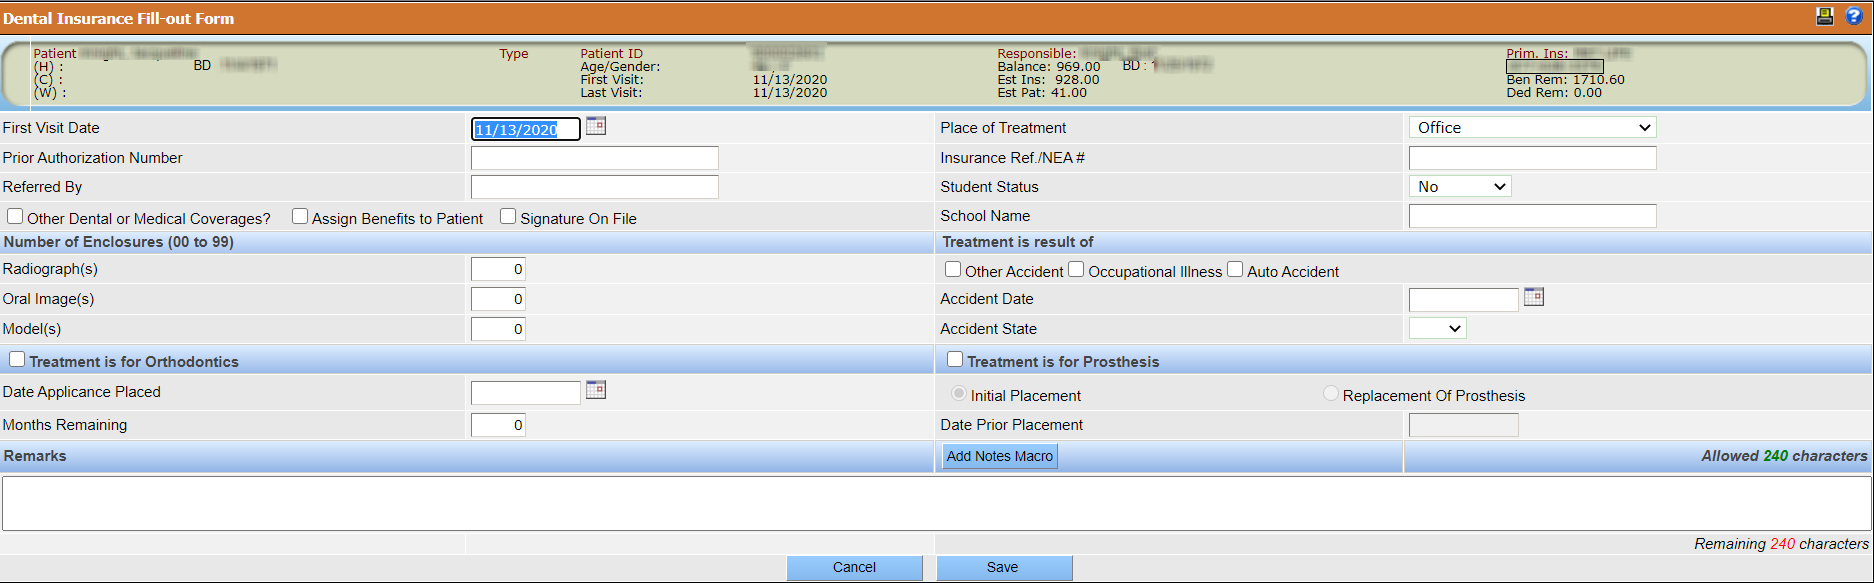
If desired, click Claim Fill-out Information to add more details
or images via NEA. (Click Save when finished).
- Complete the claim as desired.
- Click Direct Print to create a paper version of the claim for manual mailing and submission.
- Click E-Claim to prepare the claim for electronic batch submission.
-
Click Save to return to the claim at a later time.
Once the claim is created, a line item in the ledger indicating the claim and its status.
Unclose Claim
Insurance claims in QSIDental Web are primarily managed via the Ledger module. The ledger displays the recently billed charges, payments, and claims. Closed claims can be unclosed from the Primary Dental Insurance Claim page.
To unclose a claim:-
From the Account Ledger page, select the closed claim by
clicking the date of the desired claim. The date the claim was closed displays
in the Description field.
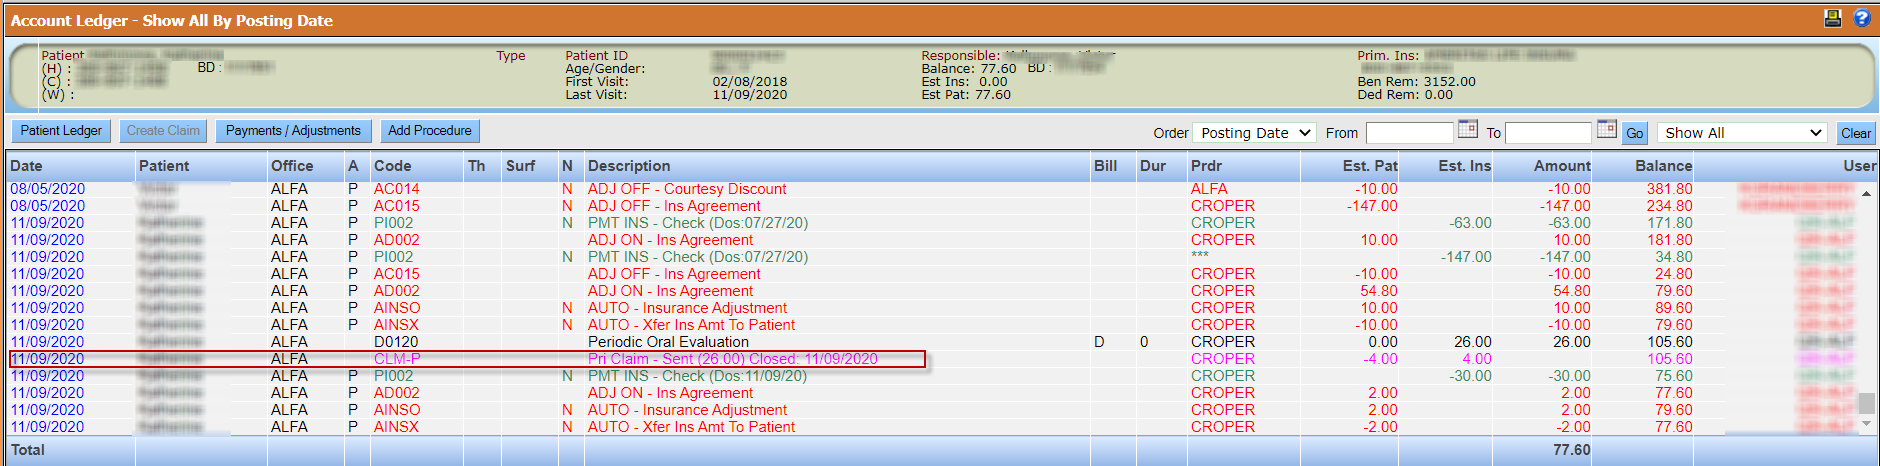
Any closed claim that has a Remaining Amount to be Paid can be Unclosed.
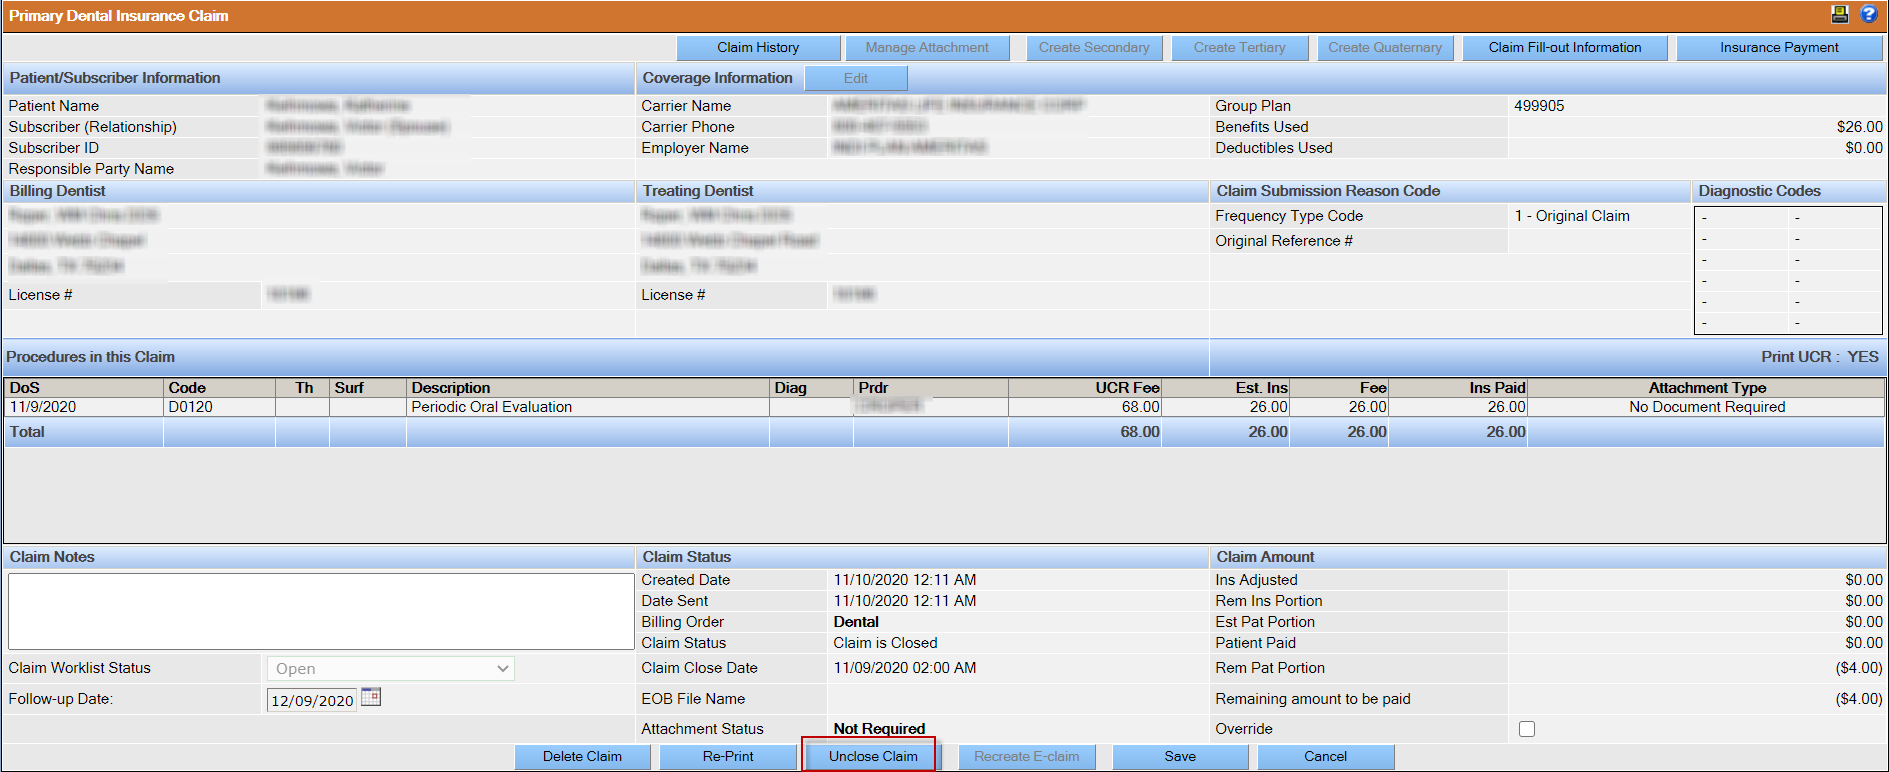
- Click Unclose Claim.
-
In the Claim Notes section, select a status from the
Claim Worklist Status dropdown.

- Click Save.
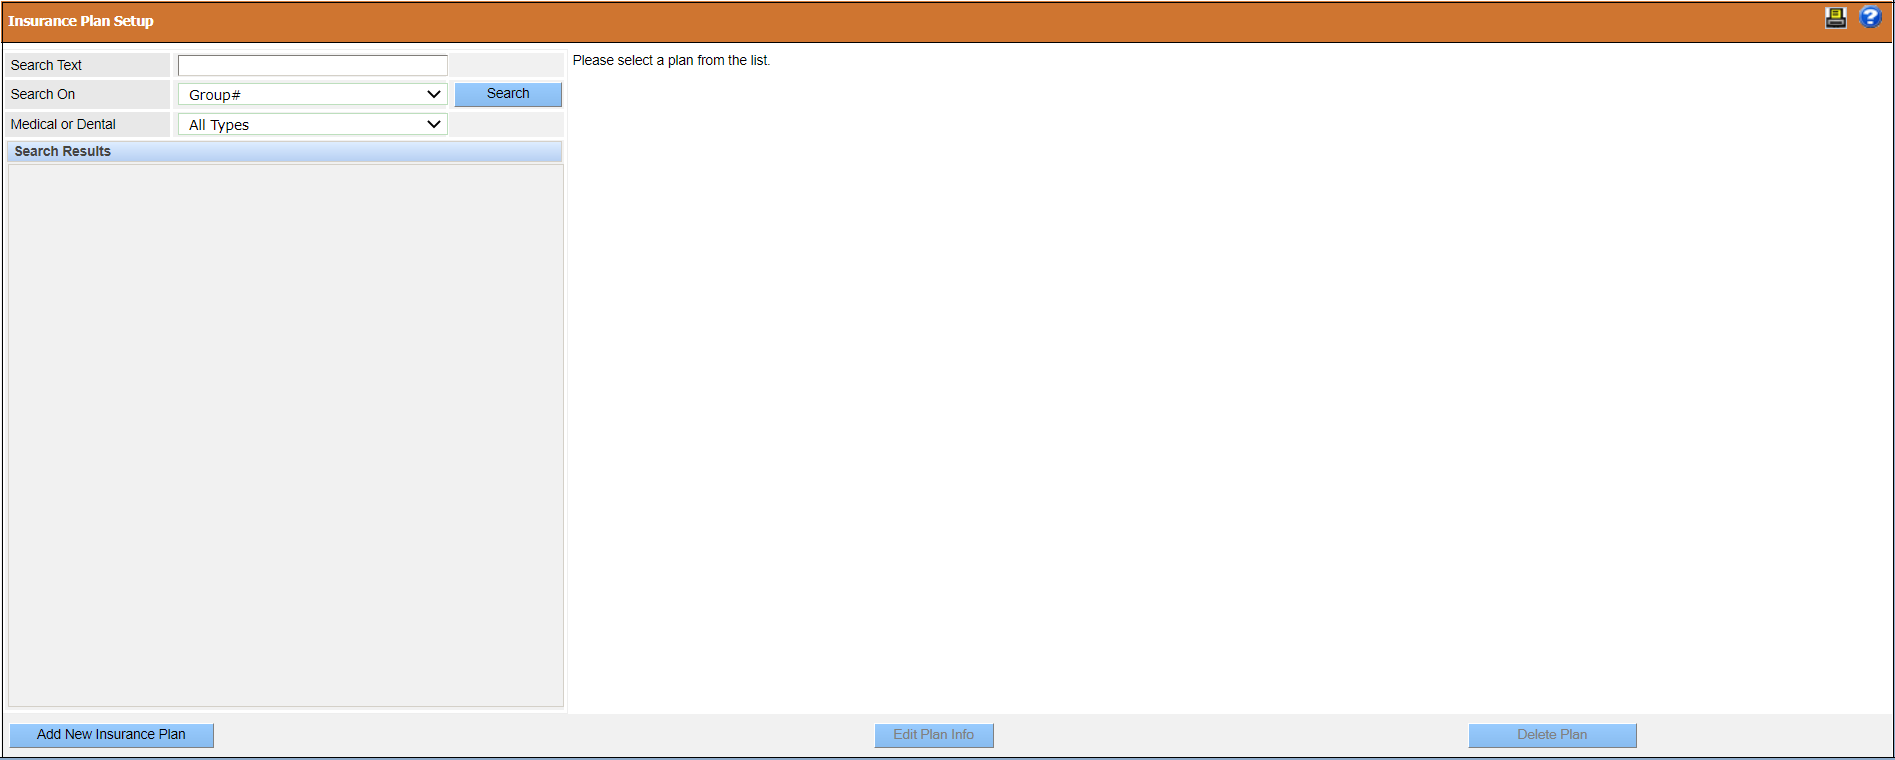
Set Up ADA (American Dental Association) 2019 Claims Form
You can set up the ADA Claims Form for payers who accept paper claims for patients.
-
In QDWDental Web, click .
The Insurance Plan Setup window opens.
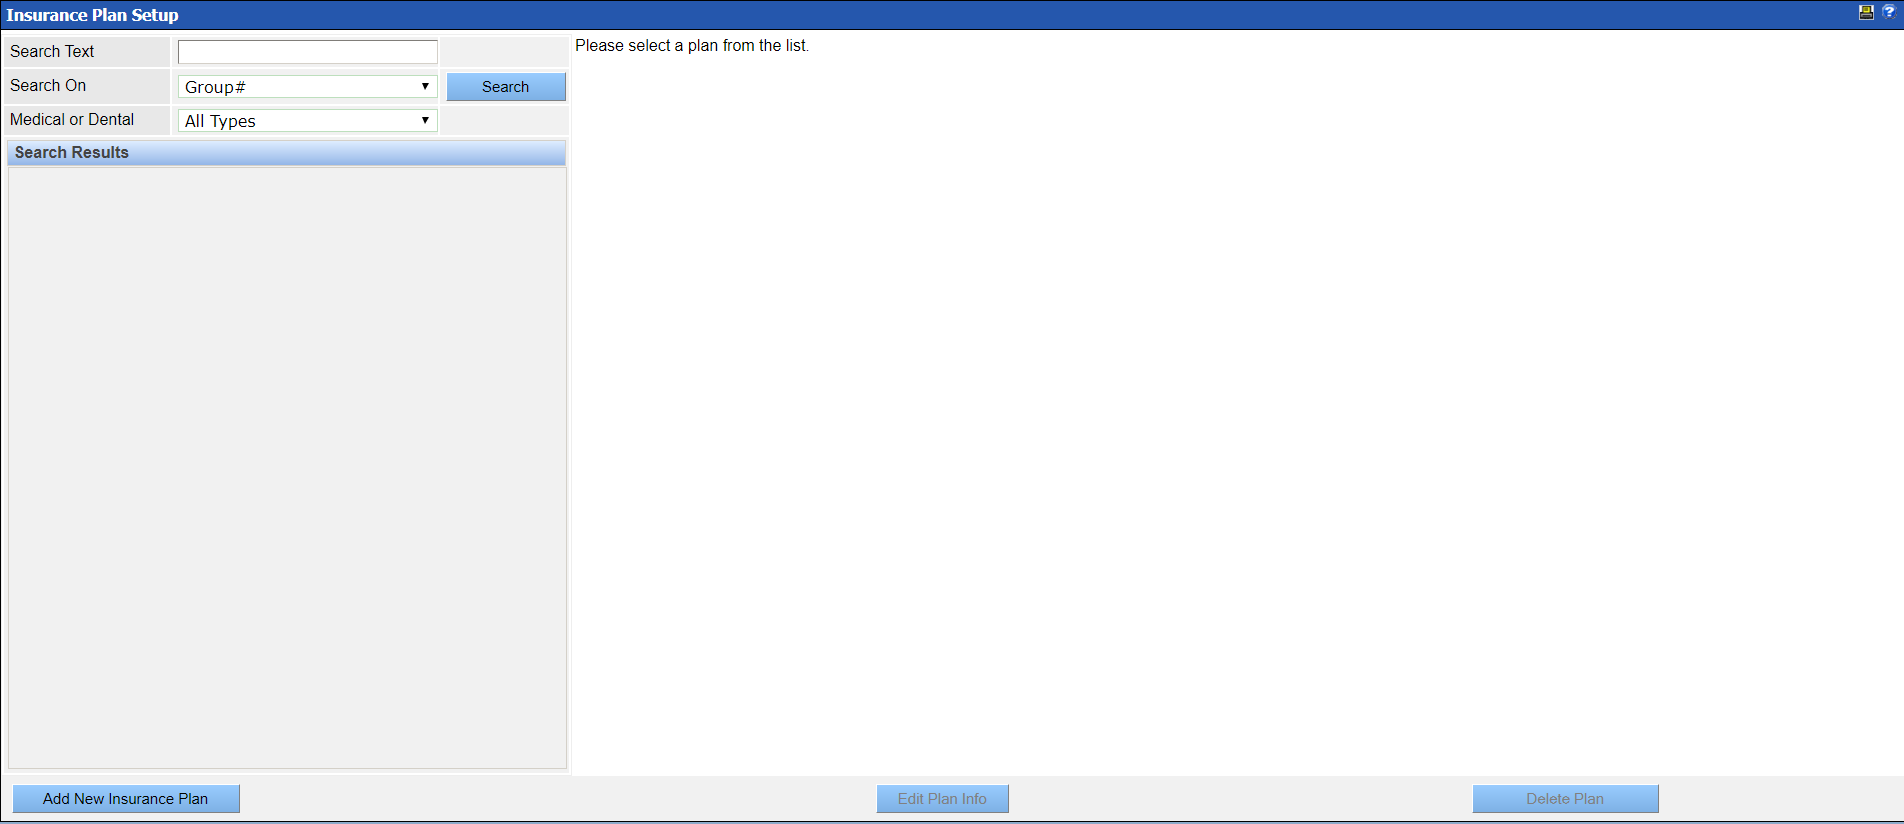
-
Enter the search criteria, and then click Search.
The Search Results window displays the available insurances.
-
Click the insurance plan ID link.
The plan details are displayed in the Plan Setup section.
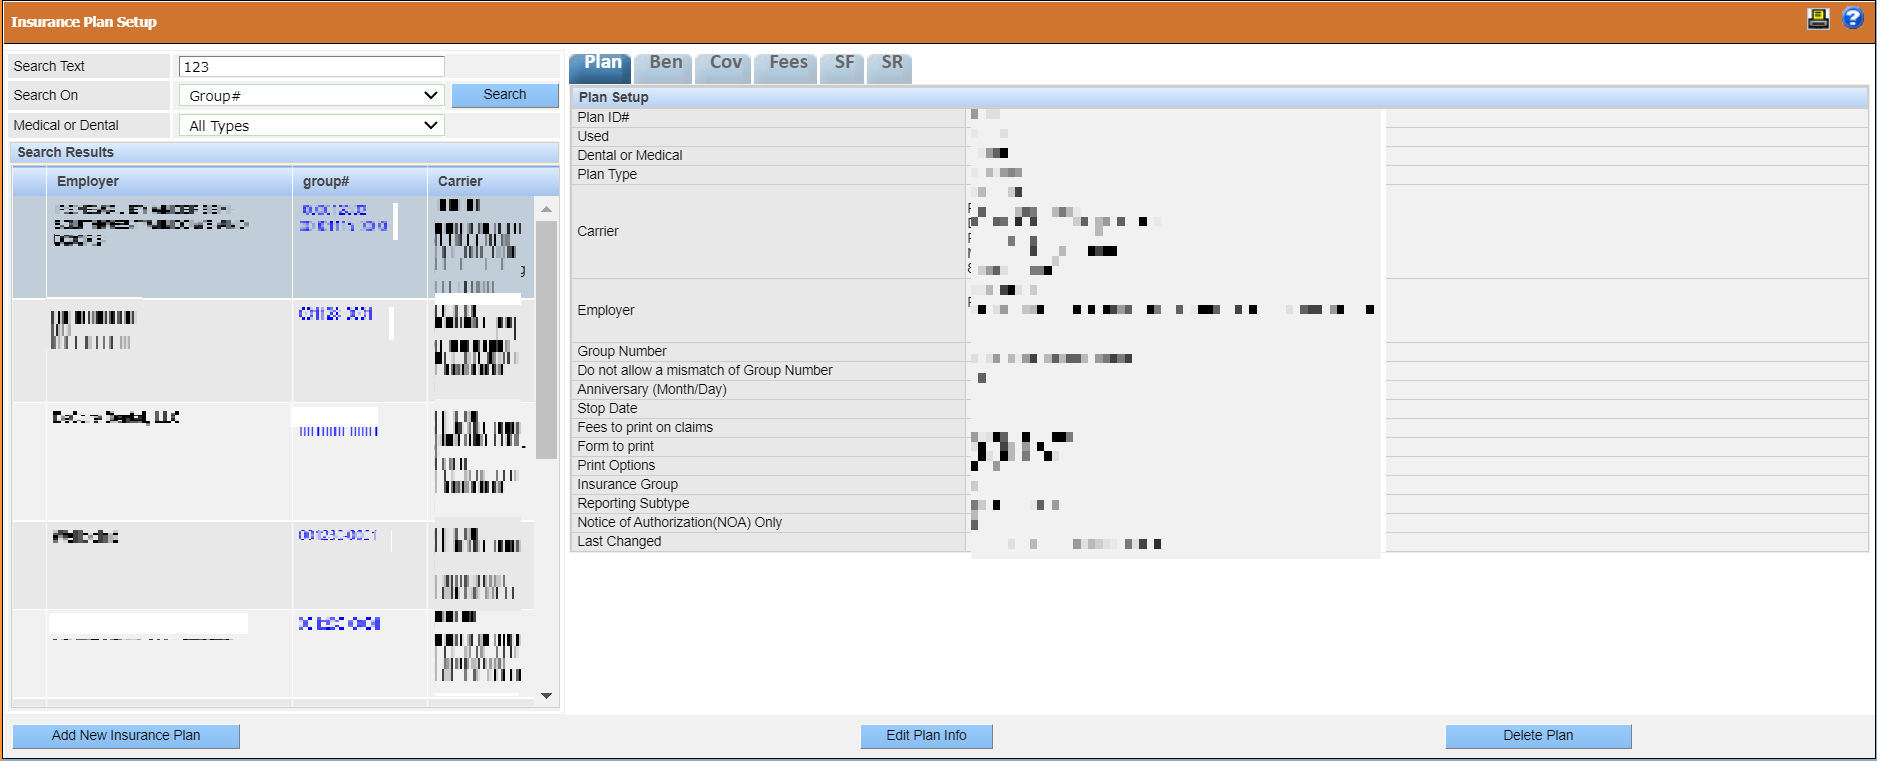
-
Click Edit Plan Info.
The Insurance Plan Setup window opens.
-
On the Insurance Plan Setup window, from the
Form to print list, select ADA 2019
Form.
-
Click Save.
Note: When you create a claim for a patient with this insurance plan and click Print, the ADA 2019 Form is automatically filled with the patient details, and the payer receives the claim details through fax.