Add an Attachment
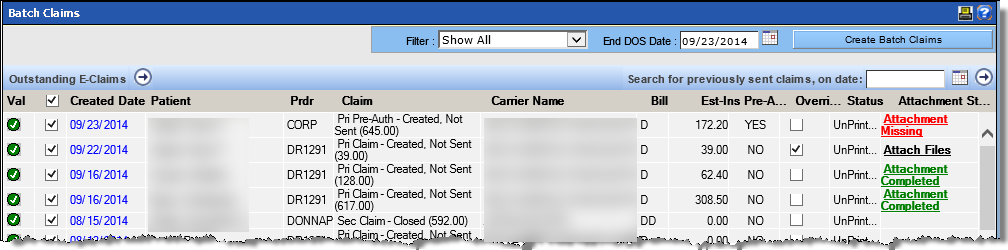
Attachment requirements are determined by NEA and displayed in the Attachment Status column of the Batch Claims Processing module. Carriers often have specialized requirements for different types of attachments.
Attach an X-Ray
X-Ray attachments are added to claims via a screen capture and copy/paste option. To add an x-ray attachment.
- Open the x-rays for the desired patient record.
-
Select and copy the desired x-ray image (hold down the CTRL key on the keyboard and tap
the "C" key).

- Return to the Batch Claims Processing window (Utilities menu).
-
Click the Attachment Missing link for the desired claim.
-
Click the Screen Capture button.

-
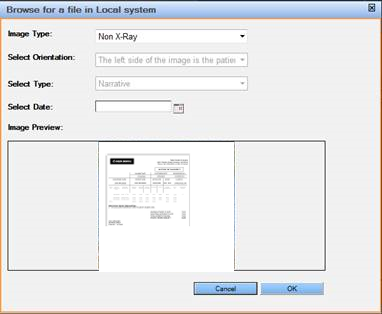
Complete the information on the Screen Capture window.
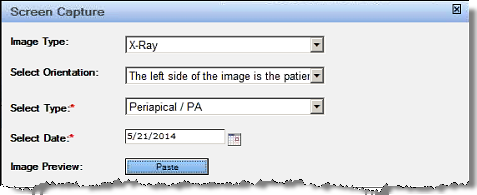
Select X-Ray from the Image Type dropdown
- Select the orientation from the Select Orientation dropdown, if required. (The default setting is that the left side of the image is the patient’s right.)
- Select the x-ray type from the Select Type dropdown.
-
Type or select the date the image was taken.
Hover the mouse over the x-ray program on the taskbar to reveal the date.
-
Click the Paste button (Or hold down the CTRL key on the
keyboard and tap the "V" key).
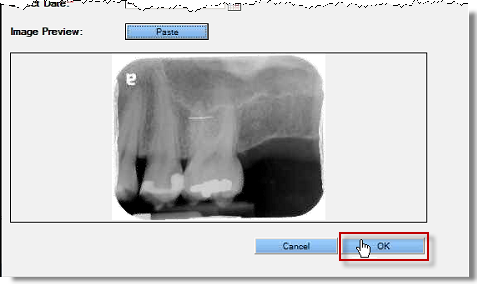
- Click the OK button when complete.
Attach a Periodontal Exam
Periodontal exams saved in QSIDental Web may be attached directly to the claim. Periodontal exams are converted to images for attachment. To attach a Periodontal exam:
- Open the Batch Claims Processing window (Utilities menu).
-
Click the Attachment Missing link for the desired claim.
-
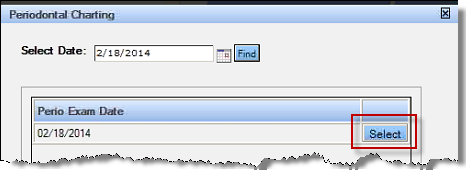
Click the Select Perio Exam Date button.
 Note: Periodontal exams from the most recent calendar month display automatically. If the desired exam is not available, use the calendar to select the desired date and click the Find button. The specific exam date must be known (Look at a comparison in the perio module to see a list of exam dates).
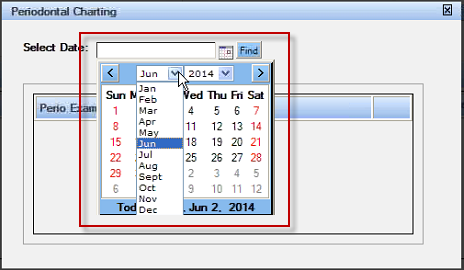
-
Once the desired exam has been located, click the Select button.
-
Click the Yes button on the confirmation window.
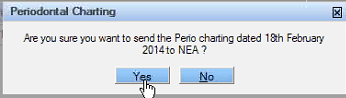 Note: It can take more than a minute to convert complex exams to an image for loading. If the Yes button is clicked more than once, the exam will be posted multiple times. Click the Delete link to remove any extra copies.
Attach a Local File
Files saved to the user's local computer may be attached to the claim. Eligible files include JPG and TFF images. To attach a file:
- Open the Batch Claims Processing window (Utilities menu).
-
Click the Attachment Missing link for the desired claim.
-
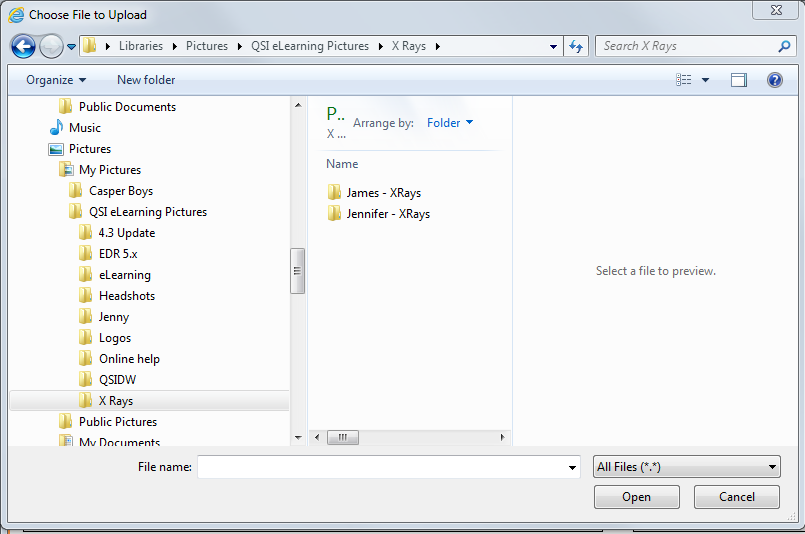
Click the Browse for a file in Local system button.

- Navigate the system folders to locate the desired file.
-
Select the desired file and click the Open button (or double
click the desired file).
-
Confirm the image and click the OK button.
Attach a file from QSIDental Web
Files that have already been posted to the QSIDental Web charting module may be attached to the claim. To be attached in this manner, the file must be posted to the patient's chart via the Documents module. To attach a file:
- Open the Batch Claims Processing window (Utilities menu).
-
Click the Attachment Missing link for the desired claim.
-
Click the Browse for an existing file in QDW button.

-
Select the desired file from the available list.
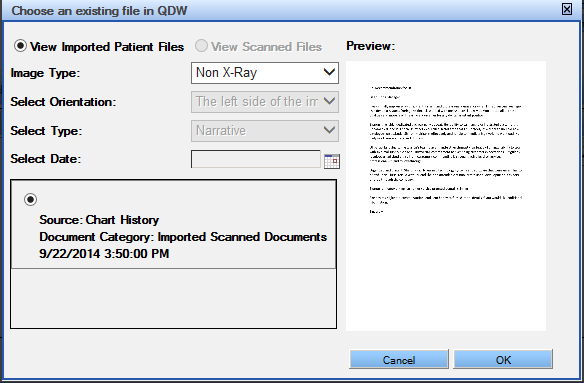
- Click the OK button.
Finalize the Attachments
As the attachments are added to the claim, they are listed in the Attached Images section of the Attachments window.
-
Open the attachment window for the desired claim if required.
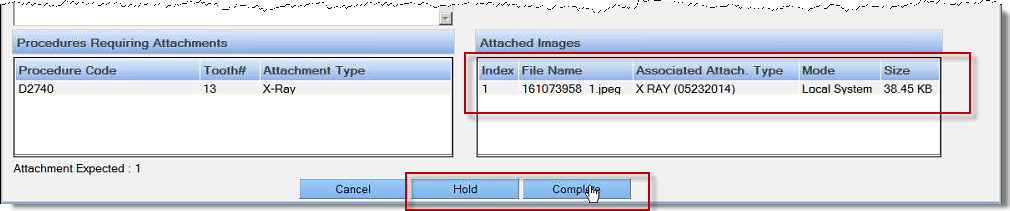
- Review the attachments.
-
Click the Complete button to include the attachments with the
claim in the submission process.
Note: Unwanted or unintentional attachments may be deleted until the attachment process is fully completed.
- Click the Delete link beside the attachment to be removed.
-
To wait for additional attachments or information, click the
Hold button to hold the claim back from submission.
Note: If the Attachment Status indicates Attachment Complete, but additional attachments are needed, the claim must be deleted and recreated with all of the required attachments.The NEA Identification Number will be added automatically in the Claim Fill-out area of the claim.
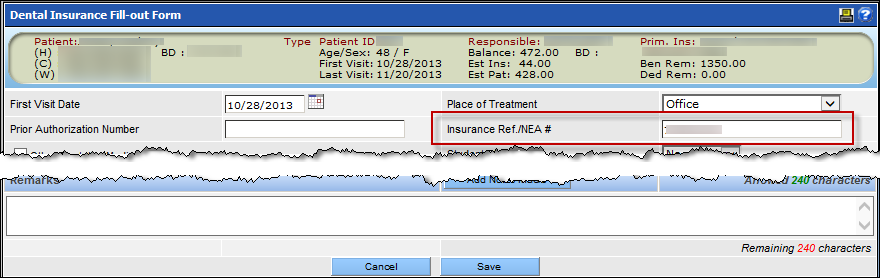
- Access the form by opening the claim and clicking the Claim Fill-out Information button.