Account Setup
Account information impacts all offices within the organization. Any preference set here flow to all offices within the account.
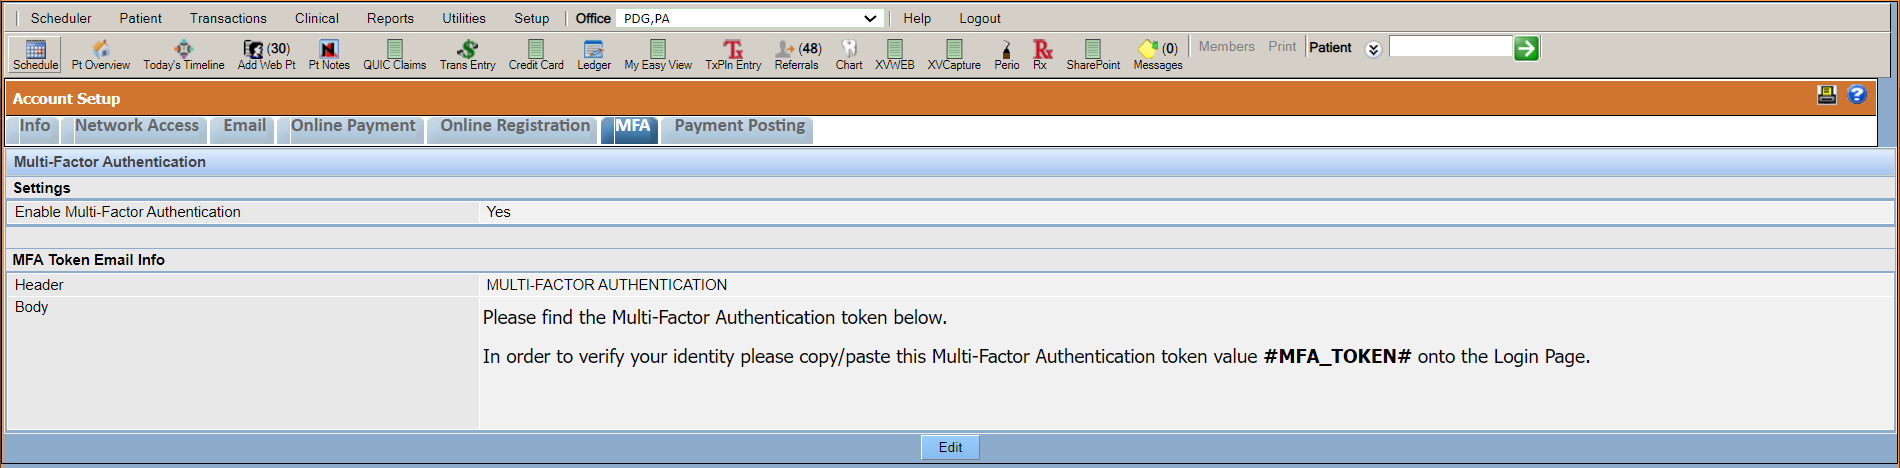
Multi-Factor Authentication (MFA)
Multi-Factor Authentication (MFA) is an authentication method that requires you to provide an additional verification token# to access QSIDental Web.
-
In QSIDental Web, click .
The Account Setup window opens.
-
Click the MFA tab.
The Multi-Factor Authentication window opens displaying the MFA Token email info.
-
Click Edit.
Enable Multi-Factor Authentication window opens.
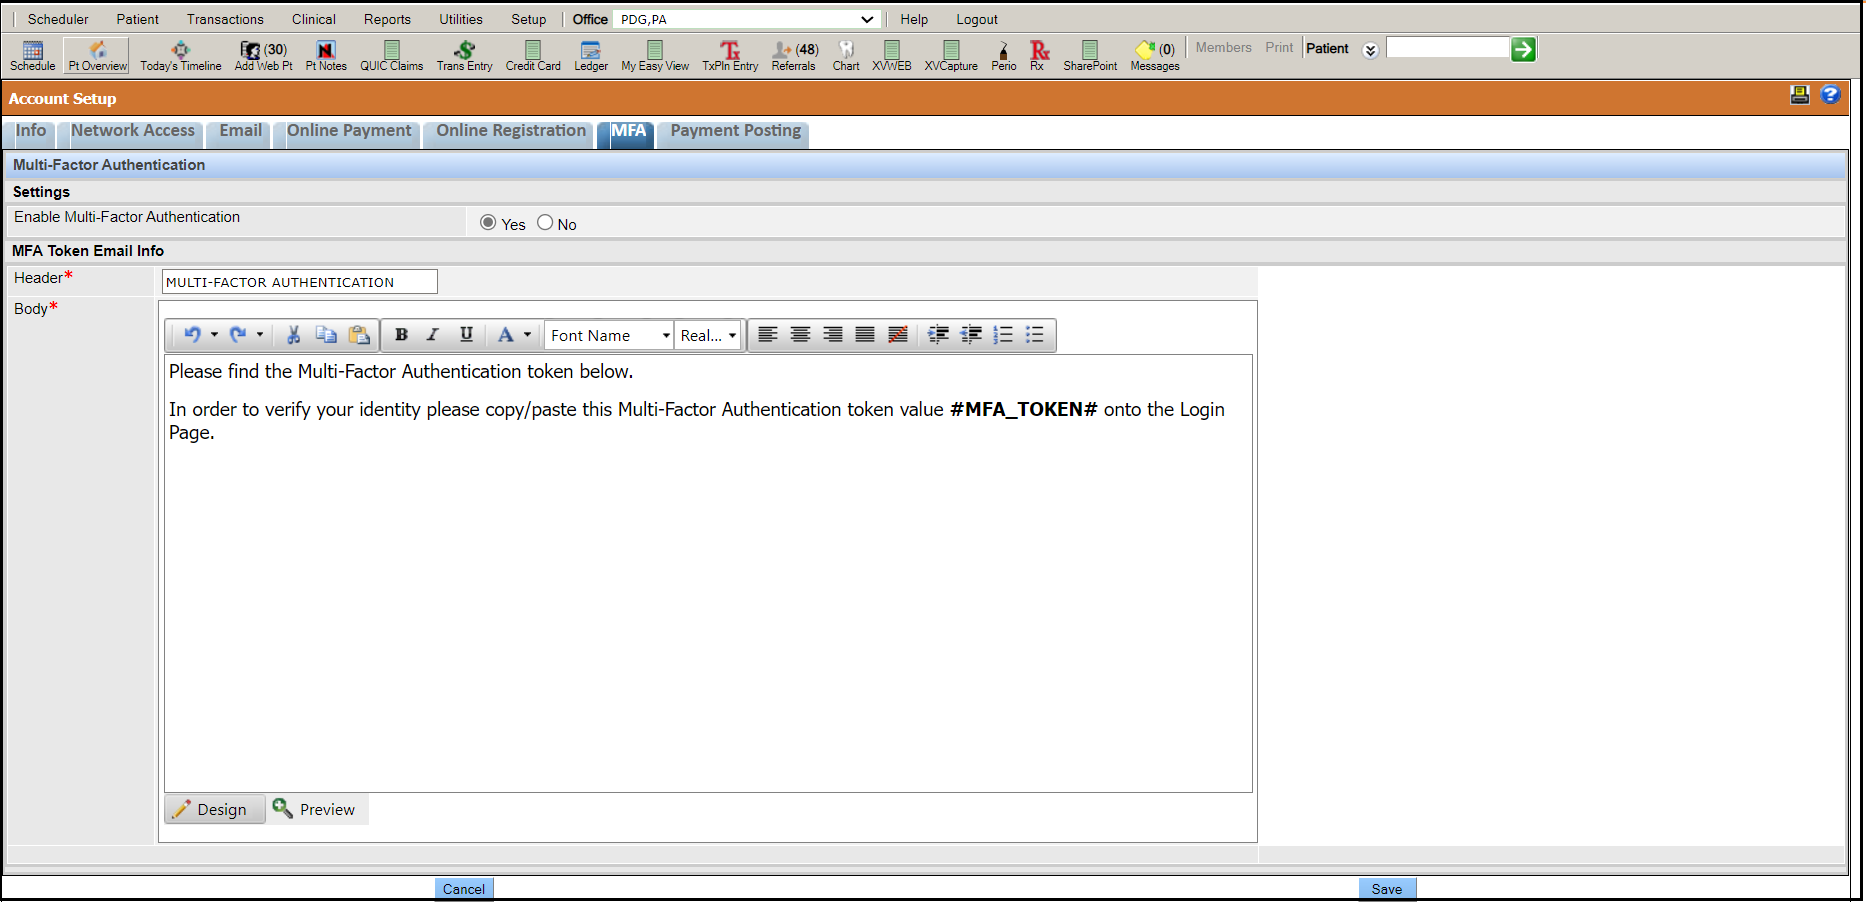
- Click Yes to enable Multi-Factor Authentication.
-
Click Save.
Note:
- You must have a valid and verified email ID set up in the Email Setup Information window.
- Enable Allow access from outside office? in the User Set up window.
- You are accessing the application outside the range of IP address range set Account Setup window.
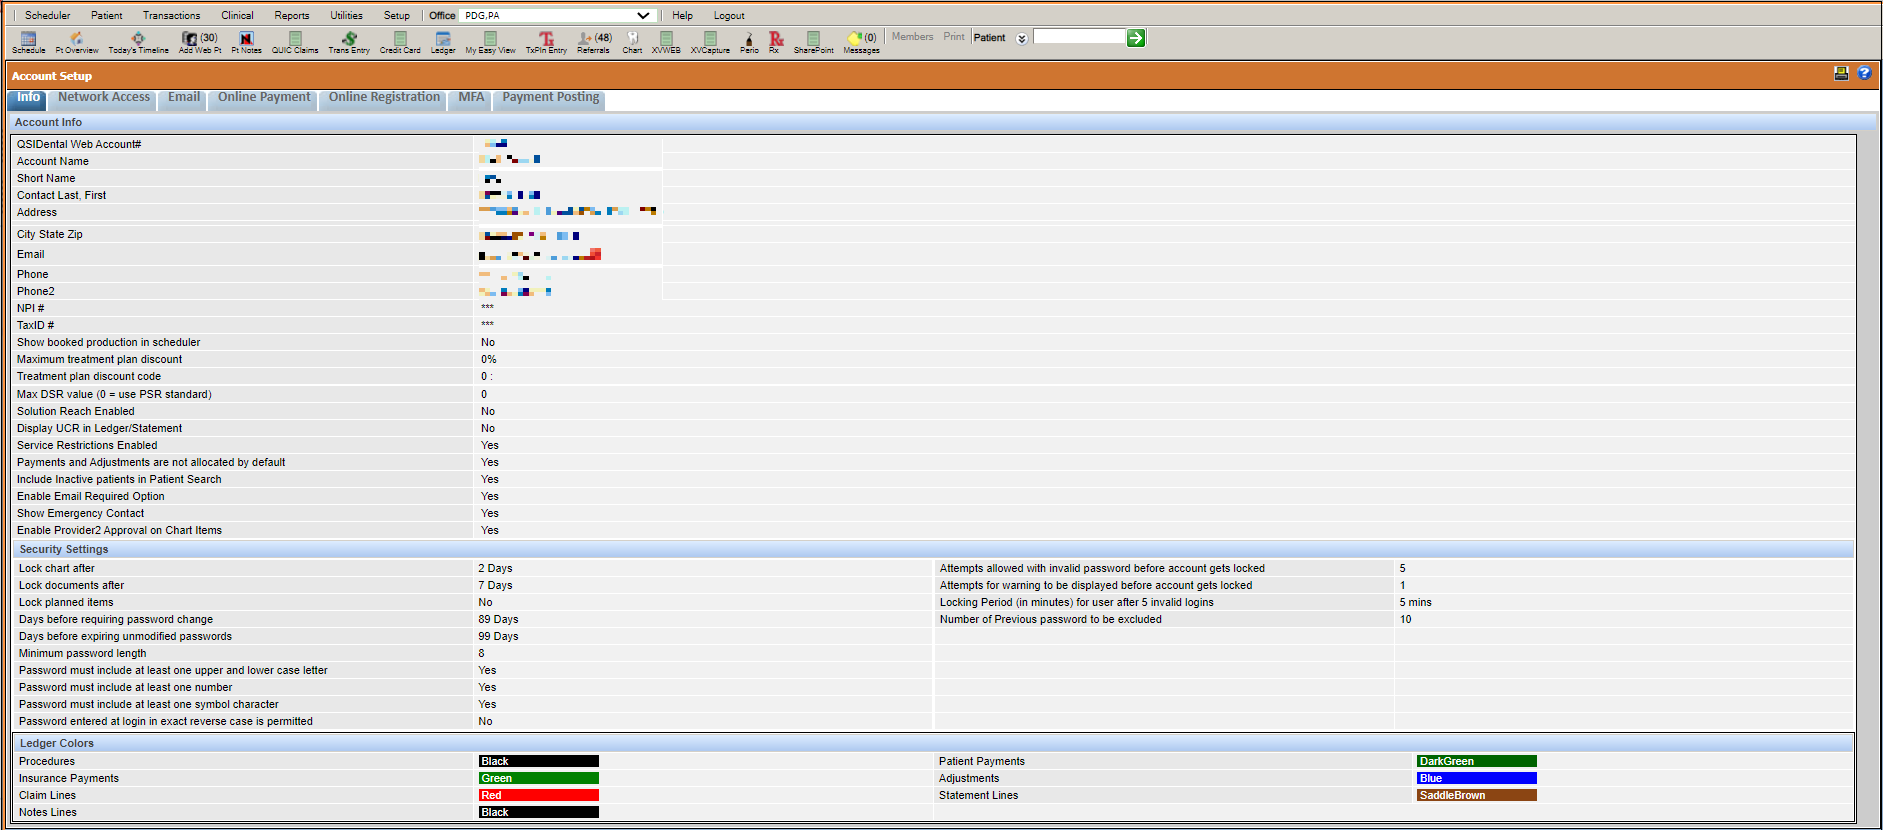
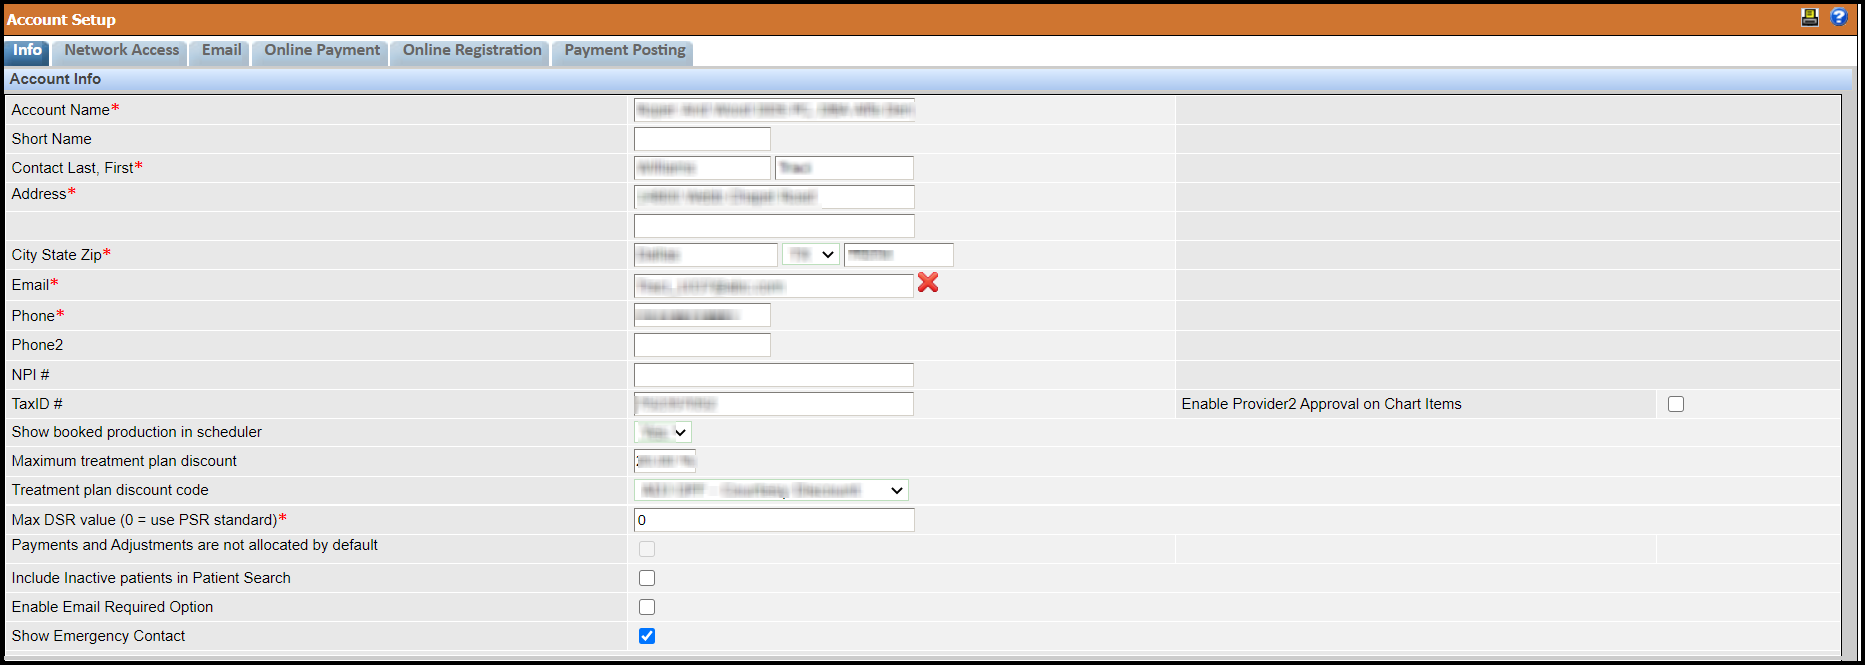
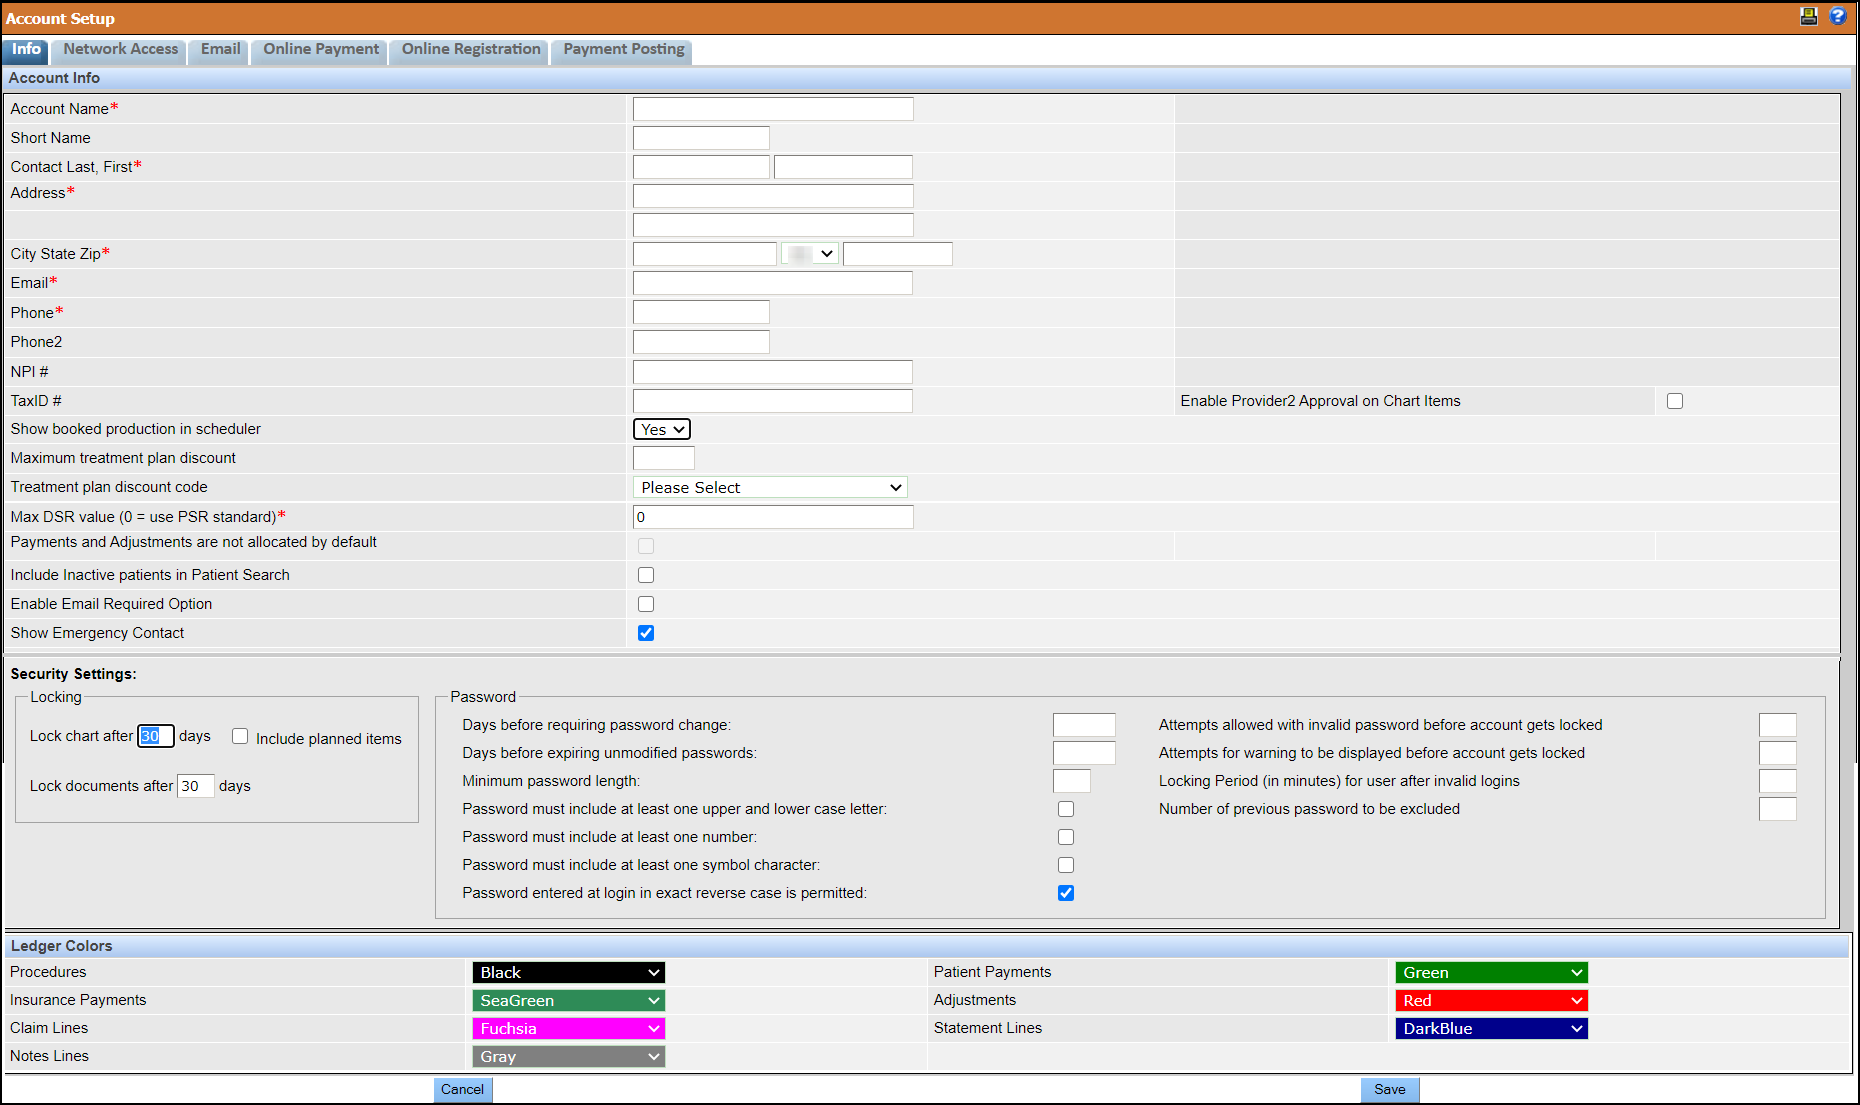
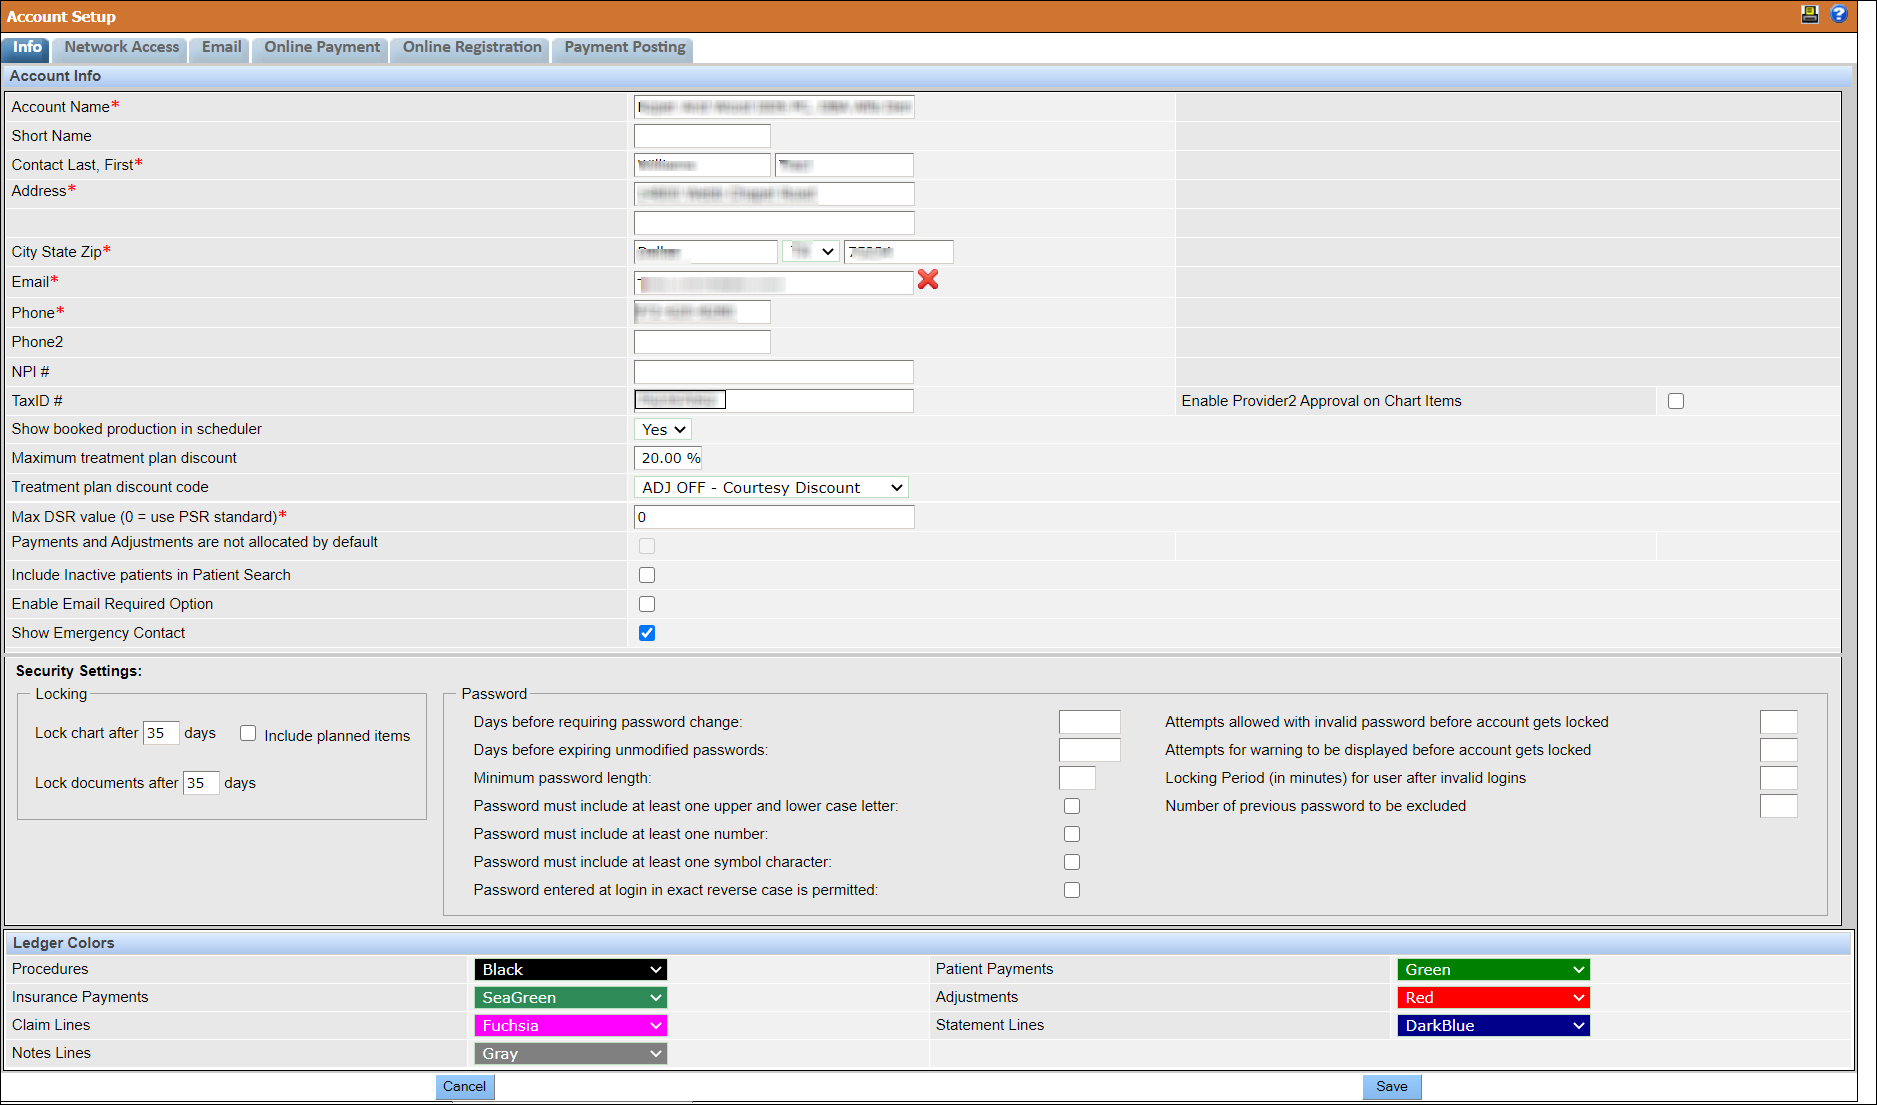
Account Info
The Account Info section of the Account Setup screen. These settings apply to all offices in the account. The preferences can be edited as needed by clicking the Edit button at the bottom of the screen.
|
Account Info Fields |
Description |
|---|---|
|
Account number and name |
Displays the number and name of the enterprise's account with QSIDental Web. |
|
Contact information |
Displays the fields contain basic contact details for the enterprise. This information could refer to the executive office, the billing office or some other location. Individual offices will have their own contact details. |
|
NPI # |
Displays the enterprise NPI number. |
|
TaxID # |
Displays the enterprise tax ID. |
|
Show booked production in scheduler |
Set the preference for displaying the forecasted production within the scheduler. |
|
Treatment Plan Discounts |
Displays the discounts can be provided to patients on treatment plans. Set the maximum discount and assign the accounting code. |
| Max DSR value |
For practices that use the Perio Sextant Screening (PSR/DSR), this field sets the value, typically 0. If another number is entered, the standard screen is updated accordingly. |
|
Enable Provider2 Approval on Chart Items |
Set this flag to enable chart approval for clinical notes and documents. |
Security Settings


- Lock chart after ___ days: Enter the number of days the practice will allow editing of entries before the chart is locked (between 1 and 35). If no number is entered, no lock requirement will be applied.
- Include planned items: Select this check box to include planned items in the lock requirement.
- Lock documents after___days: Enter the number of days the practice will allow editing before documents are locked. If entered, the maximum allowed is 35.
Password: Password settings improve security and reduce potential breaches. The practice must decide password strength requirements and any rules for locking. These requirements focus on timing and are separate from any requirements for incorrect entries. If a password expiration or modification requirement is set, the number of days may be set for as many as 999 days.

The requirements for warning and expiring passwords work in concert with one another to provide ample warning to the user and protection for the practice. In the examples above, the practice warns users to change the password on the 50th day and expires the password on the 60th day. By using such an arrangement, the user receives a prompt to change the password every day beginning on the 50th day until the user either changes the password or until the 60th day when the password will expire.
The specific date on which the user will receive the warning is calculated based on the Password Last Modified field in the User Setup screen on the Login Info tab. If the user’s password has never been modified (unmodified), no calculation can be made and the user will not be subject to requirements. QSIDental recommends that the Administrator create the user with a temporary password and then ask the user to change it when they first login. Alternatively, the administrator can manually change the password (Edit User, Change Password button.) This will establish the Password Last Modified date so that all warning and expiration options will have a base date.
Password Requirements: Several options are available to the practice to establish strength requirements:
- Minimum password length: Enter the minimum number of characters for a user password.
- Password must include at least one upper and lower case letter: Select the check box to require the user’s password to contain both upper and lower case letters.
- Password must include at least one number: Select the check box to require the user’s password to contain a number.
- Password must contain at least one symbol character: Select the check box to require the user’s password to contain a special symbol such as !@#$%^&*()
- Password entered at login in exact reverse case is permitted: Select the check box to allow a user to enter the password in reverse case. For example, if the user’s password is QSIDental and he enters qsidENTAL, the password would be accepted.
- Number of previous passwords to be excluded: Enter the number of passwords the user must enter before being able to reuse a previous password. For example, if the practice sets this value as 3, the user must use four separate passwords before being able to reuse the first one.
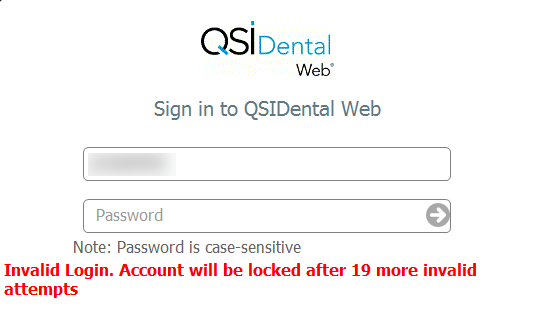
Account locking options can warn and ultimately block access for a user that has entered the incorrect password more than the allotted times. These requirements focus on incorrect entries and are separate from any expiration requirements.
- Attempts allowed with invalid password before the account gets locked. Enter the number of times a user may enter an incorrect password before the account will be completely locked. For example, the practice will allow 20 attempts before locking an account.
-
Attempts for warning to be displayed before account gets locked:
Enter the number of times a user may enter an incorrect password before the user receives a
warning that the account may be locked.
The requirements for warning and locking passwords work in concert with one another to notify the user he or she has entered an incorrect password. For example, the practice locks the account after 20 incorrect password entries, but warns users after 1 attempt. By using such an arrangement, the user receives a warning after the first attempt and can see how many attempts remain before the account is locked.
Locking Period (in minutes) for user after invalid logins: Enter the amount of time (in minutes), that the user must wait before attempting to re-enter the password after the account has been locked. For example, if the practice sets this value at 15, the user must wait 15 minutes before being able to retry his or her password. An administrator may manually lift the lock by editing the user account. Clear the check box beside Yes in the Account Lockout field.

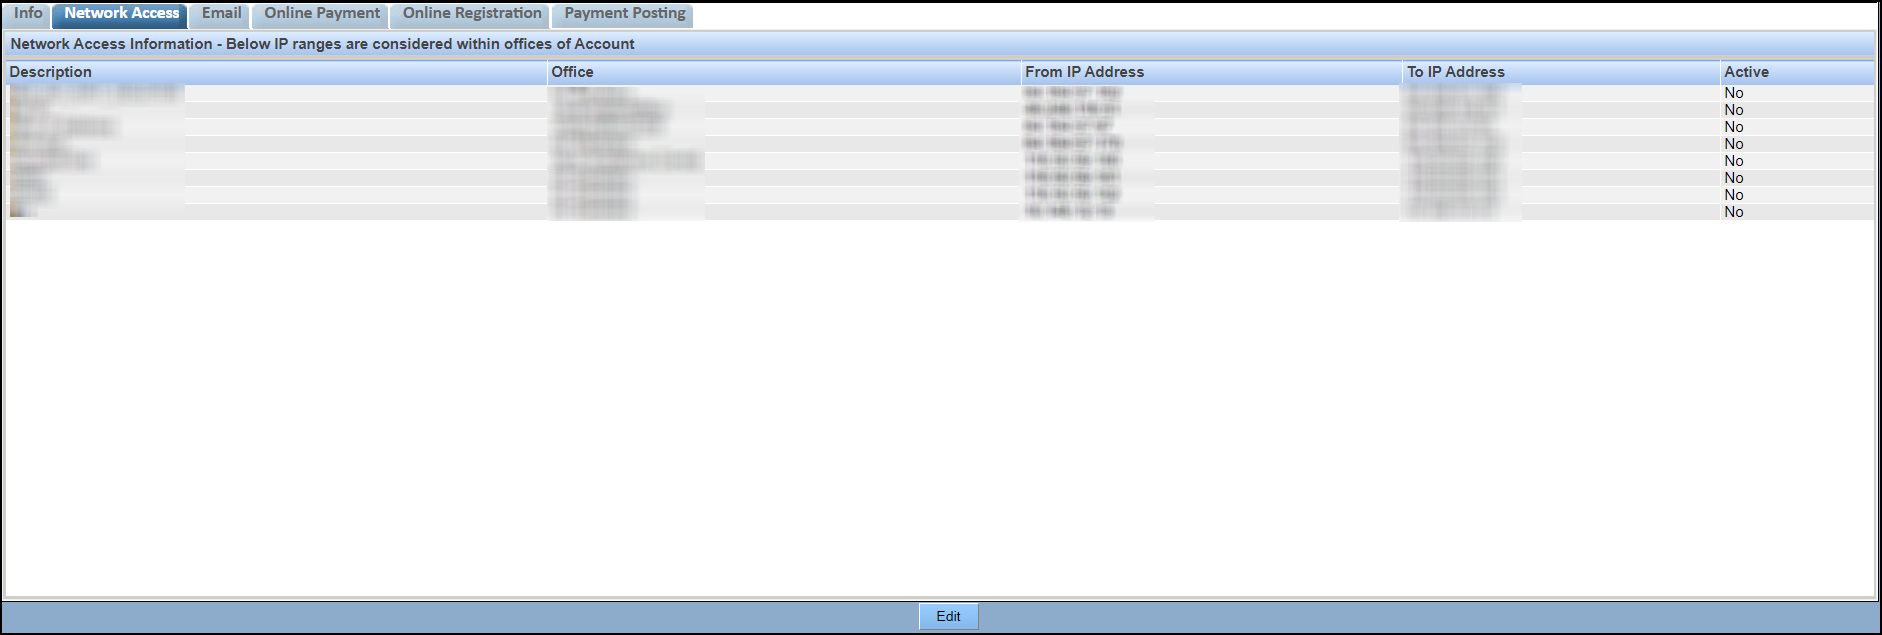
Network Access
Control the access to QSIDental Web from locations outside the office.
The Network Access section in the Account Setup screen is used to restrict access to QSIDental Web so that the account may not be accessed from outside the office locations, for example, from home computers or mobile devices. Individual outside office may be granted access via the user setup. To restrict access, enter the IP addresses.
Setup Network Access for an office
You can add or modify access to a given office.
Do the following to add or make modifications to the access for a given office in QSIDental Web :
-
In QSIDental Web, click .
The Account Setup window opens.
-
Click the Network Access Tab.
The Network Access Information tab opens displaying the different offices granted access.
-
Click Edit.
Enter the values for the following fields in the Add New section.
- Description
- Office
- From IP Address
- To IP Address

-
Click Save.
The new entry displays under the Network Access tab.
The Email section allows you to verify your domains and email addresses with Amazon SES to send your outgoing emails to patients.
The Email section in the Account Setup screen is used to verify the. domains and email addresses. QDW uses the Amazon SES email platform to send the customers' outgoing emails. To enable this service, the domains and email addresses must be verified with Amazon. The verification is a one-time process for each domain or email which you choose to use.
If your organization does not have a domain name or email address, you can use QSIDental Web services which is verified with Amazon SES. You must prefix your office name to qsidental.com to send outgoing emails from QDW to your patients.
Verify Domains
You must verify your domains to send domain-based emails to your patients.
To verify your domains, do the following:
-
From the Setup menu, select Account
Info.
The Account Setup window opens.
-
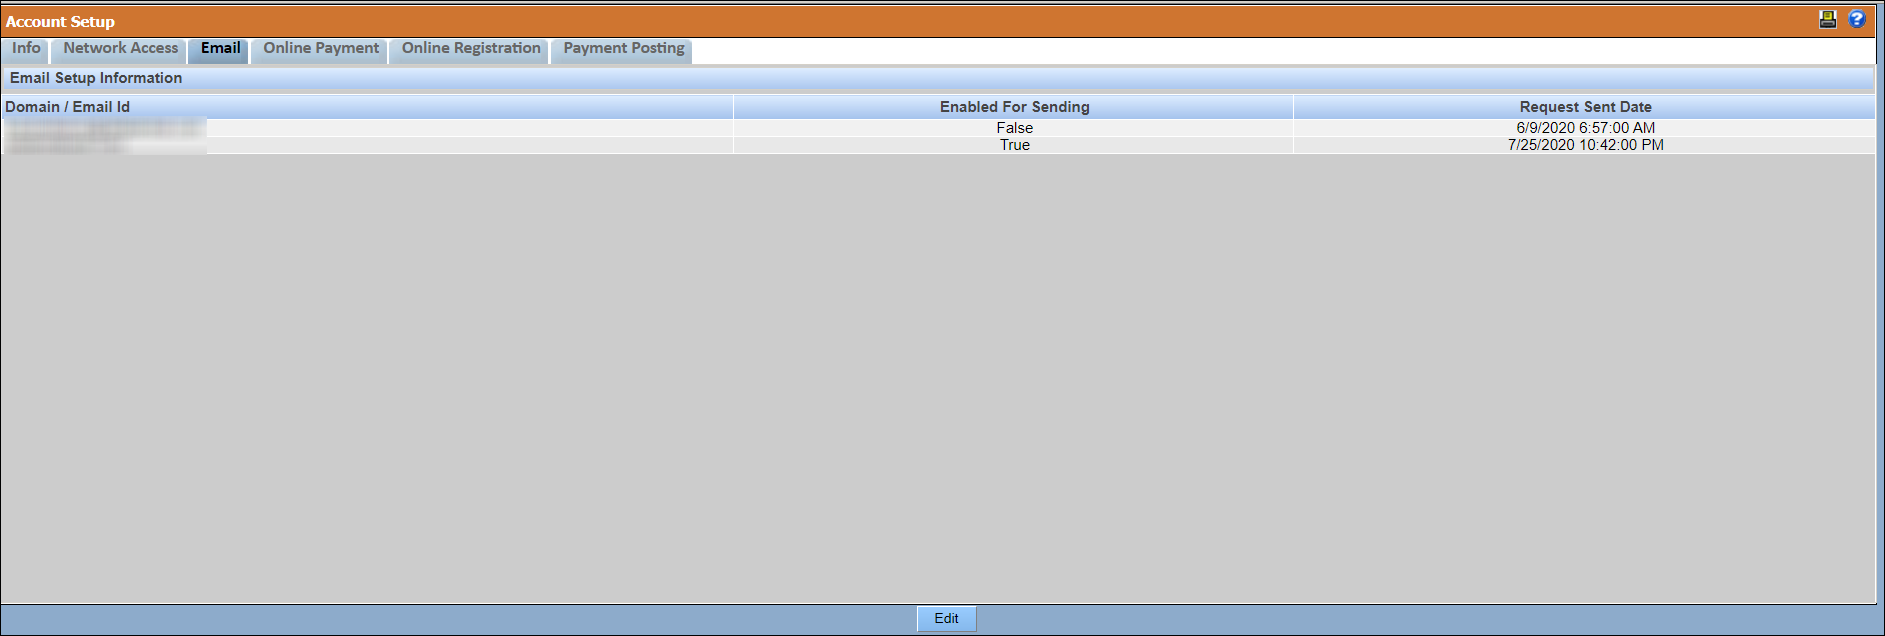
Click the Email tab.
The Email Setup Information window lists the domains and email IDs that must be verified or are verified.
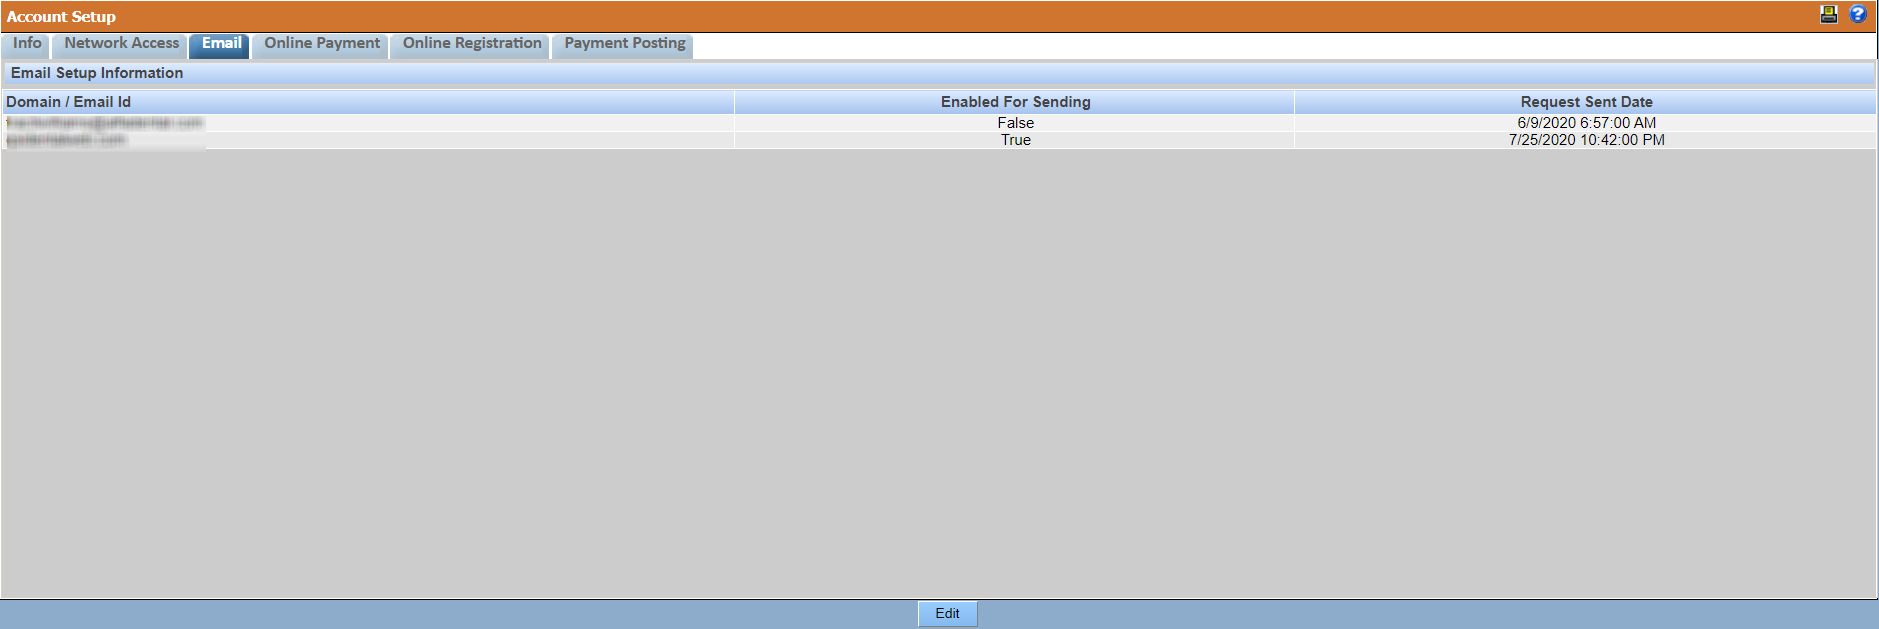
-
Click Edit.
The Email Setup Information window displays options to verify or remove domains and email IDs.
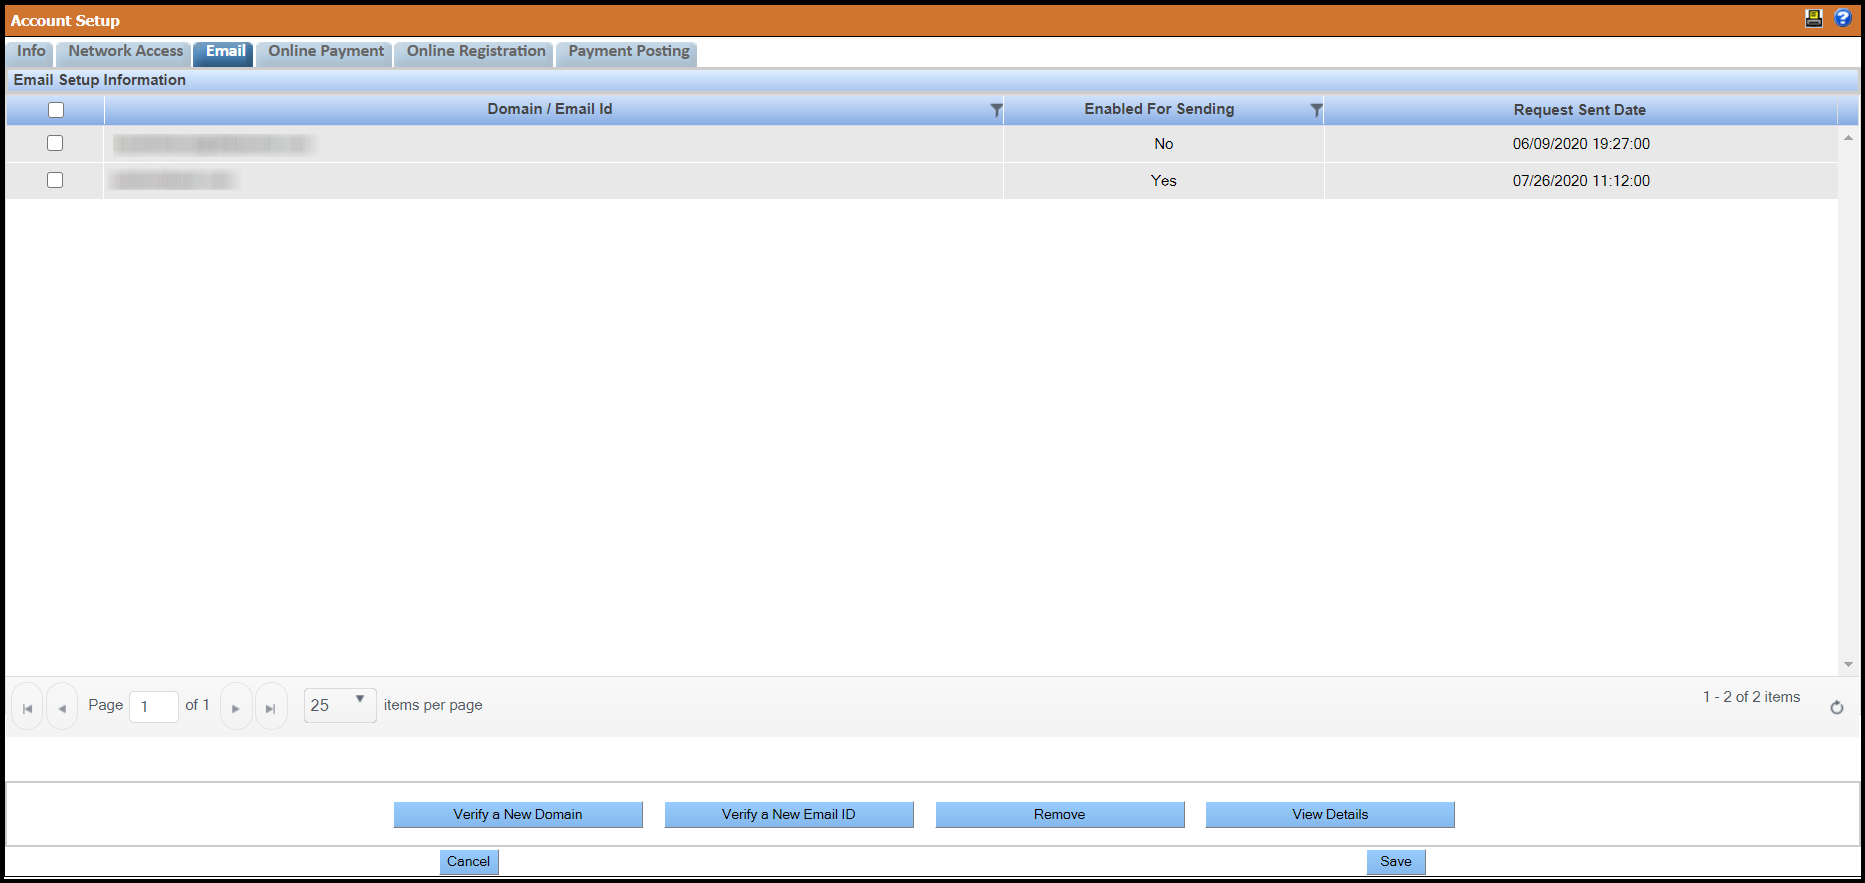
-
Click Verify a New Domain.
The Verify a New Domain window opens.
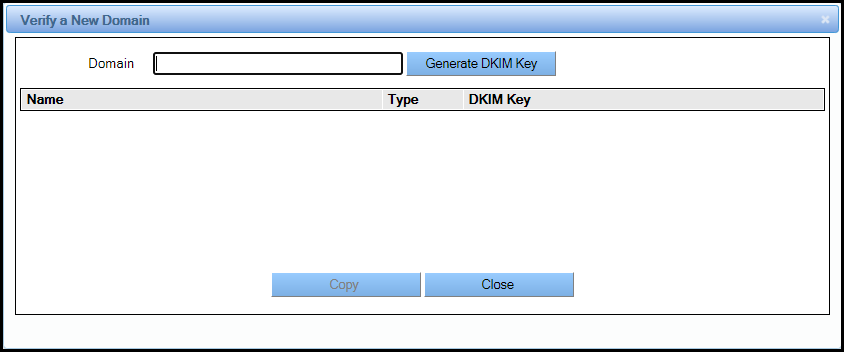
-
Enter the domain name and click Generate DKIM Key.
The TXT and DKIM Key values are generated.
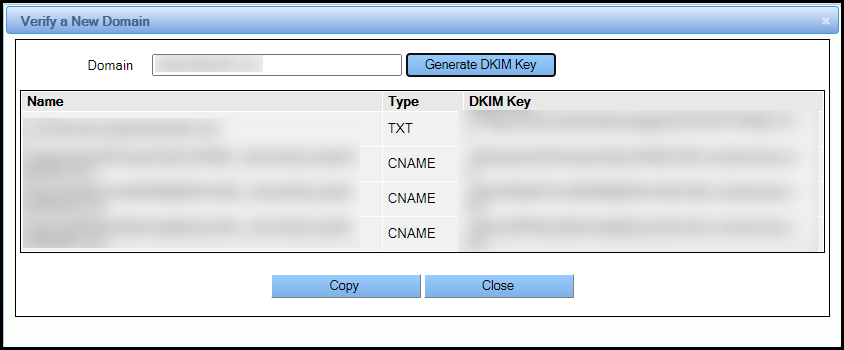
-
Click Copy and paste the TXT and DKIM Key values into
your domain's DNS server.
The verification process starts and is completed within 72 hours.
- If the Enabled For Sending status changes to
Yes, then the verification is successful.

- If the Enabled For Sending status displays No even after 72 hours, then continue from Step 7.
- If the Enabled For Sending status changes to
Yes, then the verification is successful.
-
Select the domain and click View Details.
The View Details window opens.
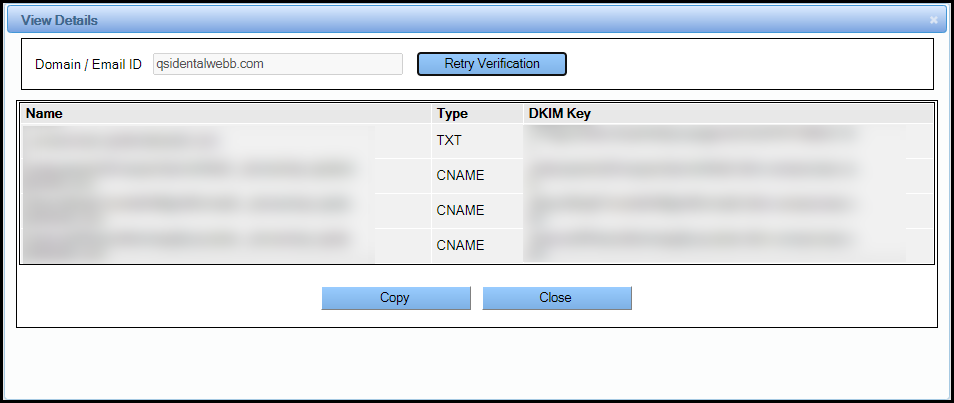
-
Click Retry Verification.
The TXT and DKIM values are generated.
-
Perform Step 6.
Note: If you encounter any of the following error messages after you send an email, do the following:
- Office email ID is not verified, then you must contact your system
administrator to check if the the email ID is verified. To check the
verification status, go to .

- Email bounced back, then the email ID is invalid, and you must
contact the patient to obtain the correct email ID.

- Email is listed as spam, then you must contact your system
administrator. The system administrator must contact QDW, who will
create a ticket in Success Community, which will be attended by QDW
support team.

- Office email ID is not verified, then you must contact your system
administrator to check if the the email ID is verified. To check the
verification status, go to .
Verify Email IDs
You must verify your email IDs to send outgoing mails to your patients.
-
From the Setup menu, select Account
Info.
The Account Setup window opens.

-
Click the Email tab.
The Email Setup Information window lists the domains and email IDs that must be verified or are verified.
-
Click Edit.
The Email Setup Information window displays options to verify or remove domains and email IDs.
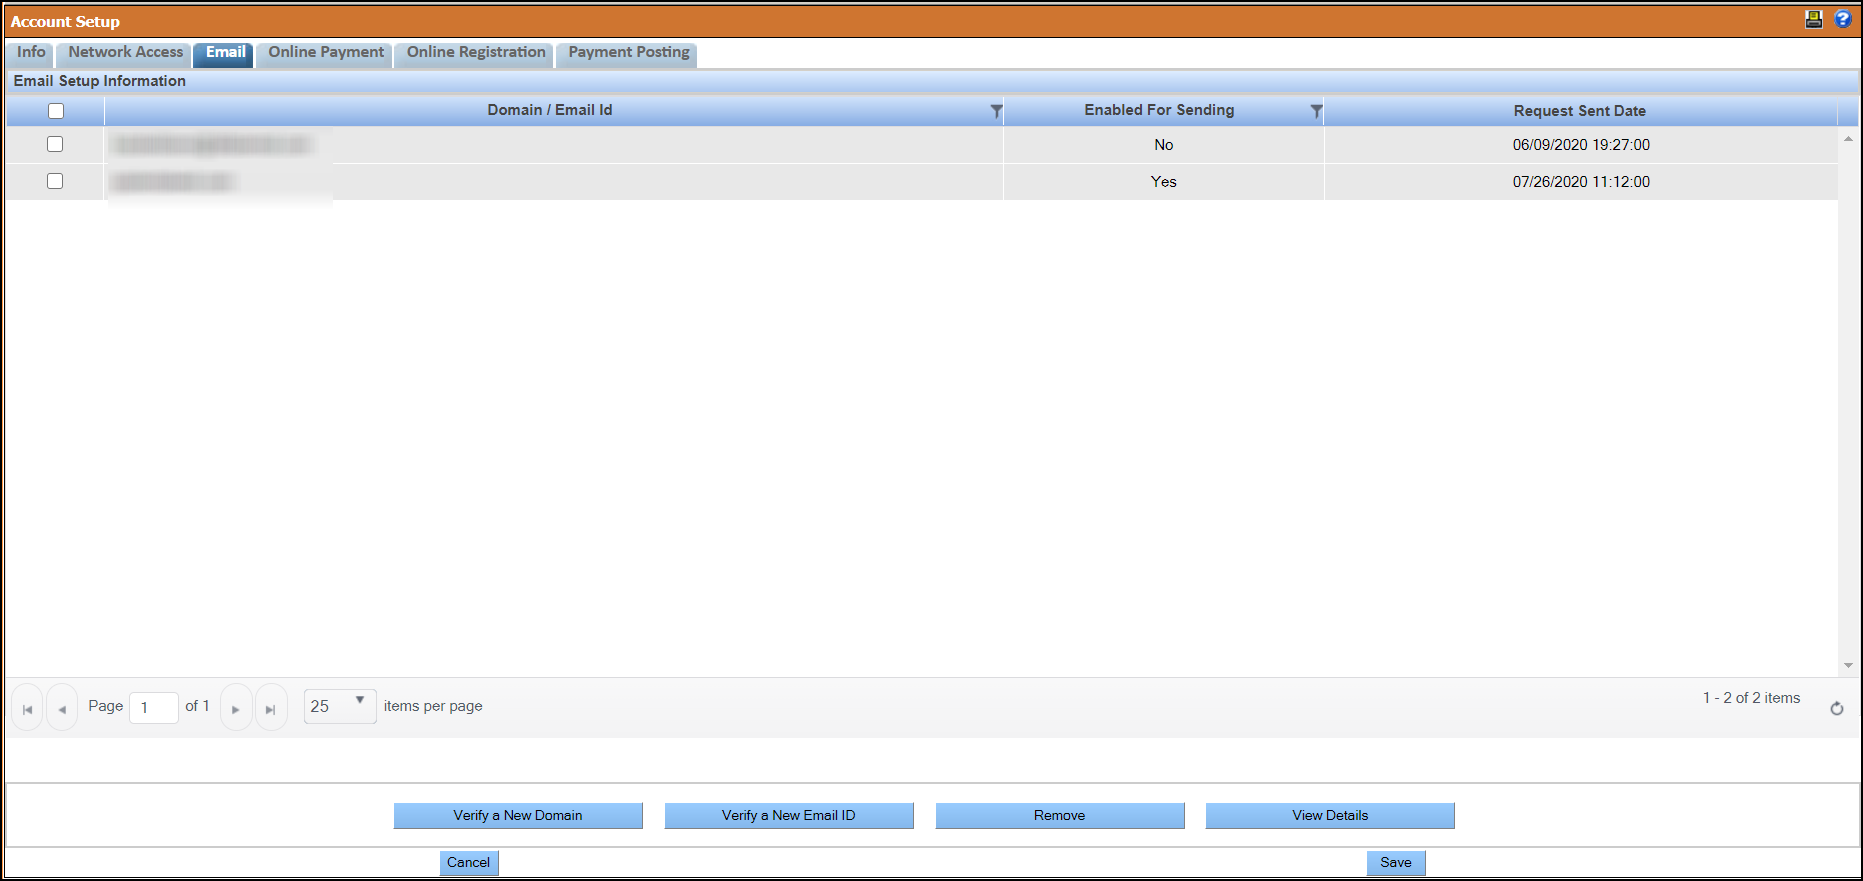
-
Click Verify a New Email ID.
The Verify a New Email ID window opens.
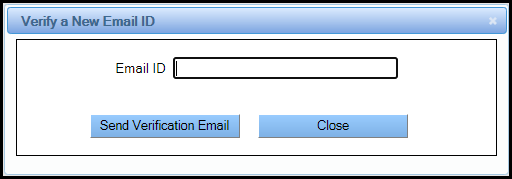
-
Enter the email ID and click Send Verification
Email.
A verification link is sent to the email ID you entered.
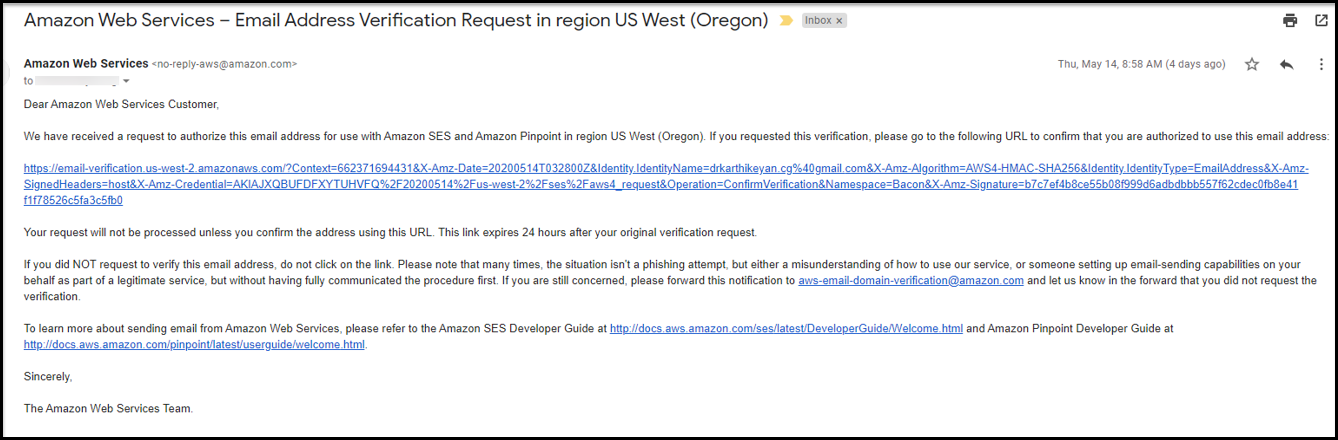
-
Click on the verification link.
The verification process starts and is completed within 24 hours.
- If the Enabled For Sending status changes to
Yes, then the verification is
successful.
 Note: When you trigger a verification email from Amazon SES, the email is appended with via amazonses.com.
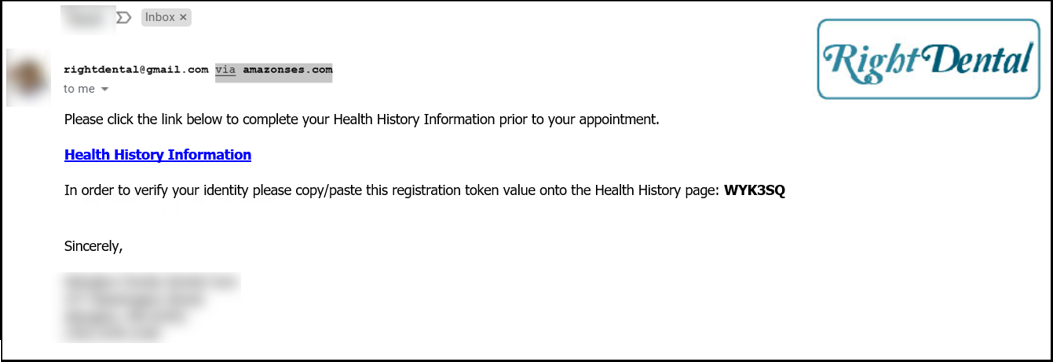
- If the Enabled For Sending status displays No even after 24 hours, then continue from Step 7.
- If the Enabled For Sending status changes to
Yes, then the verification is
successful.
-
Select the email ID and click View Details.
The View Details window opens.
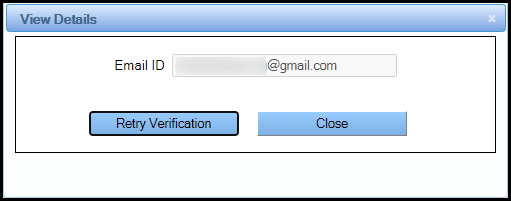
-
Click Retry Verification.
A verification link is sent to the email ID.
-
Perform Step 6.
Note: If you encounter any of the following error messages after you send an email, do the following:
- Office email ID is not verified - Contact your system administrator
to check if the email ID is verified. To check the verification
status, go to .
- Email bounced back - The email ID provided is invalid. Contact the
patient to obtain the correct email ID.
- Email is listed as spam - Contact your system administrator if the
email is listed as spam. The system administrator must contact QDW,
who will create a ticket in Success Community, which will be
attended by QDW support team.
- Office email ID is not verified - Contact your system administrator
to check if the email ID is verified. To check the verification
status, go to .
Online Payment
Setup Multi-merchant ID's to receive payments through different external vendors in QSIDental Web.
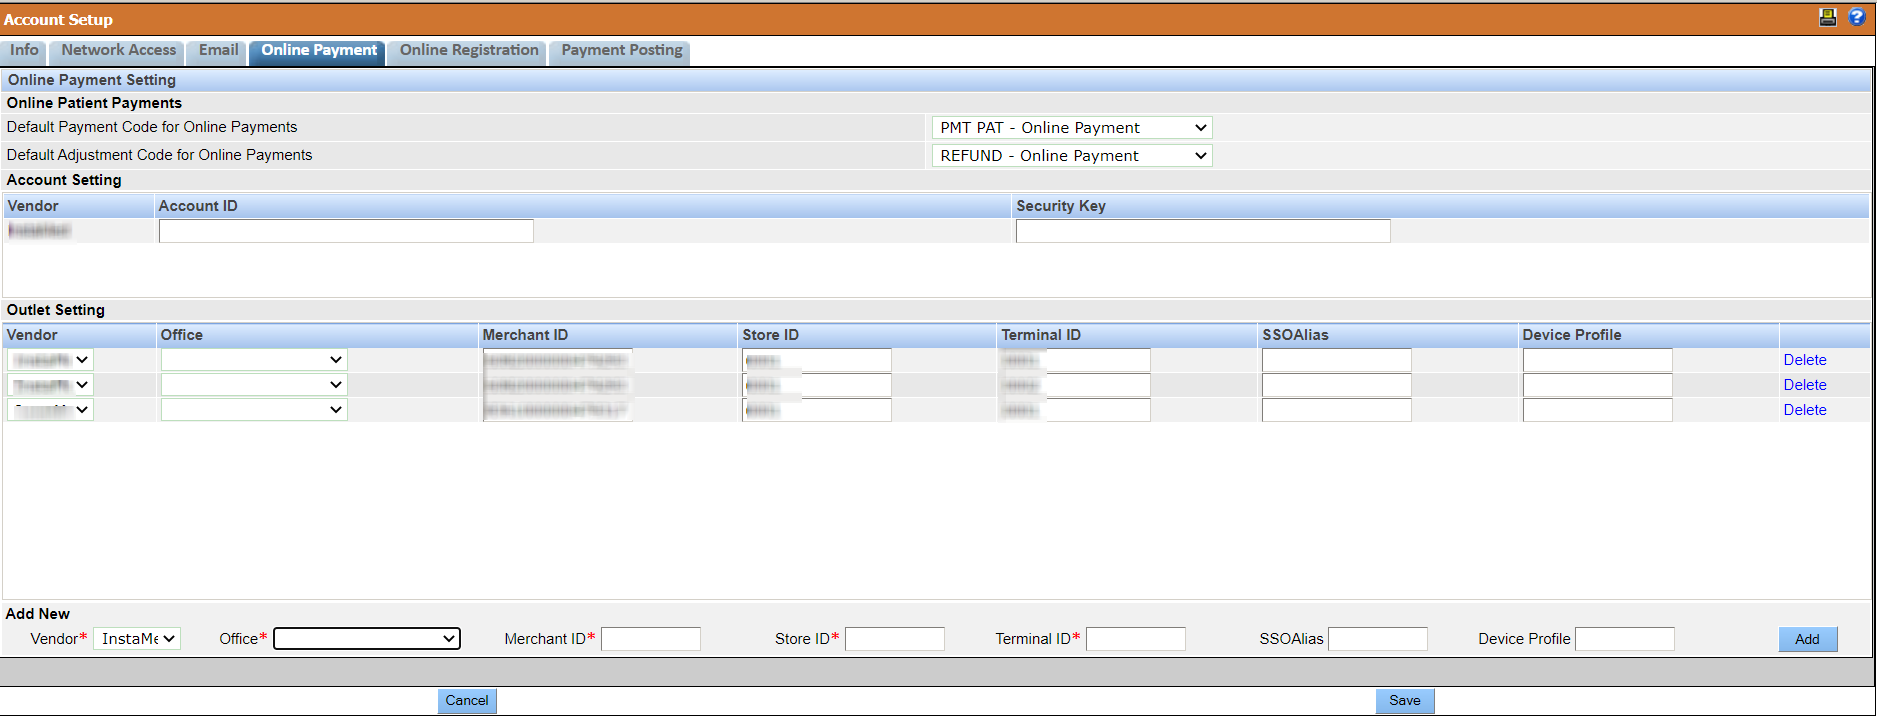
The Online Payment section in the Account Setup screen is used to configure the online patient payments, accounts and outlets for a given practice. Multi-merchant IDs or device profiles setup by any one practice in an enterprise are available for use in all practices.
- Online Patient Payments -Use this section to view and edit the payment and adjustment codes for online patient payments.
- Account Setting -Use this section to view and edit the unique Account ID and Security Key for a given online patient payment vendor.
- Outlet Setting - Use this section to view and setup online patient payment details for a given outlet or office.

Payments made through the vendor portals are accepted by QDW and reflect in the account ledger.
Online Payment Form Fields
The
The following table describes the sections of the Online Payment Screen.
| Section | Fields | Description |
|---|---|---|
| Online Payment Setting | Default Payment Code for Online Payments | Displays the code against which any payments done from the vendor will be posted. |
| Default Adjustment Code for Online Payments | Displays the Adjustment codes for online payments. | |
| Account Setting | Account ID | Displays the account number provided by the vendor for a practice or enterprise. |
| Security Key | Displays a secure password provided by the vendor. | |
| Outlet Setting | Vendor | Displays the provider of online patient payments accepted by QDW for a given practice in an enterprise. |
| Office | Displays the office which has setup the vendor for the online patient payments. | |
| Merchant ID | Displays a unique number associated with a practice usually provided by a vendor. | |
| Store ID | Displays a unique ID associated with a given practice. | |
| Terminal ID | Displays a unique terminal ID associated with a given practice. | |
| SSOAlias | Displays the Single Sign On alias used for the connection. It is usually required if payment is through a vendor's window embedded in QDW. | |
| Device Profile | Select the device profile if a practice in an enterprise has set up multi-merchant IDs or device profiles, then the profiles or multi-merchant IDs are used |
Set Up Online Payment for Practice Group (PGID)
You can set up a vendor's payment portal for your practice group to make or receive payments.
- Account ID. An account number provided by InstaMed for a practice or enterprise.
- Security Key
- Merchant ID
- Store ID
- Terminal ID
- SSOAlias and Device Profile
-
In QSIDental Web, click .
The Account Setup window opens.
-
Click the Online Payment Tab.
The Online Payment Setting window opens.
-
Click Edit and enter values in the following
fields:
- Account ID
- Security Key
- Office
- Merchant ID
- Store ID
- Terminal ID
-
Click Add.
A new outlet is configured to make and accept payments from a given vendor. It is displayed in the Outlet Setting section.
Online Registration
The Online Registration feature is used to customize the patient consent form.
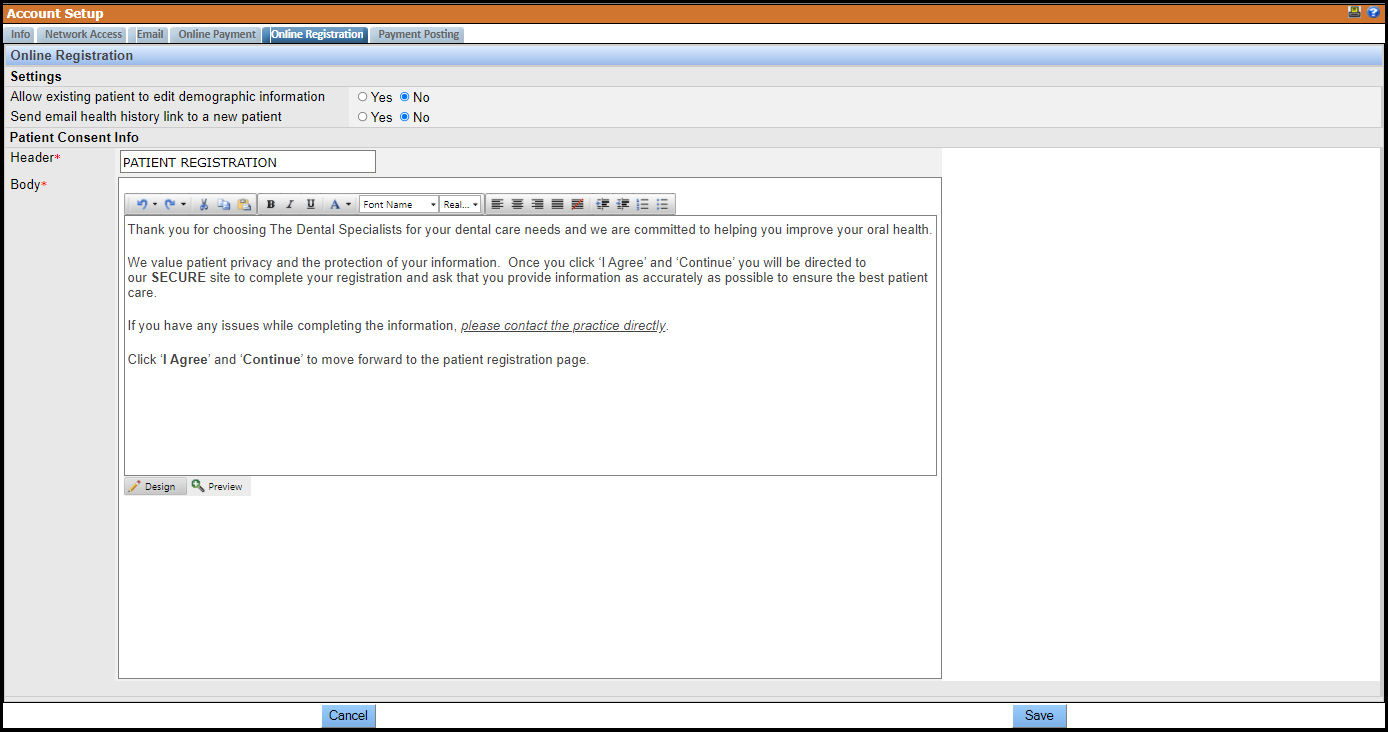
This Online Registration feature under Account Setup screen allows the customization of the Header and verbiage of the online patient registration consent form to best meet the compliance and accreditation needs of your practice. Only users with administrative level permissions can edit the default content.
Edit Online Registration Consent Form
You can make changes to the Online Registration form to suit the verbiage needs of the patient consent form.
To edit the online patient registration consent form, do the following:
-
Log in to QSIDental Web using your login credentials.
The QSIDental Web window opens.
-
Go to .
The Account Setup window opens.
-
Go to the Online Registration tab and click
Edit.
The Header and Body are now editable.
 Note:
Note:- Allow existing patient to edit demographic information - When you select Yes, the patient can edit their personal information when they access the email health history link. See Send Forms Using the Email Health History Link for more details.
- Send email health history link to a new patient - When you select Yes, the New Patients Web Registration section on the Today's Timeline screen displays the Patient, Appt Date, Email Sent On, Status, and Add columns. When you select No, only the Patient and Add columns are displayed.
-
Customize the content to meet your needs and click
Save.
The edited content is now saved.
Payment Posting
The Payment Posting tab sets the defaults for Insurance Payment and 835/Electronic Insurance Payment windows.
The Payment Posting tab is used to establish defaults for the Insurance Payment and the 835/Electronic Insurance Payments windows. Only users with administrative level permissions can edit the default content. For more information on Payment Posting fields, see Payment Posting Form Fields.

Payment Posting Form Fields
Description of the fields in the Payment Posting form.
The following table describes the sections of the Payment Posting Screen.
| Section | Fields | Description |
|---|---|---|
| Insurance Payment Screen | Default Disallow Type | Select the default Disallow Type used for adjustment if any portion of the claim is being disallowed in the Insurance Payment screen. You may select a different Disallow Type in the Insurance Payment screen as deemed appropriate at the time of entry. |
| Ortho Claims Default to Not Close Claim | Select this option to keep the Close Claim box unchecked by default for all orthodontics claims in the Insurance Payment screen. This ensures that Orthodontics claims are not closed before the final payment is received. | |
| 835/Electronic Insurance Payments | Threshold Days | Set this field to ensures that the ERA check deposit date in the
Bank File matches with the 835 check data. In
cases where the bank may return the deposit date instead of the correct
Check Issue Date, use the threshold days as
the minimum number of days to calculate a safe difference between
the Pay Date and the deposit date returned by
the bank. Checks with deposit date not greater than the
Threshold days before or after the
Pay Date are displayed as deposited on the
Batch Insurance Payment-835 window. Note: The
default value for the Threshold Days is 7
days. |
| ERA Checks Tab: Maximum Display | Set this option to the maximum number of checks to be displayed under the Checks tab in the Batch Insurance Payment-835 window. |
Edit the Payment Posting Form
You can use this form to set defaults for Insurance Payment and 835/Electronic Insurance Payments windows.
You can set the defaults for the Insurance Payment and 835/Electronic Insurance Payments windows.
To edit the payment posting form, do the following:
-
Log on to the QSIDental Web.
The QSIDental Web window opens.
-
Select SetupAccount Info.
The Account Setup window opens.
-
On the Payment Posting tab, click
Edit.
The Insurance Payment Screen, and the 835/ Electronic Insurance Payments sections are now editable.

-
Enter values in the fields as per your requirements.
Click Save.