User Setup
This section provides details the User Setup.
User Setup Introduction
Every individual that will login to QSIDental Web requires a unique username and password. User accounts apply across the enterprise, but access to individual offices is controlled. As these accounts are established, additional preferences may also be set. Depending on the security settings, a user may be able to adjust his/her individual preferences.
The resulting User Setup window displays the list of the practice’s users on the left and the information for the currently selected user on the right side of the screen.
The information in the User Setup window is organized into tabs:
- Login Info: User name, password and other relevant user and demographic information
- Office Access: Offices where the user may access information
- Home Office: Office that automatically is selected when the user first logs in
- Charting: Default preferences for electronic charting such as
-
Security Groups: Membership in the security groups for each assigned
office.
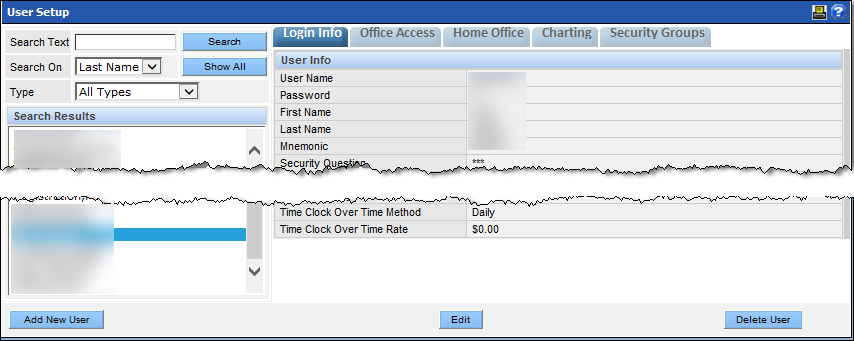 Note: This window can be used to add, edit, or delete user accounts.
Add a User
To create a new user:
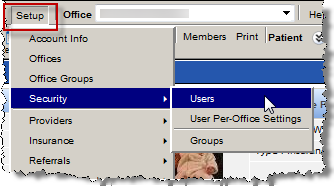
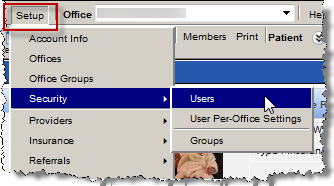
- Select Users from the Security section of the Setup menu.
- Click the Add New User button.
- Complete the information for each of the six steps as appropriate. Each step ultimately corresponds to the tabbed information for the user.
- Use the buttons on the bottom of the screen to advance or move back.
-
Click the Save button when complete.
The mnemonic identifies the user's activities in the charting module.
 Note: Time Clock : QSIDental Web features an internal time clock to track the worked hours for a team member and to get simple time and gross wages reports. It does not attempt to replace a payroll service, but instead is a tool to more easily track and report the hours to the payroll service.
Add User Info
Step 1
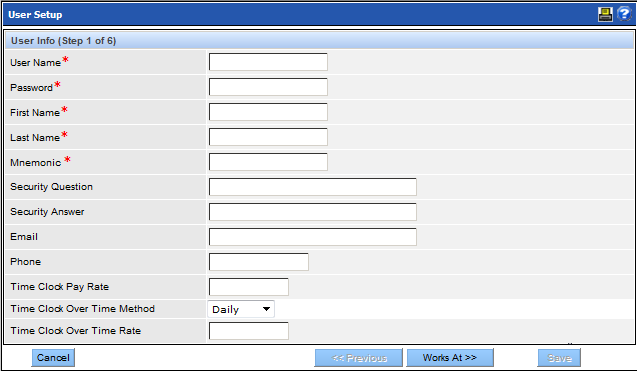

The Forgotten Password? option on the login page will work for a user only if you enter an email address for the user in this step. See QSIDental Web Login for more information.
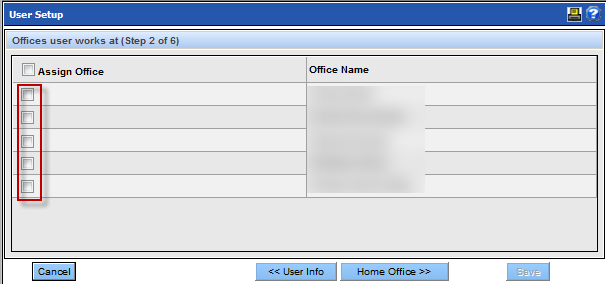
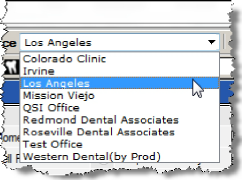
Assigning Offices the User Works At
Step 2
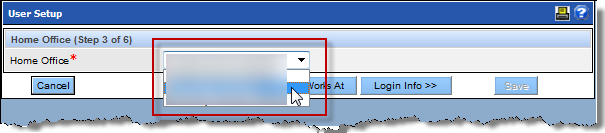
Specifying Users Home Office
Step 3
Setting Up User Login Info
Step 4
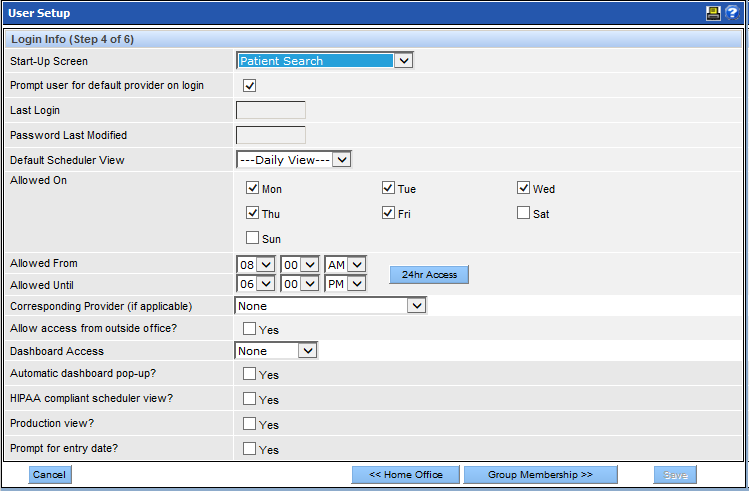
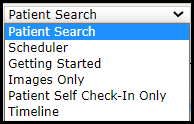
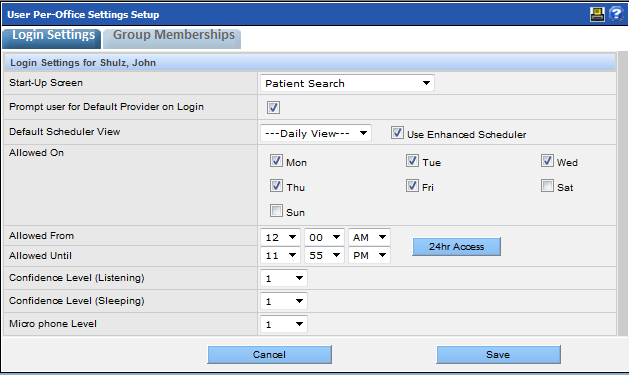
- Start-Up Screen: Sets the screen that automatically opens when the user has logged-on. QSIDental recommends Patient Search, however for clinical users, the chart may be preferred.
- Prompt user for default provider: When selecting this box, users that are not assigned to a specific provider will be prompted to select one from a dropdown list whenever logging in.
- Default Scheduler View: Select a user’s default scheduler view
from the dropdown. Note: An additional setup is required in the User Per-Office Settings section.
- Allowed On: Set the window during which a user can access
QSIDental Web. Place check marks beside the days of the weeks and select the hours for
those days. To allow 24 hour access, click the 24hr Access button.Note: An additional setup is required to allow users to access QSIDental Web from IP addresses outside the office.
- Corresponding Provider: If the user is a provider, associate the user account with the provider account. The corresponding provider is primarily used for My Reports options.
- Allow access outside the office: Place a check mark here to allow
users to access QSIDental Web from computers and mobile devices outside the office. Access
will still be limited within the timeframe given above. Note: The IP addresses for these users must be provided in the Account Info Setup screen.
- Dashboard: The dashboard is an extra feature that offers business intelligence graphics and statistics. If enabled, few users will need access.
- HIPAA compliant scheduler view: The scheduler offers a special view to hide all Personal Health Information (PIH). The view can be toggled on and off with the HIPAA check box on the scheduler. This setting sets whether or not the initial view should show or hide the PHI when initially launched.
- Production view: The scheduler may display the forecasted production based on the treatments in the scheduled appointments. Additionally, the scheduled appointments are color-coded by the type of procedures being performed. The view can be toggled on and off with the Production check box on the scheduler. This setting sets the initial view.
- Prompt for entry date: Requires an entry date for items being added or updated in multiple modules. Since all entries include an entry date, QSIDental recommends this box remain unchecked.
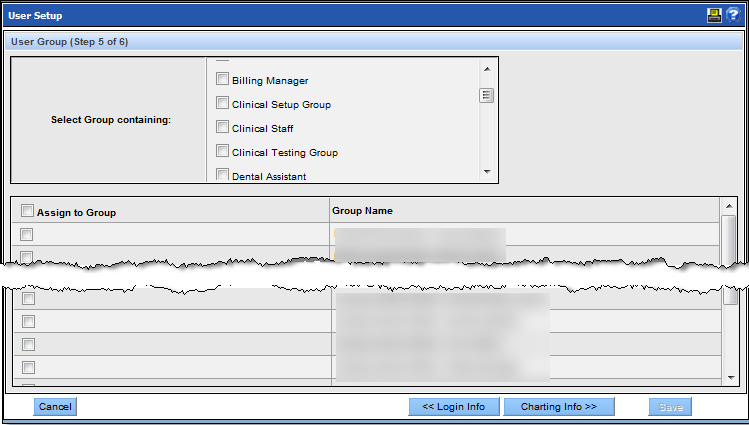
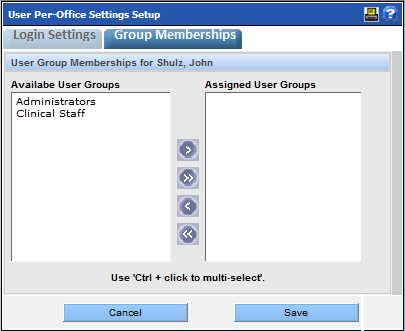
Group Memberships
Step 5:
This section allows the user to be assigned to specific security groups for his/her designated offices. The top section allows groups to be selected for all offices with that designation. It is especially useful for practices that have consistent groups across all offices.
Charting Info
Step 6:
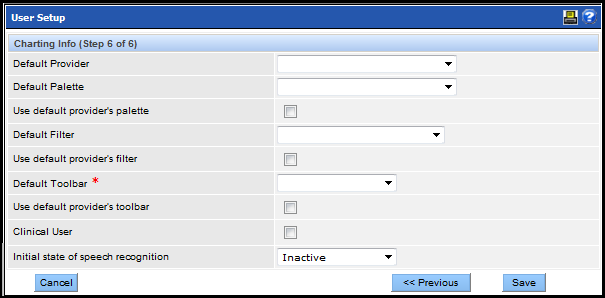
- Default Provider: Select the Provider that will be associated with this user. The Provider may be changed for individual payments or treatments.
- Default Palette: Select the default palette that the user will want to show by default. If no default is selected, the user must select each time the chart is opened.
- Default Filter: Select the default filter that the user will want to use by default. If no default is selected, the default (all items) will be applied.
- Default Toolbar: Select the toolbar for the user from the dropdown.
- Use default provider’s palette/filter/toolbar: Selecting these check boxes will override the user’s selected palette/filter/toolbar when the assigned default provider is the provider for the service.
- Clinical User: Select this check box to indicate the user is a clinical user. When selected, the patient’s Tooth Chart opens for the selected patient (as opposed to the Patient Overview). If this user will be a Provider, the box must be selected to associate the user account with the provider.
- Initial state of speech recognition: Select the state for speech recognition.
Edit a User
Once the user's account is created, the user's settings, permissions and preferences are saved. These settings can be updated by the administrator as needed.
To edit an existing user:
- Select Users from the Security section of the Setup menu.
-
Select the desired user from the list on the left and click the
Edit button.
- Use the tabs to navigate and adjust the settings as appropriate.
- Click Save.
Additional User Options
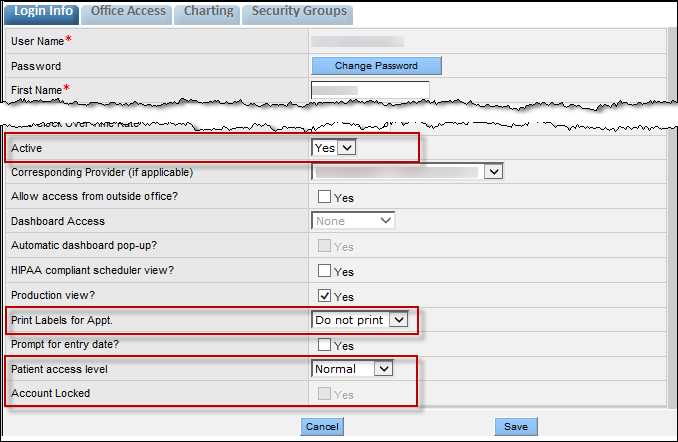
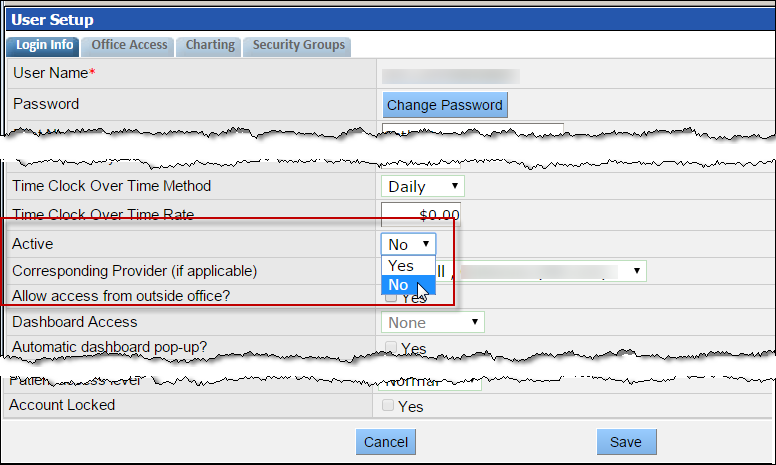
- Active: Sets the user account as active or inactive. Select No from the dropdown to disable the user account.
-
Print Labels for Appt: Controls the automatic printing of appointment
labels when the appointment is scheduled.
- Do Not Print: Appointment Labels will not be automatically printed.
- Small Labels: Print the small version of the Appointment Label for the patient.
- Large Labels: Print the large version of the Appointment Label for the patient.
- Patient access level: Controls the user’s ability to search across
all offices within the practice.
- Normal: In the Search Patient window, the user may select the radio button to conduct the search within the current office or across all offices.
- Limited: In the Search Patient window, the user may only search within the current office. The all office option is disabled (greyed-out).
- Restricted: In the Search Patient window, the users search results will only include patients specifically assigned to the user (Patient menu > Assign to Restricted User.) This option would primarily be used for limited duration employees and/or activities.
- Account Locked: If a user’s account has been locked because of password failures, the check box will activate so the account can be unlocked by the administrator. Clear the check box beside Yes to unlock the account.
User Passwords
Users may change their own passwords even if they do not have administrator rights. They can do this in either of the following ways:
- Users who are logged into QSIDental Web can reset their password via the Change Password option found on the Help menu (see instructions below).
- Users who are unable to log in due to a forgotten password can reset their password via the Forgotten Password? link found on the login screen. For this function to work, the user must have an email address saved in his or her user profile.
To change your password while logged into QSIDental Web:
-
Select Change Password from the Help
menu.
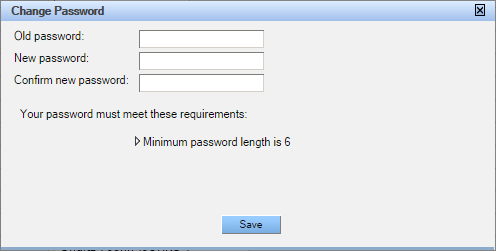
- Type the current password in the Old password field.
- Type a new password in the New password field. Please note that the new password must meet the requirements set for the practice. These requirements are displayed in the Change Password window and will vary by practice.
- Type the same password in the Confirm new password field. The passwords must be typed the same way in both fields.
- Click Save.
User Per-Office Settings
An administrator can set user options that apply to a selected office in the User Per-Office Settings Setup window.
You can access the User Per-Office Settings Setup window by navigating to .
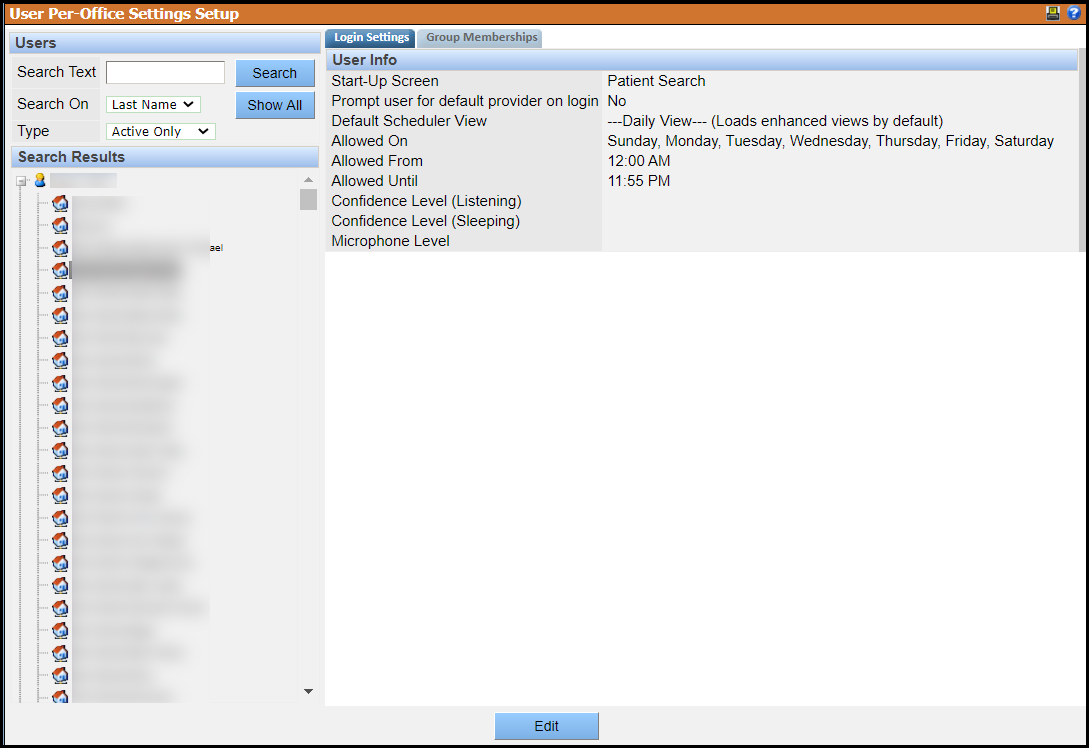
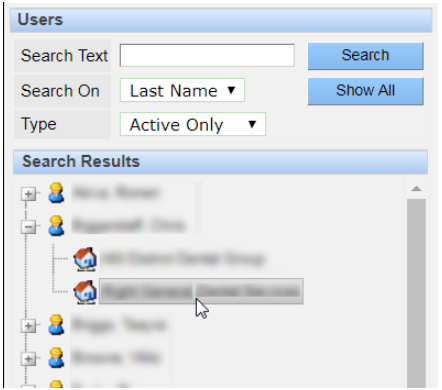
The User Per-Office Settings Setup window displays active users and their offices on the left and the respective information about a selected user or office on the right. The information on these tabs was established when the user was created. You can use the search options to locate a particular user or filter the list by active or inactive status.
The window is organized into the following tabs:
- Login Settings: Options for setting a user’s login schedule and
startup options. Note that you can select the desired start-up screen from the start-up
screen list.
- Group Memberships: Assignments for specific security groups for a user’s designated offices
Edit User Per-Office Settings
To change the user's per-office settings:
-
From the Setup menu, select .
The User Per-Office Settings window opens.
-
Select the desired user and office from the list on the left side of the User
Per-Office Settings Setup window.
- Click the Edit button.
-
Edit the information on the Login Settings tab as you see fit. Most of these
settings were located on the Login Info
tab when the user was created.
-
Click the Group Memberships tab and edit the group memberships
as you see fit. All security groups available in the selected office are listed on the
left, and the groups to which the user belongs are listed on the right.
- Click Save.
Deactivate a User
- Changing the user’s password,
- Setting the user’s status to inactive, and
- Removing the user’s access to all offices.
To fully deactivate a user:
-
Navigate to
-
Select the desired user from the list on the left and click
Edit.
The user's information becomes editable.
-
Click Change Password , enter a new password twice in the popup
window and click Save.
-
In the active field, select No from the picklist.
- Click the Office Access tab.
-
Click the Move All button to move all offices from the
Assigned list on the right side to the
Available list on the left.
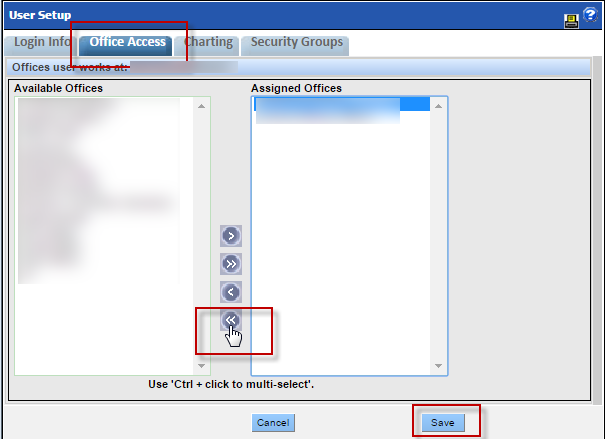
- Click Save.