Planning Future Treatment
This section discusses about the concepts of planning a future treatment.
Charting Planned Treatment
Planned treatments are diagnosed treatments, both necessary and cosmetic, that are recommended by the practice but that have not yet been performed. A planned treatment or service is distinguished as such in the Posting Details window. Planned treatments may be organized into groups, in phases, left individually or in a combination. See Grouping Treatments for more information.
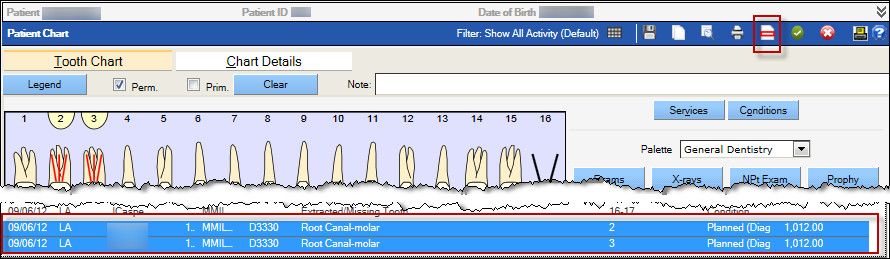
As treatments are planned, they display graphically in the tooth chart, typically in red, or in a color selected by the practice. The planned treatments are also listed in the chart details section and are identified as planned. Additionally, the planned items are visible in a separate. The Treatment Plan module offers a focused view of planned treatments and access to some specific planning and billing activities related to planned treatments.
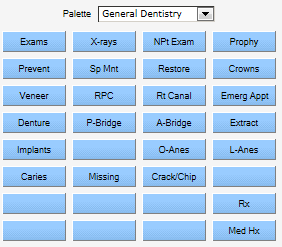
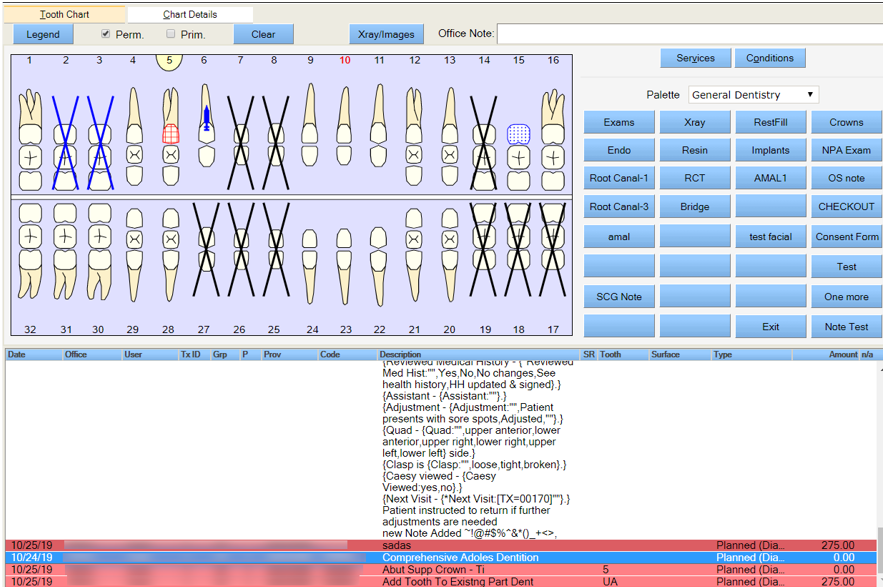
Like all services in QSIDental Web, existing treatments can be charted using a palette button if available or through the Services tool. The palette is the easiest way to chart clinical elements, including planned treatment.
Chart a Planned Treatment with a Palette Button
The palette buttons link directly to specific services that can be used to chart any recommended treatments.
To chart a planned treatment with a palette button:
-
Select the desired tooth or teeth.
Hint: To plan the same treatment for multiple teeth, select them by clicking each tooth in succession before clicking the palette button.
-
Click the desired service from the palette.
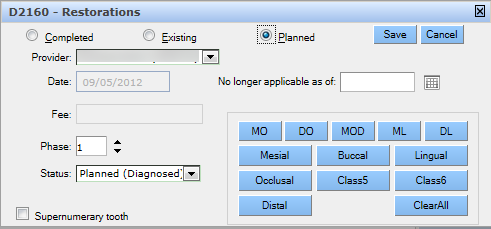
- Complete the Posting Details window.
- Select the radio button beside Planned.
- Select the appropriate surfaces using the surface buttons.
-
Select the phase, if so desired.
-
Click
Save.
The treatment appears in the graphical chart and in the chart details.
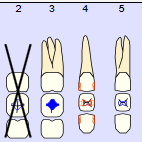
Chart Planned Treatment without a Palette Button
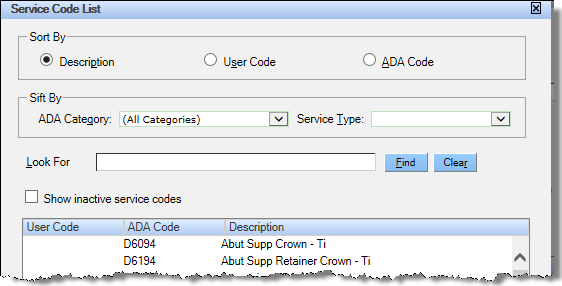
Not all services have an associated palette button. However, any service may be charting using the Service Code lookup tool.
To chart an existing treatment using the Services button:
- Select the desired tooth or teeth.
- Click Services.
- Locate the desired service.
- Select the radio button beside the desired search criteria.
- Type a keyword or code in the Look for field.
- Click Find.
-
Select the desired service and click Use.
- Complete the Posting Details window.
- Select the radio button beside Planned.
-
If the procedure was performed within the practice, clear the Other
Provider check box and select the desired provider from the dropdown.
-
Click Save.
The item appears in the graphical chart and chart details as appropriate.
Grouping Treatments
When a planned treatment needs to be structured by urgency, necessity, appointment or some other characteristic, procedures can be grouped. Grouping planned treatment helps to organize and prioritize procedures within the chart or to identify special situations such as pre-authorization or service restrictions. Typically, the practice will establish some preset groups. However, a custom group can be created for a single specific purpose within a chart.
Create a Group for Treatments
While preset groups are typically established by the QSIDental Web administrator (see Treatment Plan Groups to learn more), groups may also be created as needed for the chart.
To create a group for treatments:
- Select the treatments that will belong to the group.
-
Click the
Group
icon.
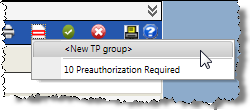
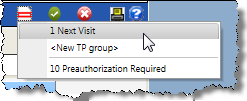
-
Select the desired group from the dropdown list or select <New TP
group> to create a single-use group.
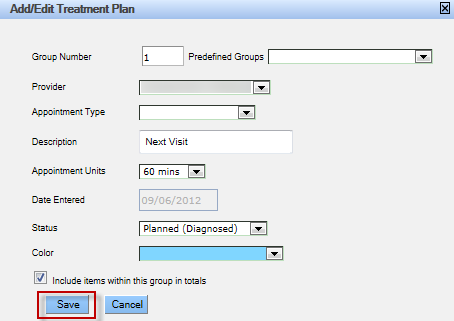
-
If a new plan is desired, complete the details as appropriate and click
Save.
 The treatment items are now grouped together in the Chart Details section.
Schedule a Treatment Plan Group
Once a treatment group has been established in the chart, you can schedule an appointment for an existing group.
Once a treatment group has been established in the chart, you can schedule an appointment for an existing group.
To schedule an appointment for an existing group:
-
From the Chart History grid, group two or more planned treatments. See
Create a Group for Treatments for information on how
to create a group for treatments.
-
Select the desired treatment plan group header, right-click and then select
Schedule.
The Appointment Search window opens displaying the details transferred from the treatment plan group.
 Note: Click on Copy Reference Data to copy the details in the Provider / Group, Prod Type, and Length (mins) of the reference patient to the rest of the patients in the Select Patients grid. You can manually change the details if required.
- TP Group Headers - Lists the patient's treatment
planned group items.Note:
Selection of a Group Header copies all the details necessary for the search (Provider / Group, Prod Type if any, and Length), and the corresponding treatment items are automatically linked.
- Provider / Group - Lists the Provider or Provider Group
- Prod Type - Lists the production type
- Length (mins) -The length of the appointment
- Coordination - The Coordination list has
the following options:
- Reference - The first patient in the Patient grid is the Reference to which the Window of time logic is calculated and no appointment start time can be earlier than the reference patient's start time.
- Simultaneous - All the patients in the Patient grid have their appointments at the same time.
- Consecutive - All the patients in the Patient grid have their appointments slotted one after the other based on the time interval for the treatment for each member.
- Window of time - The appointment must start between the window of time selected for all the members in the patient grid. This coordination must be related to the reference patient in the patient grid.
- Delete - Click Remove to remove a patient from the Selected Patients grid.
- TP Group Headers - Lists the patient's treatment
planned group items.
-
Click Appt Search.
The application displays a list of appointment options in the Search Results area.
-
Choose the appropriate option and click Select to modify
individual appointments in the order they appear in the Search
Results window or click Save to save all
family appointments to the schedule in their respective time slots. Note that if
the user wants to associate treatment with the appointments, then they must
visit each appointment individually once the save has been completed.
Note: You must have the Appointment-Appointment Search Select and Appointment-Appointment Search Save rights to select or save respectively in the Search Results grid.
Add Treatments to an Existing Group
Once a treatment group has been established in the chart, treatments may be added as needed.
To add another treatment to an existing group:
- Select the treatments to be added to the group.
- Click the Group icon.
-
Select the desired group.
 The additional treatment items are now part of the group.
 Note: Multiple groups can be established within a chart.
Remove Treatments from a Group
Once a treatment group has been established in the chart, treatments may be removed from the group or added to an alternate group.
To remove a treatment from a group:
- Select the treatments to be removed from the group.
- Click the Group icon.
-
Select <Unassigned TP group>.
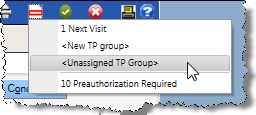
- To assign the treatment to an alternate group, select the group from the list or create a new group.