Search for Appointments
You can search for an appointment.
You can find an appointment slot by family using the Appointment Search window:
-
Select Appointment Search from the
Scheduler menu.
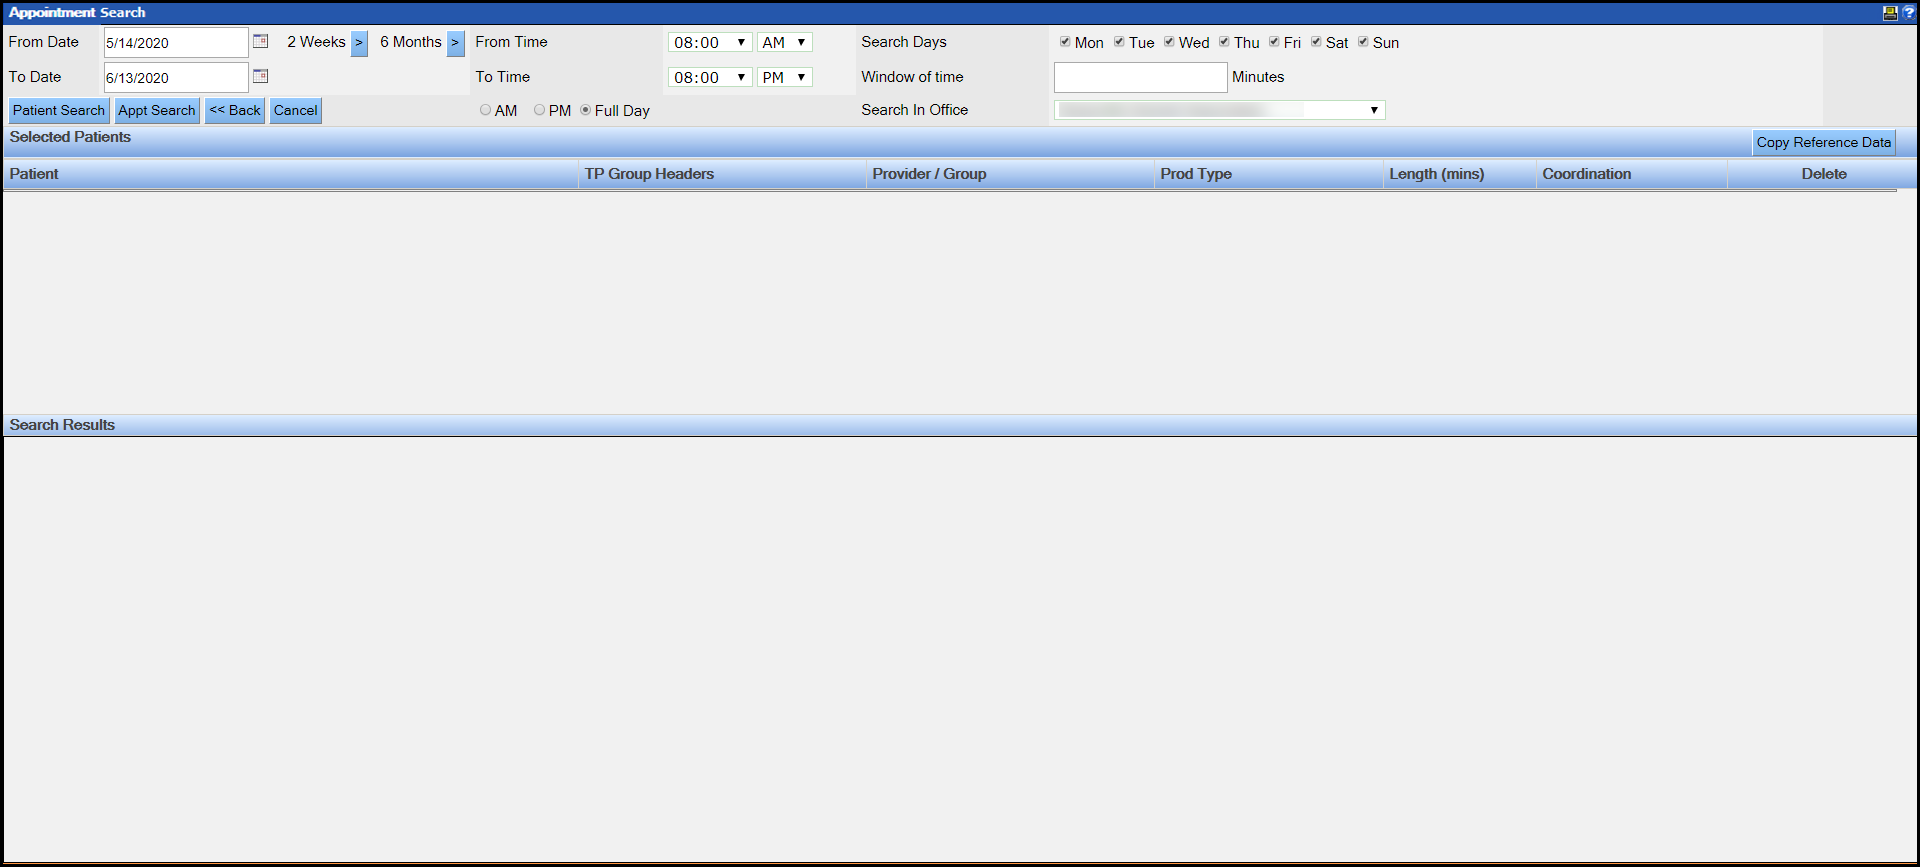
Note: You must have the Appointment-Appointment Search rights to be able to view the Appointment Search option.The Appointment Search window opens.
-
Select the date range.
- Select or type the From and To dates.

- In Search Days, select the check boxes next to the days of the week to be included in the search.
- The Search in Office field defaults to the office that the user is currently logged on.
- Select or type the From and To dates.
- Set the time range.
-
Click Patient Search.
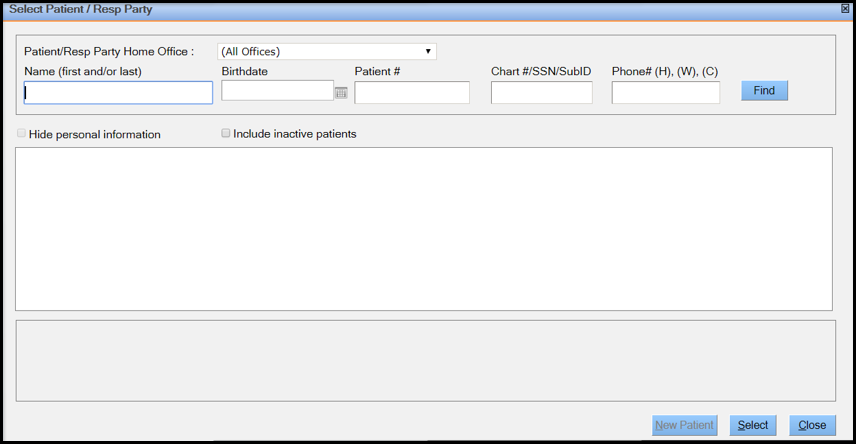
The Select Patient / Resp Party window opens.Note: The Patient/Resp Party Home Office field defaults to All Offices when the Search Patients in all offices checkbox is selected on the SetUp tab of the Office Setup window. For more information, see Office Setup.
-
Search for a patient using the following criteria and click
Find.
- Name (first and/or last)
- Birthdate
- Patient # (Patient's ID number)
- Chart#/SSN/SubID (Patient's chart number, social security number, or subscriber ID number)
- Phone# (H), (W), (C) - Patient's phone number (home, work, or cellphone)
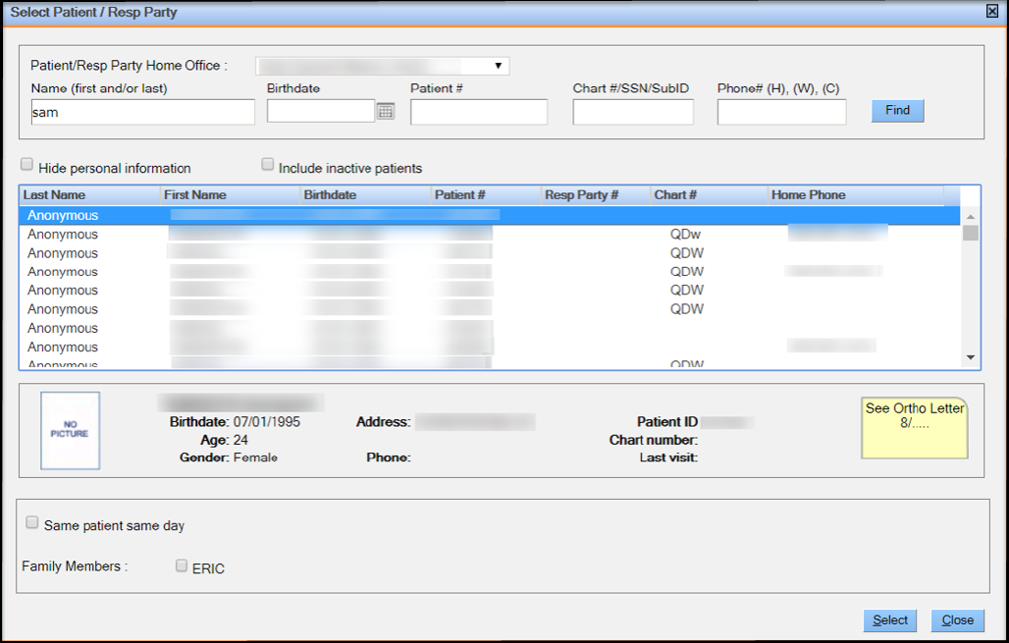
- If the application displays a list of patients based on the search
criteria as shown in the following image, then skip to Step 10.
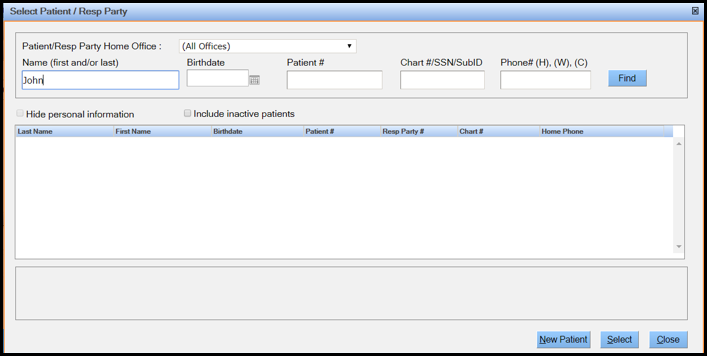
- If there are no matches for the search criteria, then the New
Patient button is made available. Proceed to Step 6.
-
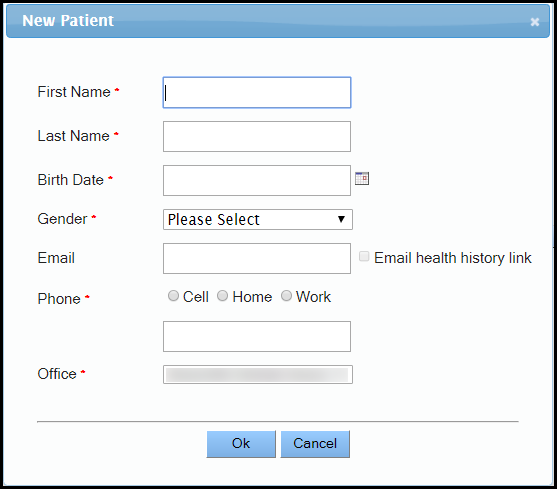
Click New Patient.
The New Patient window opens.
-
Enter values in all the fields and click Ok.
Note:
- The Office field defaults to the office that you are currently logged on. However, you can change the office to where the appointment search needs to be performed.
- If multiple new patients are searched for or scheduled at the same time, all subsequent new patients in this search are scheduled in the same office as the reference patient.
The Appointment Search window opens with the patient’s details automatically populated. For more information on the fields in the Selected Patients area, see Selected Patients Area Fields.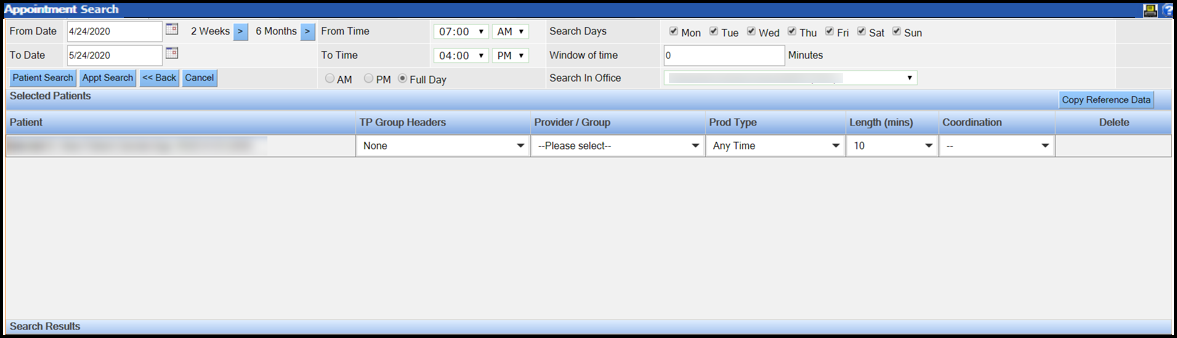
-
Select the provider from the Provider / Group list and
click Appt Search.
The Search Results section displays a list of appointment options.

- Skip to Step 12.
-
Select the desired patient and family members that require an appointment from
the Select Patient / Resp window and click
Select.
Note: Select the Same patient same day check box if the patient’s treatment requires seeing more than one provider on the same day.
The Selected Patients section displays the patient and the selected family members.
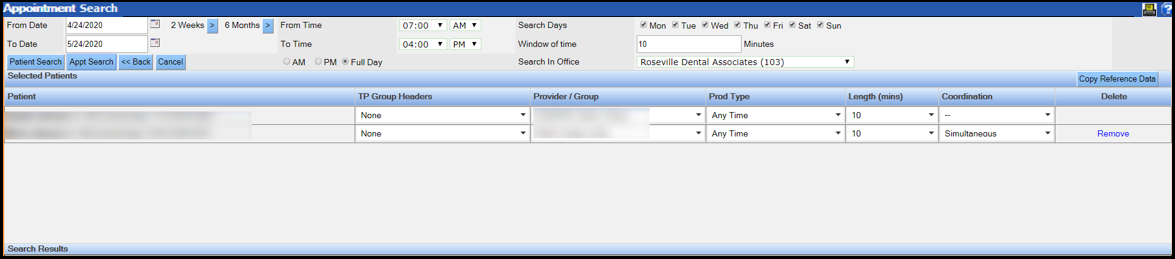 Note: Click Copy Reference Data to copy the details in the Provider / Group, Prod Type, and Length (mins) columns of the reference patient to the rest of the patients in the Select Patients grid. For more information, see Selected Patients Area Fields.
 -
Click Appt Search.
The application displays a list of appointment options in the Search Results area.
-
Choose the appropriate option and click Select to modify
individual appointments in the order they appear in the Search
Results window or click Save to save all
family appointments to the schedule in their respective time slots. Note that if
the user wants to associate treatment with the appointments, then they must
visit each appointment individually after saving the family appointments.
Note:
You must have the Appointment-Appointment Search Select and Appointment-Appointment Search Save rights to select and save, respectively, in the Search Results grid.