Regular Payment Plans
There is not a specific payment plan module, but any existing payment plans are visible in each patient’s Patient Overview module. If the patient doesn’t yet have a payment plan, one can easily be created in the same location.
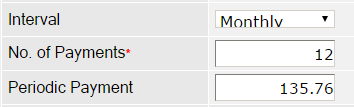
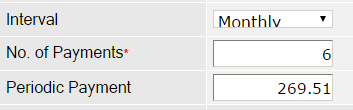
One of the best features of the payment plan tool in QSIDental Web is the automatic calculation. Most patients know how much they can afford to pay each period. Enter the payment amount and QSIDental Web will calculate the number of payments. If the patient wants to pay over six months, QSIDental Web will calculate the amount of the payment.
As the payment plan is created, the figures are calculated and updated to reflect the information entered. Know what matters most to the patient and let QSIDental Web do the rest.
As the plan is built, consider the following elements:
- Amount Financed: The total amount that is being spread into the payment plan ( Total Plan Amount – Downpayment Amount) . Remember that the total plan amount comes from an individual patient balance, not the balance for the family or account.
- Interval: The frequency of the payments to be made on the plan, weekly, monthly, etc. The greater the frequency, the smaller the payment itself.
- Number of Payments: The number of payments that the patient or responsible party will need to make to fully pay off the balance.
- Periodic Payment: The amount of the payment the patient must make each period. ( Amount Financed / No of Payments)
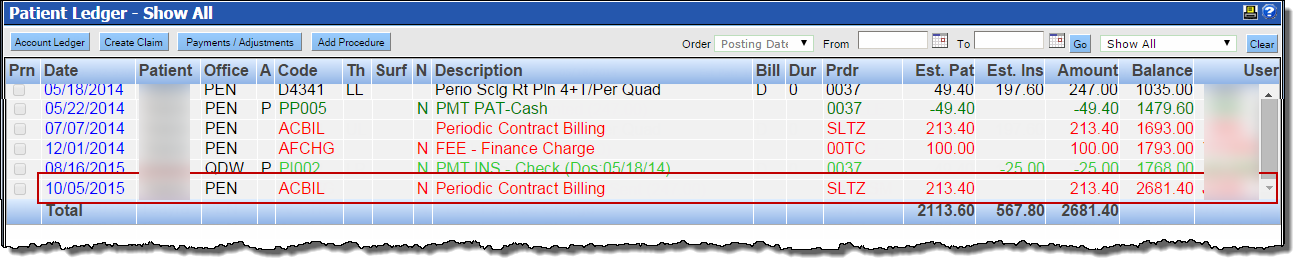
Once the regular payment plan agreement is in place, the patient will make the periodic payments as agreed. To facilitate payments and to smooth the accounting process, the practice must generate these periodic charges and add to the patients’ ledgers.
Create a Regular Payment Plan
To create a regular payment plan:
-
In the Regular Payment Plan Agreement section of the
Patient Overview module, click the Details
button.
 If the section is Regular Payment Plan Agreement, the window for a regular plan will open. If the section is Ortho Payment Plan Agreement, the window for an orthodontic plan will open.
 -
Move any balances to the payment plan, if desired. Click the Move to
Contract button beside Current Patient Balance to
include the amount the patient already owes in the payment plan. Click the Move
to Contract button beside Treatment Plan Patient
Balance to include the anticipated charges for planned treatments in the
payment plan.
The amounts will be populated into the contract.
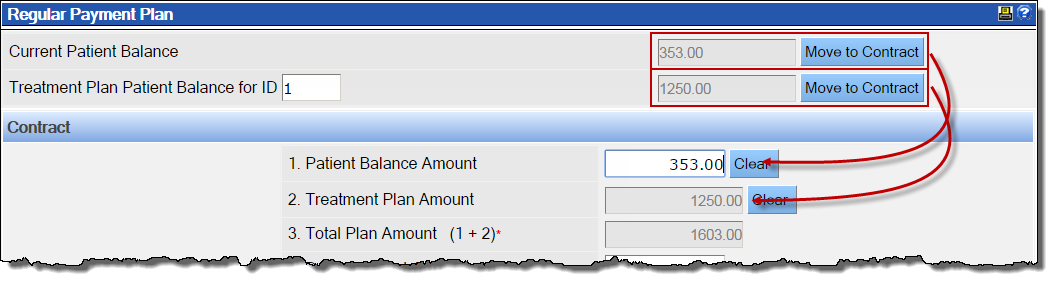
- Click Clear to remove the amounts from the contract if desired.
-
Enter the amount the patient will pay at the beginning of the contract, the
Downpayment Amount.
If the patient will not make a down payment, enter 0.
 Once the down payment is entered, many fields will calculate and populate automatically. As further information is entered, the fields will update.
 -
Enter the APR (Annual Percentage Rate) if the practice will
charge any interest on the amount financed.
If a percentage is entered, the Finance Charge field will populate automatically, and the amount in the Total of Payments field will increase to include those finance charges.

- In the Interval picklist, select how often the patient will make payments on the plan.
- In the No. of Payments field, enter how many payments the patient will make to pay the balance. If the patient prefers to pay a specific amount, skip the field and the number of payments will be calculated by QSIDental Web.
-
In the
Periodic Payment
field, enter the amount the patient will pay each period. If the patient prefers to pay the balance over a specific time, skip the field and the amount will be calculated.
- The First Billing Date represents the due date of the first periodic payment. To change the defaulted date, click the calendar icon.
- Select any required disclosures from the Financial Disclosure picklist. Financial disclosures are established by the practice and should be selected based on practice requirements. View the disclosures by selecting Custom Letters from the Reports menu.
-
Click Save.
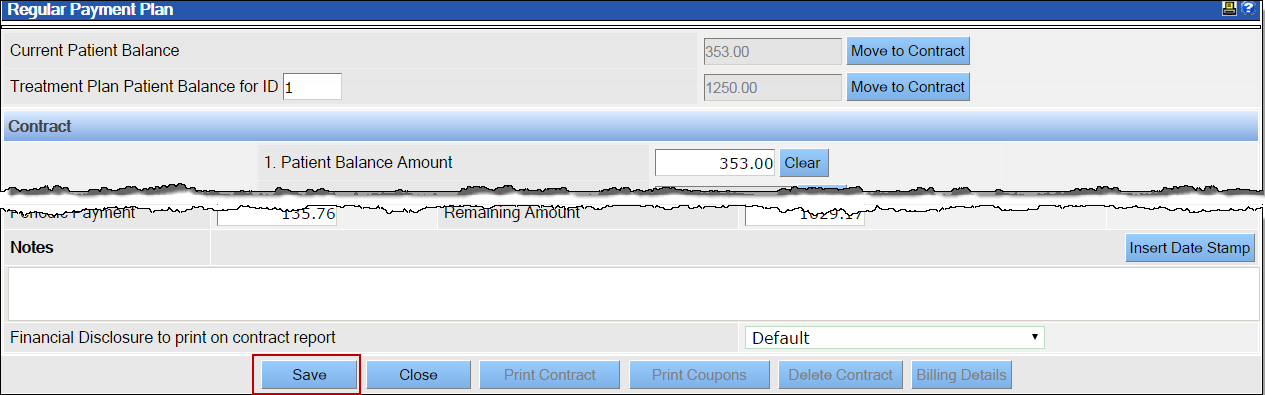 Once saved, the plan information is locked (greyed out) and editing is limited.The contract, coupon, and billing details buttons will become active.
 - Print the payment contract for the patient by clicking Print Contract.
-
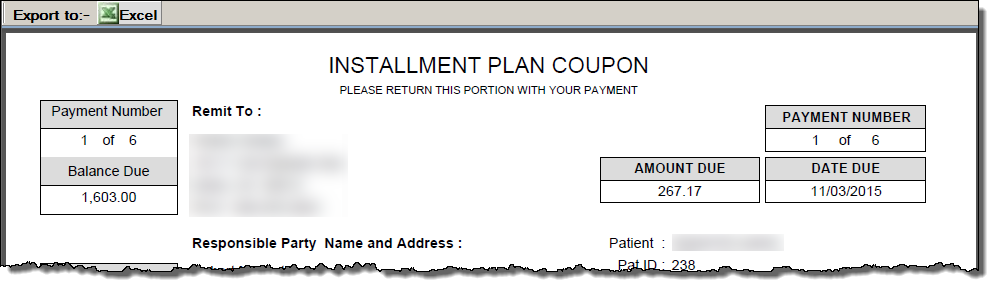
Print the installment coupons for the patient to use when sending the payment by
clicking Print Coupons.
The documents open in a separate window for standard pdf printing.
Regular Payment Plan Billing Details
With the payment contract in place, you can view the schedule of payments for either the patient or insurance side by clicking Billing Details on the Payment Plan Details screen.
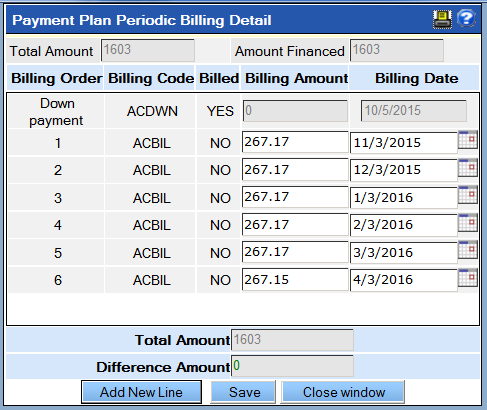
Any payment amounts that have not yet been billed may still be adjusted (if allowed by security rights and practice policy) so long as the total amount is paid by the final payment.
Change a Payment in a Regular Payment Plan
To change a payment:
- On the patient’s regular plan detail screen, click Billing Details.
-
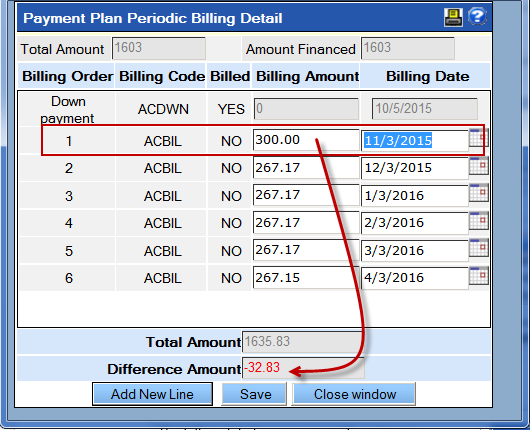
In the row for the specific payment, type the new payment amount in the
Billing Amount
field.
QSIDental Web will not automatically adjust any other payments in the schedule.However, the difference created by the change in payment amount will appear at the bottom of the window.
- Adjust another payment to account for the difference amount. For example, subtract the difference from the last payment. Follow the practice’s policies for adjusting payments.
-
Click
Save.
Note: In some cases it may be easier to delete the plan and recreate it than to update a series of individual payments.
Generate Charges for a Regular Payment Plan
If this function is not performed, the patients will never have the charges posted to the ledger, nor receive statements from these charges.
To generate regular payment plan charges:
-
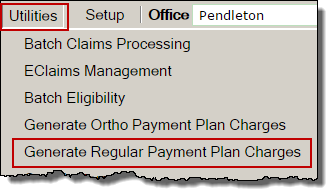
Select Generate Regular Payment Plan Charges from the
Utilities menu.
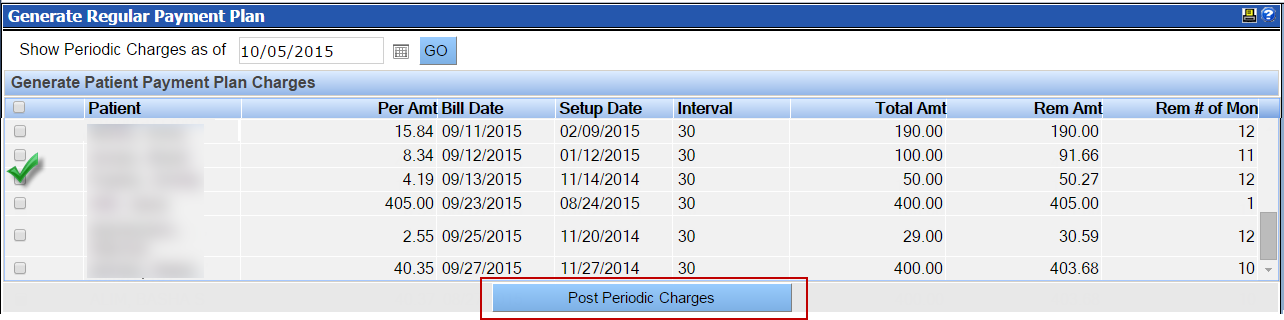
 Today’s date will populate in the Show Periodic Charges as of field. If desired, select an alternate date by clicking the calendar icon. If the date is changed, click Go to refresh the list.
-
Select the check boxes beside the patients who need to have payment plan charges added
to the account. To select all payments, click the top check box.
-
Click
Post Periodic Charges.
The periodic charge will be posted to the patient’s ledger and become part of any current balance.