Edit eRx Patient Profile
ePrescribing is available in QSIDental Web through the integration of a special system
called MD Toolbox which also maintains patient information. The patient side focuses on the
individual, selected patient in QSIDental Web. The patient identity banner will always reflect
the selected patient and will only display information relative to that patient. Access the
ePrescribing Module by clicking the ePrescribing icon, or by selecting
e-Prescription from the Patient menu. The module
will open with the current patient's profile with the identity banner at the top. 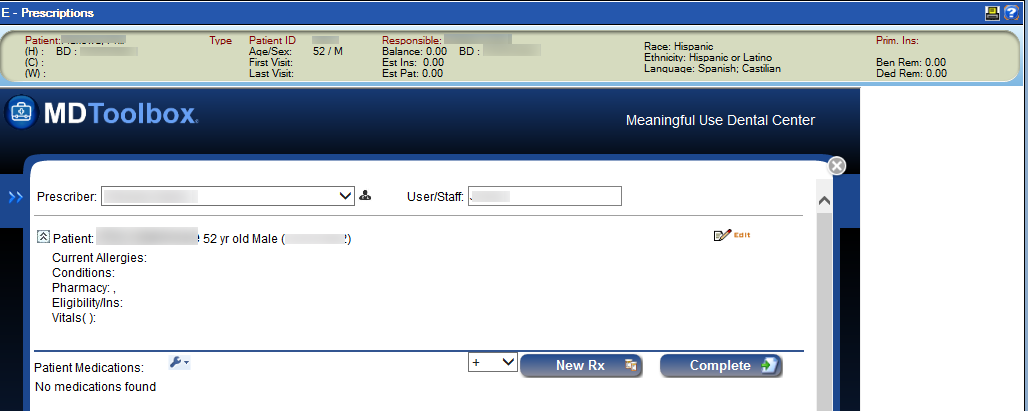 . The
patient profile inside MDToolbox shares some information with the QSIDental Web patient profile,
including demographics and allergies. Some information in the QSIDental Web profile will be
shared to MDToolbox, however, MDToolbox information is not shared back with QSIDental Web.
Hence, the patient profile in QSIDental Web should be considered the primary
profile.
. The
patient profile inside MDToolbox shares some information with the QSIDental Web patient profile,
including demographics and allergies. Some information in the QSIDental Web profile will be
shared to MDToolbox, however, MDToolbox information is not shared back with QSIDental Web.
Hence, the patient profile in QSIDental Web should be considered the primary
profile.
To edit the patient's profile within MDToolbox:
-
Click the Edit link in the profile window.

-
Select the desired tab.

- Complete the profile as desired.
- Click the Save or Save+Close button when complete.
Allergies Tab
The Allergies tab contains allergy information about the patient. Most allergy information will flow from QSIDental Web, but it may be necessary to add a new allergy.
- Click the Edit link in the profile window.
- Select the Allergies tab.
-
Click the Add Allergy link to open a new allergy row.

- Complete the details for the specific allergy.
- Begin typing the name of the allergy.
-
Select the desired allergy from the list.

- Describe the patient's reaction.
- Select the Severity Level from the dropdown.
- Select the Status from the dropdown if required.

-
Save the allergy.

- Click the Save button to save the allergy and remain on the allergy screen.
- Click the Save+Close button to save the allergy and return to the patient's prescription screen.
Pharmacy Tab
Set the patient's preferred pharmacy in his/her profile so it need not be selected each time a prescription is written.
- Click the Edit link in the profile window.
- Select the Pharmacy tab.
- Click the Search icon (Magnifying glass) to search for a pharmacy.

- Select the desired pharmacy from the list.
- Click the Star icon to select from the favorites list.
- Click the Globe icon to use Google to search for a pharmacy near the location.
-
Click the X icon to remove the selected pharmacy.

-
Save the pharmacy.

- Click the Save button to save the pharmacy and remain on the pharmacy screen.
- Click the Save+Close button to save the pharmacy and return to the patient's prescription screen.