|
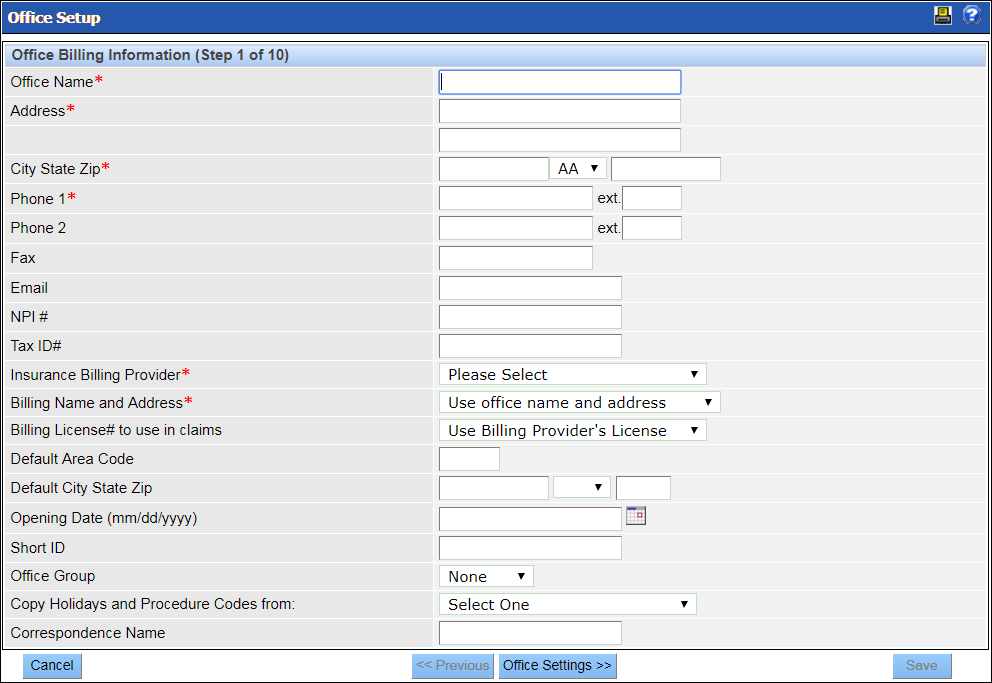
In This Section Office Billing Information (Add an Office - Step 1 of 10) Office Settings (Add an Office - Step 2 of 10) Monthly Statement Messages (Add an Office - Step 3 of 10) Operatories (Add an Office - Step 4 of 10) Office Schedule (Add an Office - Step 5 of 10) Holidays (Add an Office - Step 6 of 10) Procedure List (Add an Office - Step 7 of 10) Security Groups, Letters and Progress Notes Macros (Add an Office - Step 8 of 10) Preferences Settings (Add an Office - Step 9 of 10) Patient Messaging Reminders Patient Referral (Add an Office - Step 10 of 10) |
See Also Office Setup Office Groups Edit an Office Security Groups Copy Holidays |