Office Billing Information (Add an Office - Step 1 of 10)
Step 1 of adding an office involves entering the location and contact information for the office, as well as tax and billing information. Fields with a red asterisk are required.
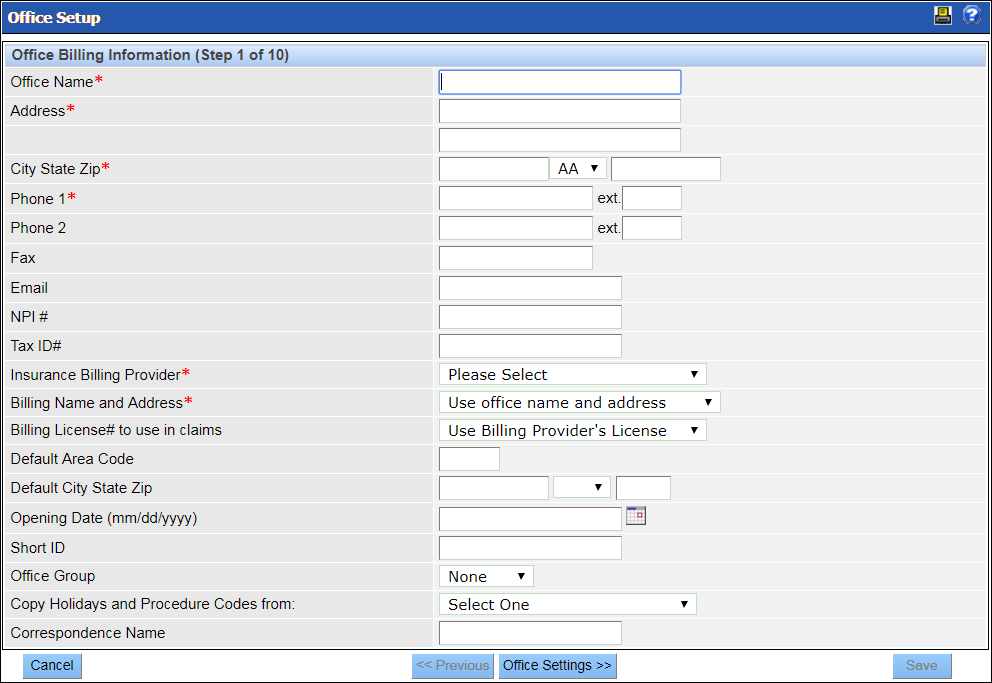
Following are descriptions of the fields on this window:
- Account Details: Basic identifying information specific to this location, including the NPI# and Tax ID#.
- Insurance Billing: The billing information that appears in the corner of the claim form.
- Insurance Billing Provider: Select the desired provider from the list (if available). As providers are added to the enterprise, and associated with the office, they can be selected from this list.
- Billing Name and Address: Select either office name and address or corporate name and address.
- Billing License # to use in claims: Select either billing provider or treating provider.
- Default Details: Provide a default area code, city, state, and/or zip. This information will automatically populate when creating patient records. It can be overridden if needed.
- Short ID: Set an identifier for the office that displays when there is limited space in the module.
- Office Group: Office groups can be established for reporting purposes at a later stage.
- Copy Holidays and Procedure Codes from: Select an existing office to use its holidays and procedure code settings.
- Correspondence Name: Set the office name as it should appear on correspondence. If no name is entered, correspondence will show the office name as it appears in the Office Name field.