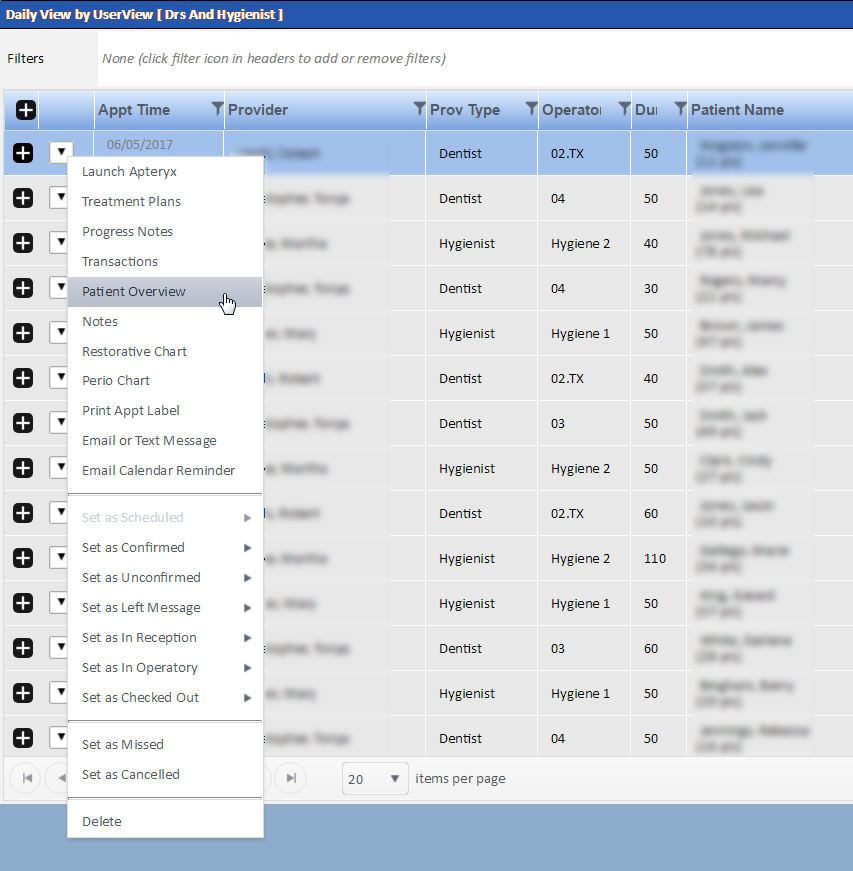
To the left of each appointment in the list view of the Scheduler is an arrow icon that you can click to reveal a list of actions that you can take on that particular appointment.

Following are explanations of the options you see in this list:
Launch Apteryx: Launches the Apteryx application.
Treatment Plans: Opens the Treatment Plan module.
Progress Notes: Displays the patient's progress notes, if any.
Transactions: Opens the Transactions Entry module.
Patient Overview: Opens the Patient Overview.
Notes: Opens the Notes module.
Restorative Chart: Opens the Patient Chart and displays the Patient Summary.
Perio Chart: Opens the Perio Chart.
Print Appt Label: Opens the Label Appointment window, where you can specify options for printing the appointment label.
Email or Text Message: Allows you to compose and send an email or text message to the patient.
Email Calendar Reminder: Emails a calendar reminder to the patient.
Appointment status options: These options allow you to set the appointment's status to confirmed, unconfirmed, left message, in reception, in operatory, checked out, missed or canceled. Except for missed or canceled, each of these statuses has multiple options from which to choose. When you select a status, the Status column of the list view will update accordingly.
Delete: Deletes the appointment.