Add Primary Dental Plan for a Member
Typically, the insurance plan associated with one member of the group will also apply to other members of the group.In step 2 of adding a new member, you must select the appropriate plan from the list of plans available in the group. Linking the plan in this way ensures that the family deductible calculations are correct.
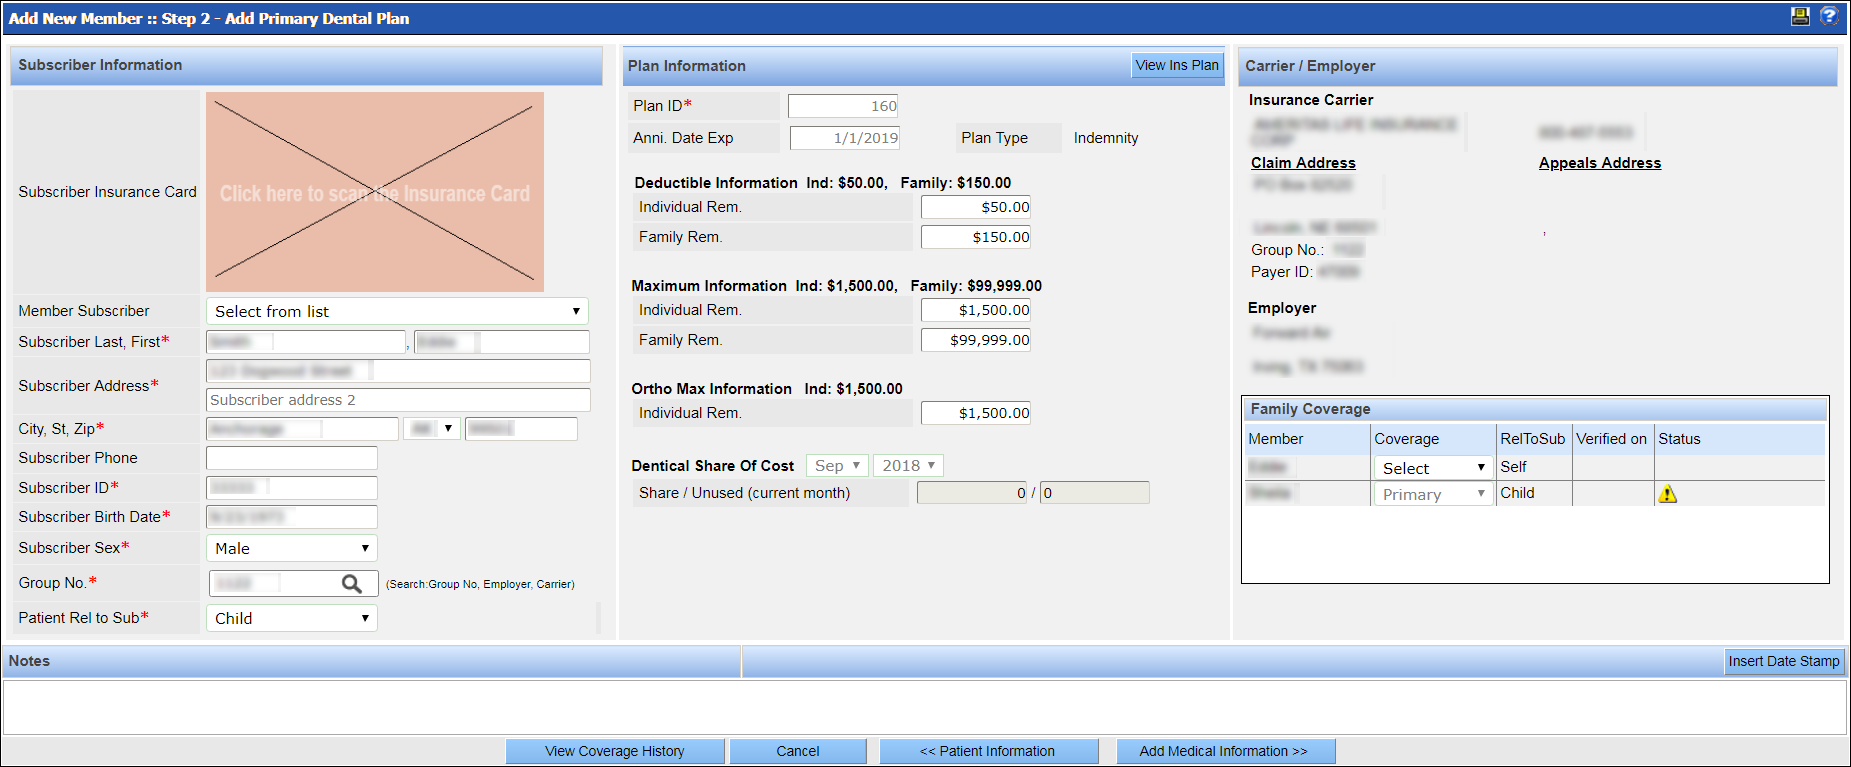
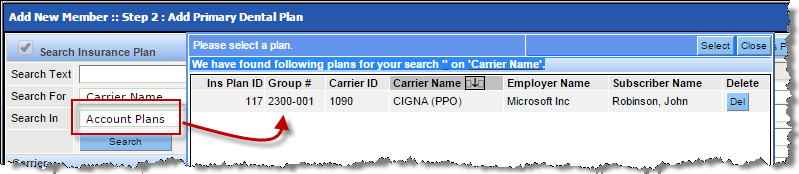
Plan information: The deductible, coverage and benefit information for the patient's insurance plan.Use the search tool to locate a plan within the account.Select Account Plans from the Search In field. (If the insurance is not already part of the account's plans, a new one must be added by searching within the larger database. See Add a New Insurance Plan to learn more.)
Subscriber Information:
To add a dental plan for a member:
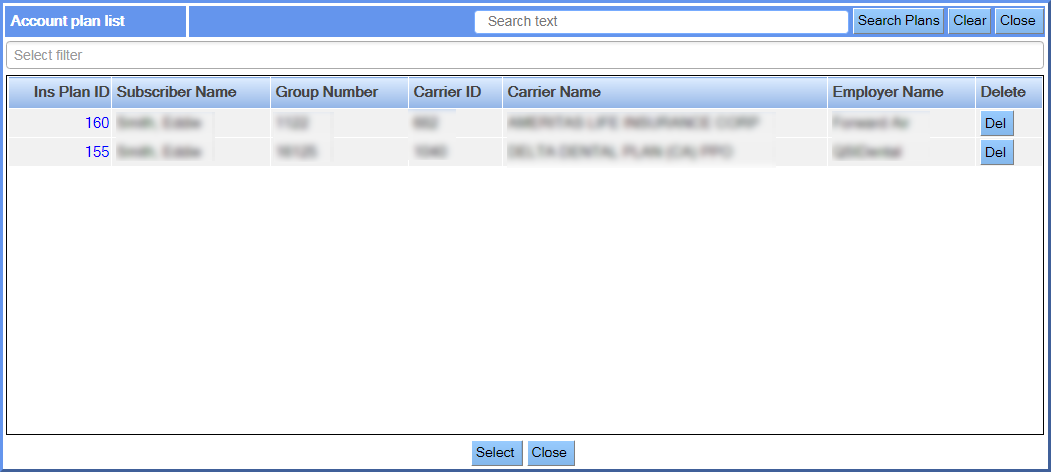
If coverage exists for a family member on the same account, the system will display a list of plans on the account when the screen first displays. If the patient is covered under one of the displayed plans, select the plan and then click Select. The account plan will close, and the screen will be populated with information from the selected plan. If the patient is not covered by one of the listed account plans, click Close.
Tip: Click the insurance plan ID to view details about a plan. If necessary, you can filter the list of account plans by entering text in the search field and clicking Search Plans or also by clicking Select filter and choosing a filter from the list. It is also possible to delete a plan from this dialog by clicking Del in the appropriate row.
If desired, click in the Subscriber Insurance Card field and scan the patient's insurance card into the system. You can then click the thumbnail image to view the card as you enter details about the patient's insurance. For more information see Scan a Patient's Insurance Card.
Select the appropriate subscriber from the Member Subscriber list. The other fields in the Member Subscriber section will populate based on your selection. If you select Other, you will have to complete the fields manually.
Enter or edit the subscriber's name, address, phone number, subscriber ID, birth date and sex.
If you did not select an insurance plan for the patient in step 1, you can search for the appropriate plan in the system. To do so, take the following steps:
In the Group No. field, enter a carrier name, employer name or group number and then hit the Enter key or click the magnifying glass.The system displays a list of plans that meet your criteria.
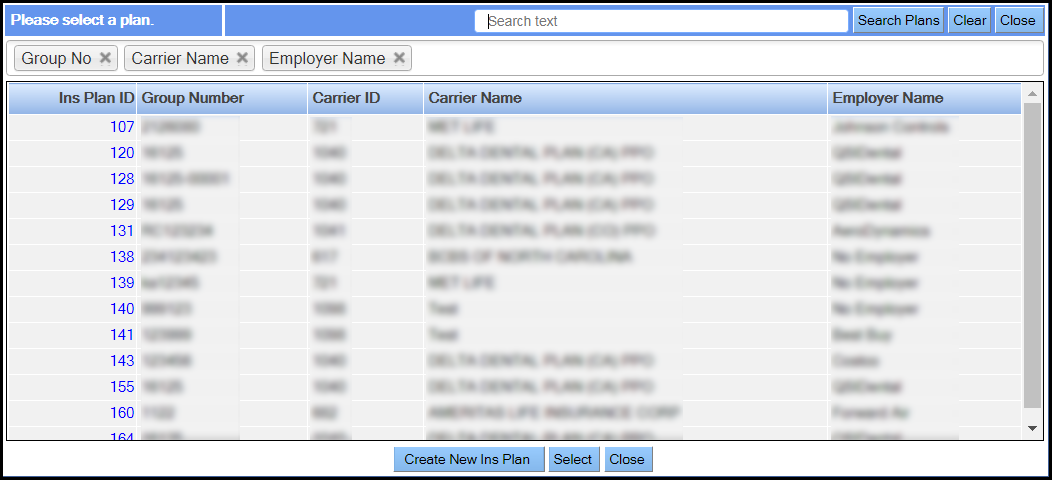
Select the correct plan from the list and click Select. To view additional details about a plan, click its insurance plan ID. You can then select the plan by clicking Use in the Additional Details window. (If necessary, you can further narrow the list by entering search text and clicking Search Plans. )
The Add Primary Dental Plan screen redisplays with the Plan Information and Carrier/Employer sections populated with information from the selected plan.
Complete and confirm the plan information. Following are some tips:
Required fields are indicated by a red asterisk.
You must specify a value in the Patient Rel to Sub (patient relationship to subscriber) field to activate the coverage for the patient. If it is set to None, coverage will be deactivated (but not deleted).
To indicate that you have verified the patient's insurance, click Insert Date Stamp next to the Patient Last Verified Date field. For more information about verifying eligibility, see Eligibility Verification.
In the Family Coverage section ...
Click Add Medical Information.