- In the Ortho Payment Plan Agreement section of the Patient Overview module, click the Detail button.

Note: If the section is Ortho Payment Plan Agreement, the window for an orthodontic plan will open. If the section is Regular Payment Plan Agreement, the window for a regular plan will open.
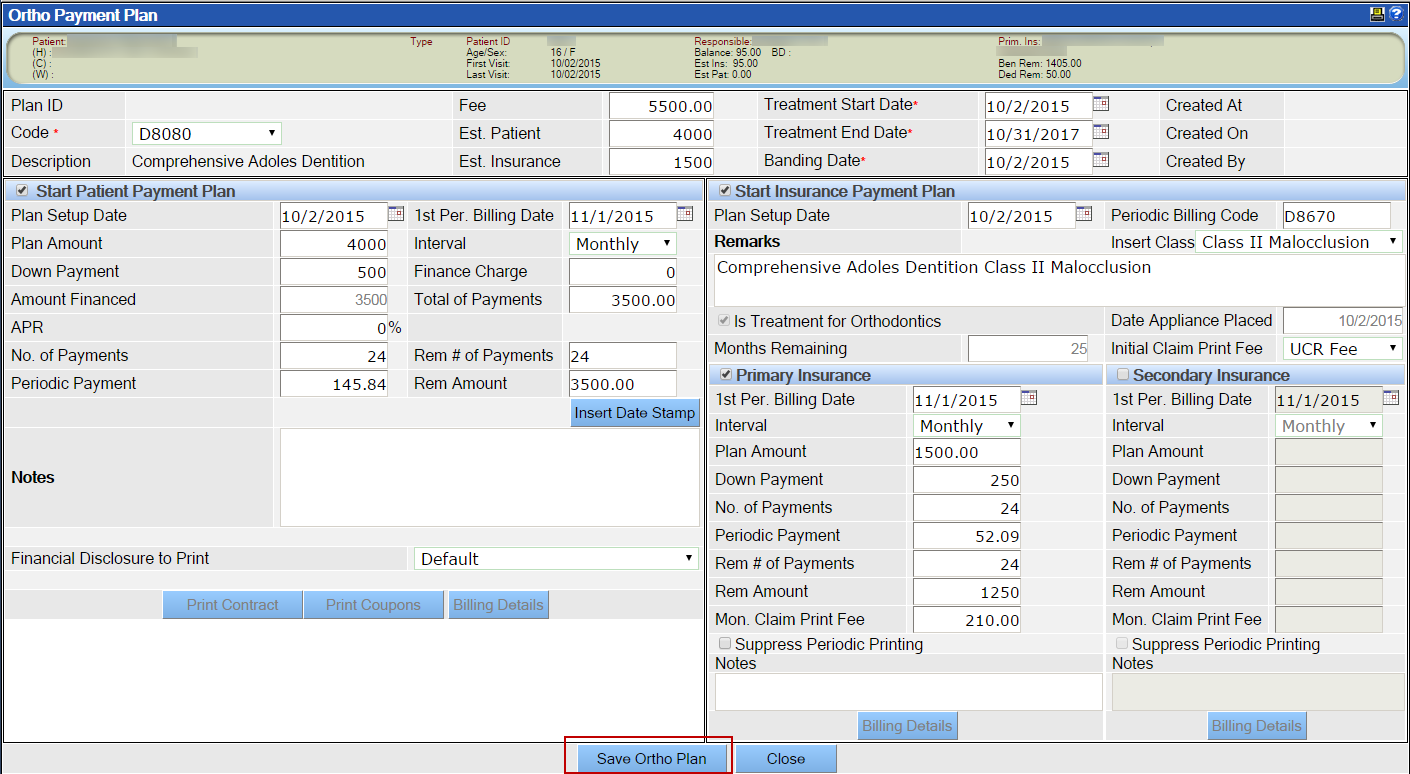
- Select the specific orthodontic procedure code from the Code picklist.

- The fees and estimates for the insurance and patient portions will automatically populate based on the code selected, the insurance plan, and the appropriate fee schedule. Update the amounts if required by typing amounts in the Fee, Est. Patient, and Est. Insurance fields.
- Today’s date will automatically be populated as the Treatment Start Date. If desired, select an alternate date by clicking the calendar icon.
- Select the approximate Treatment End Date by clicking the calendar icon.
- Today’s date will automatically be populated as the Banding Date. If desired, select an alternate date by clicking the calendar icon.
- If desired, click the checkbox beside Start Patient Payment Plan to enable the fields for the patient side. If not enabled, no patient portion will be included in the ortho payment plan.

- Enter the information for the patient side of the orthodontic payment plan as appropriate. If no patient side is needed, skip to step 9.
- The Plan Amount will automatically populate based on the patient responsibility. Update the amount if required by typing a new amount in the Plan Amount field.
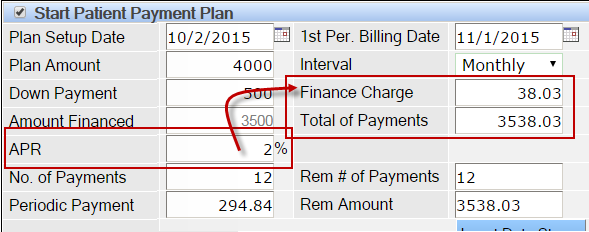
- Enter the amount the patient will pay at the beginning of the contract, the Down Payment. The Amount Financed field will populate with the plan amount less the down payment.
- Enter the APR (Annual Percentage Rate) if the practice will charge any interest on the amount financed. If a percentage is entered, the Finance Charge field will populate, and the amount in the Total of Payments field will increase to include those finance charges.
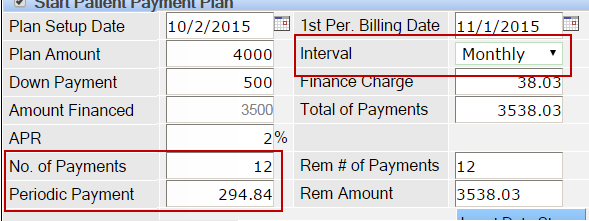
- In the Interval picklist, select how often the patient will make payments on the plan.
- In the No. of Payments field, enter how many payments the patient will make to pay the balance. If the patient prefers to pay a specific amount, skip the field and the number of payments will be calculated by QSIDental Web.
- In the Periodic Payment field, enter the amount the patient will pay each period. If the patient prefers to pay the balance over a specific time, skip the field and the amount will be calculated.

- Select the desired disclosure from the Financial Disclosure to Print picklist. Financial disclosures are written by the practice and should be selected based on practice requirements. View the disclosures by selecting Custom Letters from the Reports menu.

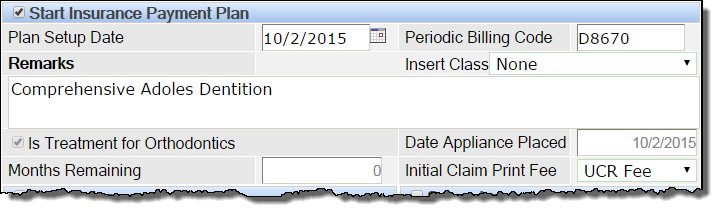
- If desired, click the checkbox beside Start Insurance Payment Plan to enable the fields for the patient side. If not enabled, no insurance portion will be included in the ortho payment plan.

If no primary insurance side is required, skip to step 12.
- Enter the information for the insurance side of the orthodontic plan for the primary insurer as appropriate.
- The billing code will populate by default based on the service code setup. Update the code if required by typing the new code in the Periodic Billing Code field.
- Add any remarks as desired in the Remarks field. These remarks appear in the remarks section of the claim form. By default the description for the selected service code will appear. Select the malocclusion class from the Insert Class picklist if desired.
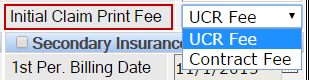
- Set the amount that should appear as the fee shown on the first claim to be filed with the carrier. By default the practice’s UCR will be used, but the contract price may be chosen from the picklist.
- The Plan Amount will automatically populate based on the insurance plan limits. Update the amount if required by typing a new amount in the Plan Amount field.
- Enter the amount the carrier will pay at the beginning of the contract, the Down Payment. This initial payment from the carrier is typically a larger portion of the benefit.

Be sure the down payment is accurate for the carrier. If the amount received is different from the anticipated amount, all further payments will be impacted and the payment plan would likely need to be deleted and replaced. The Amount Financed field will populate automatically with the plan amount less the down payment.
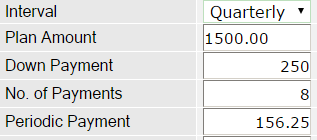
- In the Interval picklist, select how often the carrier will make payments on the plan.

- The No. of Payments field will populate based on the entered treatment end date and the selected interval. If this number is changed, the other fields will update accordingly.
- The Periodic Payment field will populate based on the plan amount and the number of payments. If this amount is changed, the other fields will update accordingly.
- The Mon. Claim Print Fee field will calculate automatically and represents the fees billed to the carrier on a monthly basis even though the expected payment will be different. The fee is expressed as monthly even if the payment interval is set to another period.
- If desired, click the checkbox beside Suppress Periodic Printing to disable automatic printing of the claims for the ongoing payments. If left unchecked, claims are printed by default when the periodic charges are generated through the utility.

- Enter the information for the insurance side of the orthodontic plan for the secondary insurer as appropriate. Secondary insurance must be associated with the patient prior to adding the secondary insurance component. If there is no secondary insurance, continue to step 12.

- When everything has been validated and the plan is ready, click Save Ortho Plan.
Once saved, the plan information is locked (greyed out) and editing is limited. The contract, coupon, and billing details buttons will become active.
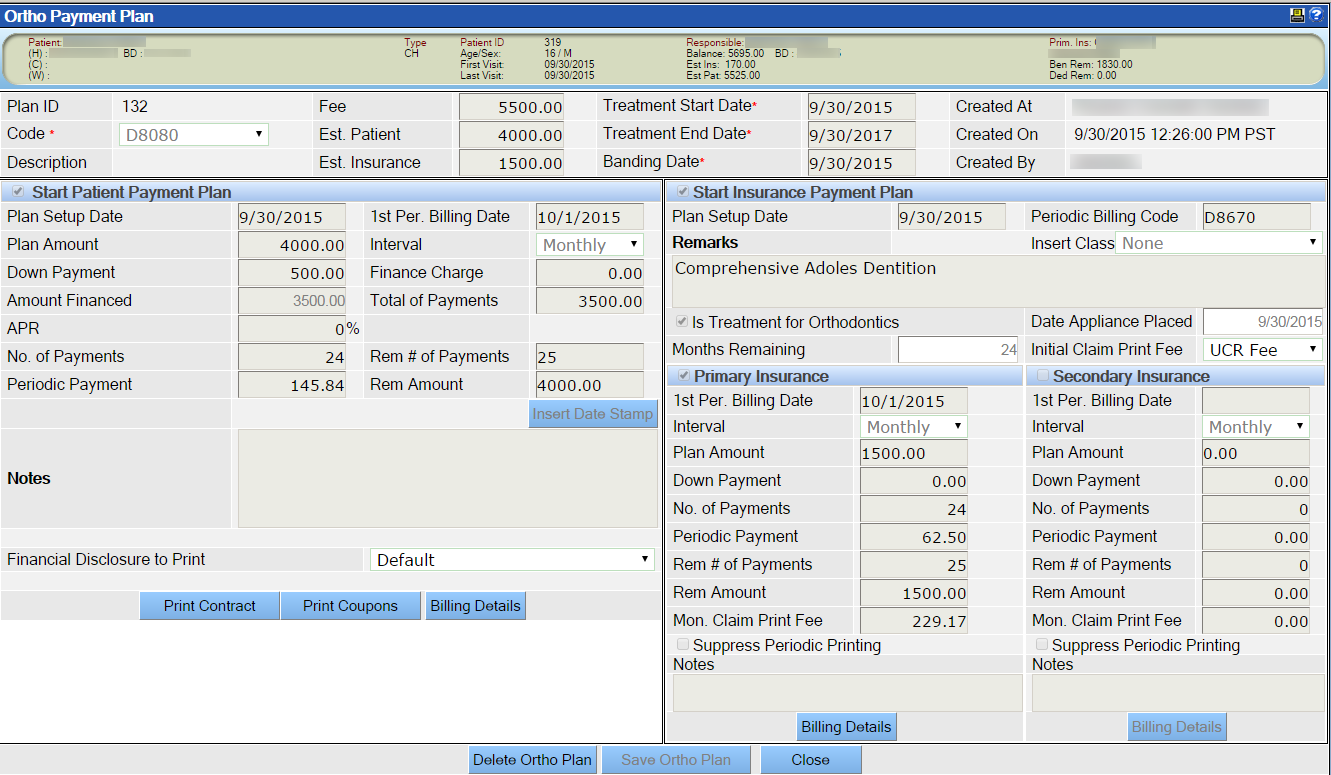
Print the payment contract for the patient by clicking Print Contract.
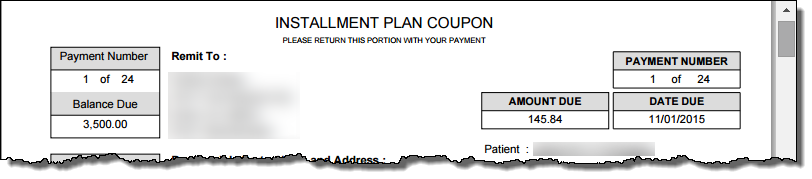
Print the installment coupons for the patient to use when sending the payment by clicking Print Coupons. The documents will open in a separate window for standard pdf printing.